<?xml version="1.0" encoding="utf-8"?><feed xmlns="http://www.w3.org/2005/Atom" ><generator uri="https://jekyllrb.com/" version="4.4.1">Jekyll</generator><link href="/feed.xml" rel="self" type="application/atom+xml" /><link href="/" rel="alternate" type="text/html" /><updated>2025-08-24T23:21:11+00:00</updated><id>/feed.xml</id><title type="html">Cluttered Spaces</title><entry><title type="html">Window Frame Restoration</title><link href="/house/2025/08/23/Window-Frame.html" rel="alternate" type="text/html" title="Window Frame Restoration" /><published>2025-08-23T00:00:00+00:00</published><updated>2025-08-23T00:00:00+00:00</updated><id>/house/2025/08/23/Window-Frame</id><content type="html" xml:base="/house/2025/08/23/Window-Frame.html"><![CDATA[<div class="imgWrapper imgBlock center" style="width: 80%; ">
  <figure>
    <picture class="imgPicture">
  <img alt="Finished window frame" class="imgImg rounded shadow" src="/assets/posts/2025-08-23-Window-Frame/finished.jpg" style="width: 100%; " title="Study window with period appropiate casing" />
</picture>
    <figcaption class="imgFigCaption ">
  Study window with period appropiate casing
</figcaption>
  </figure>
</div>

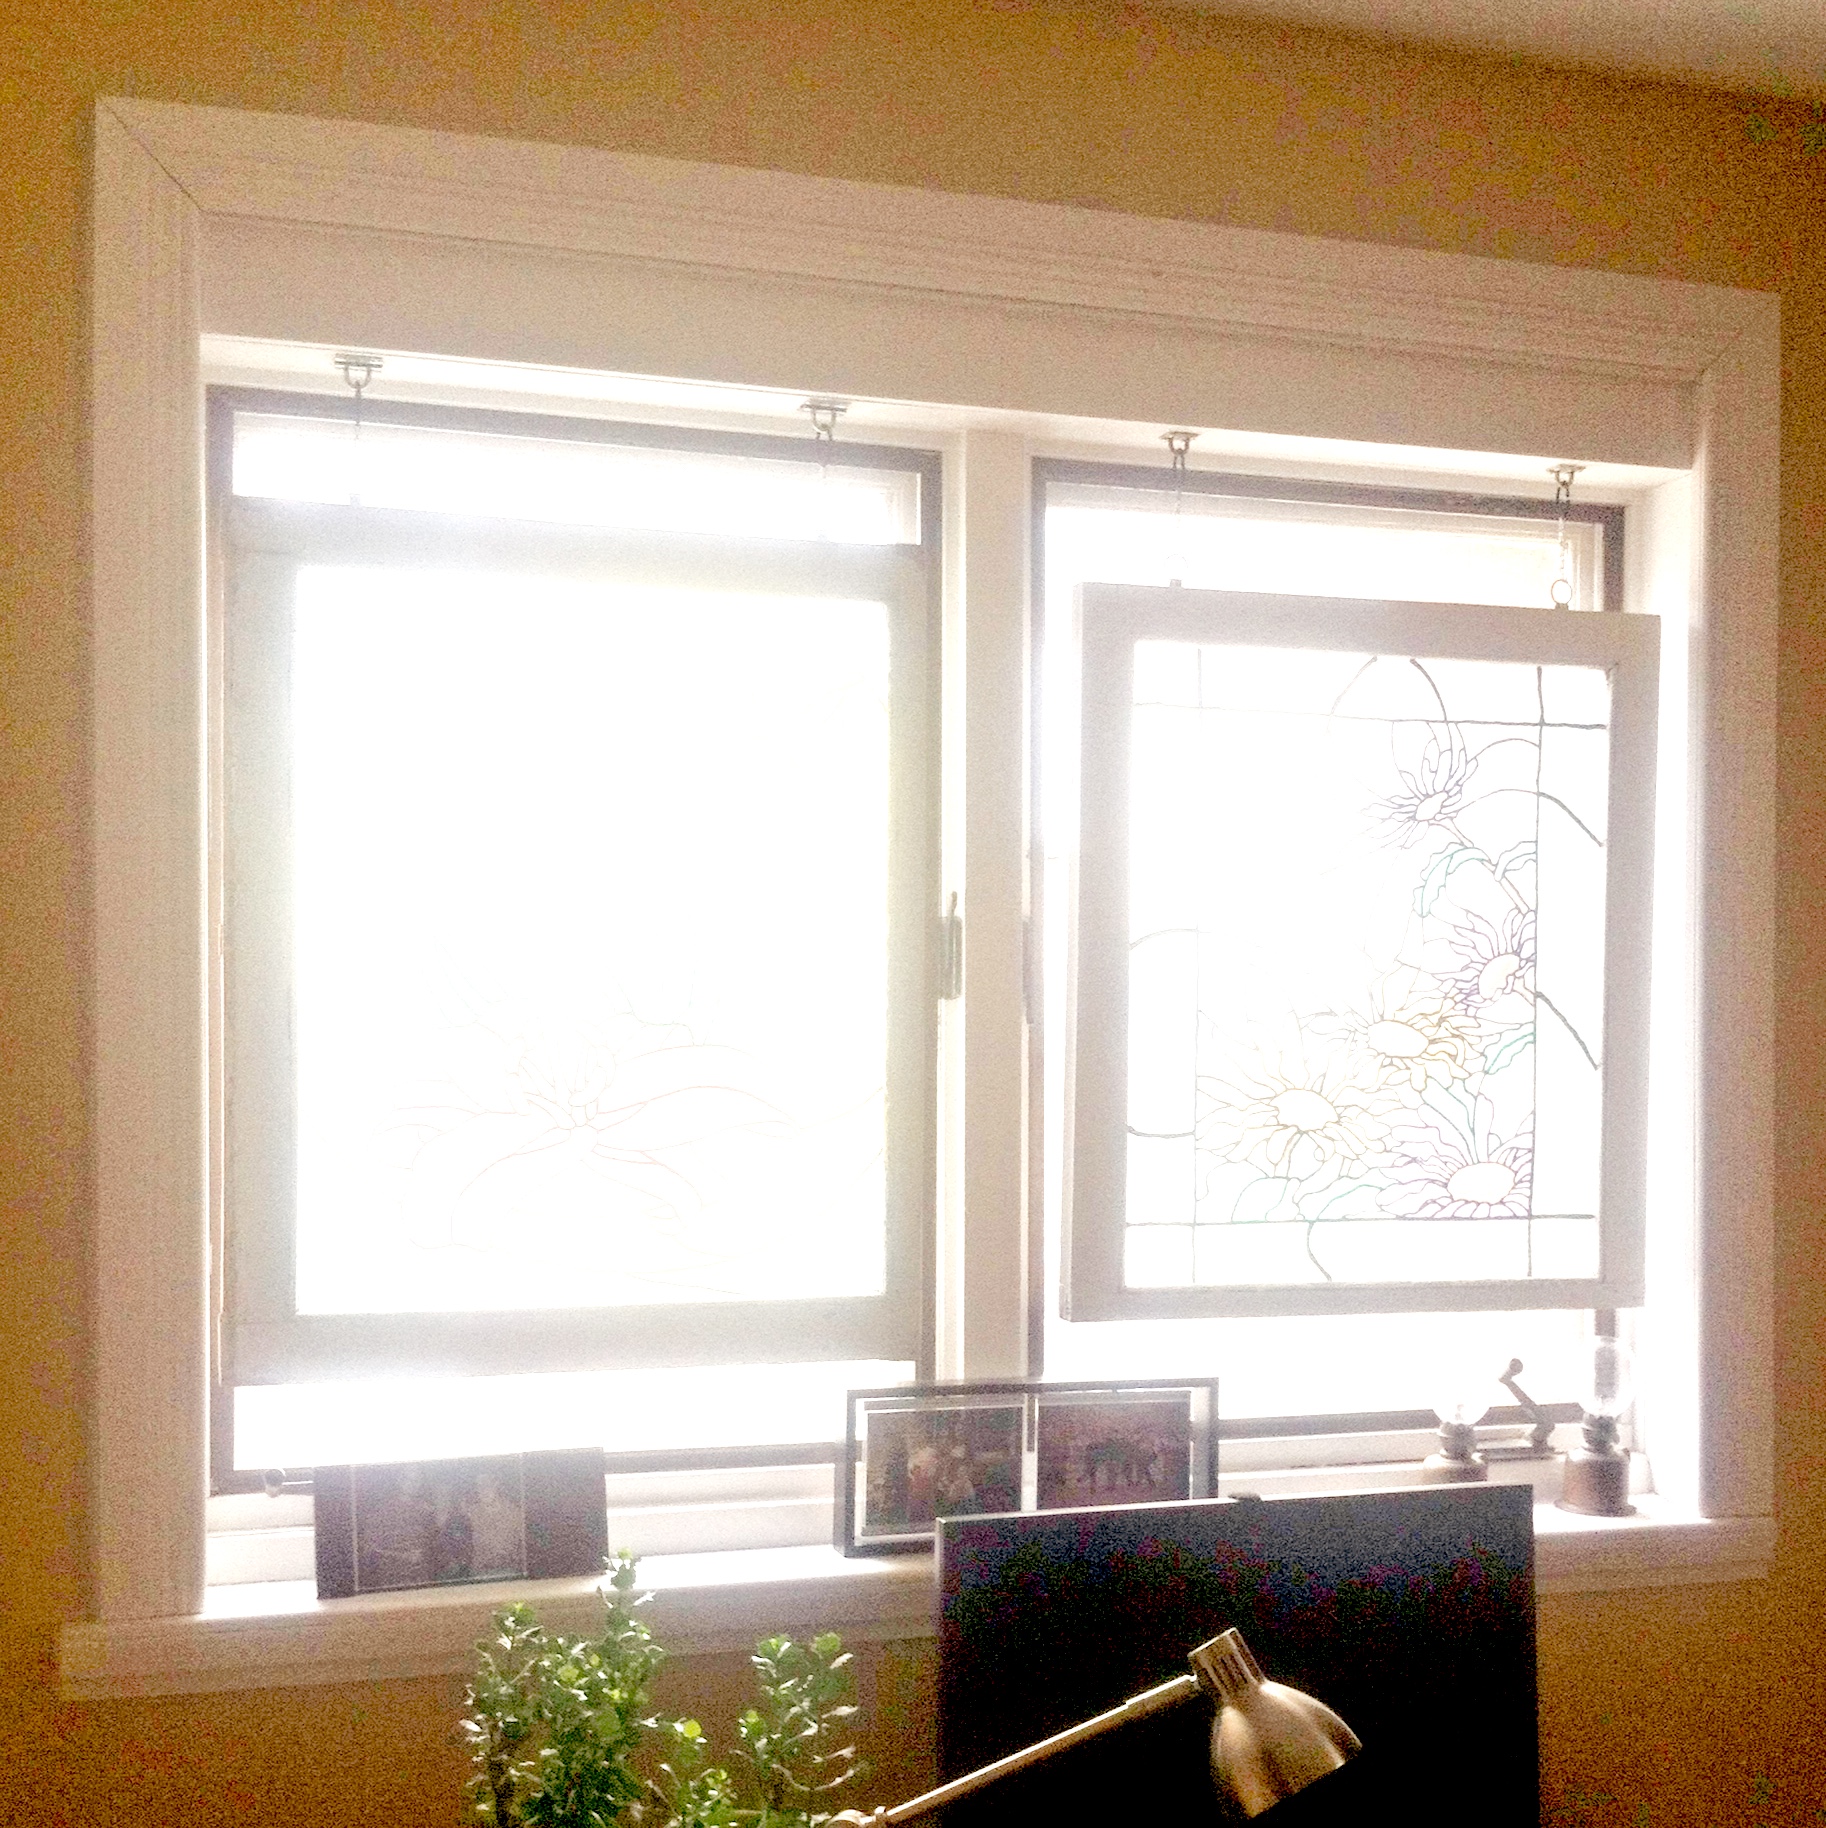
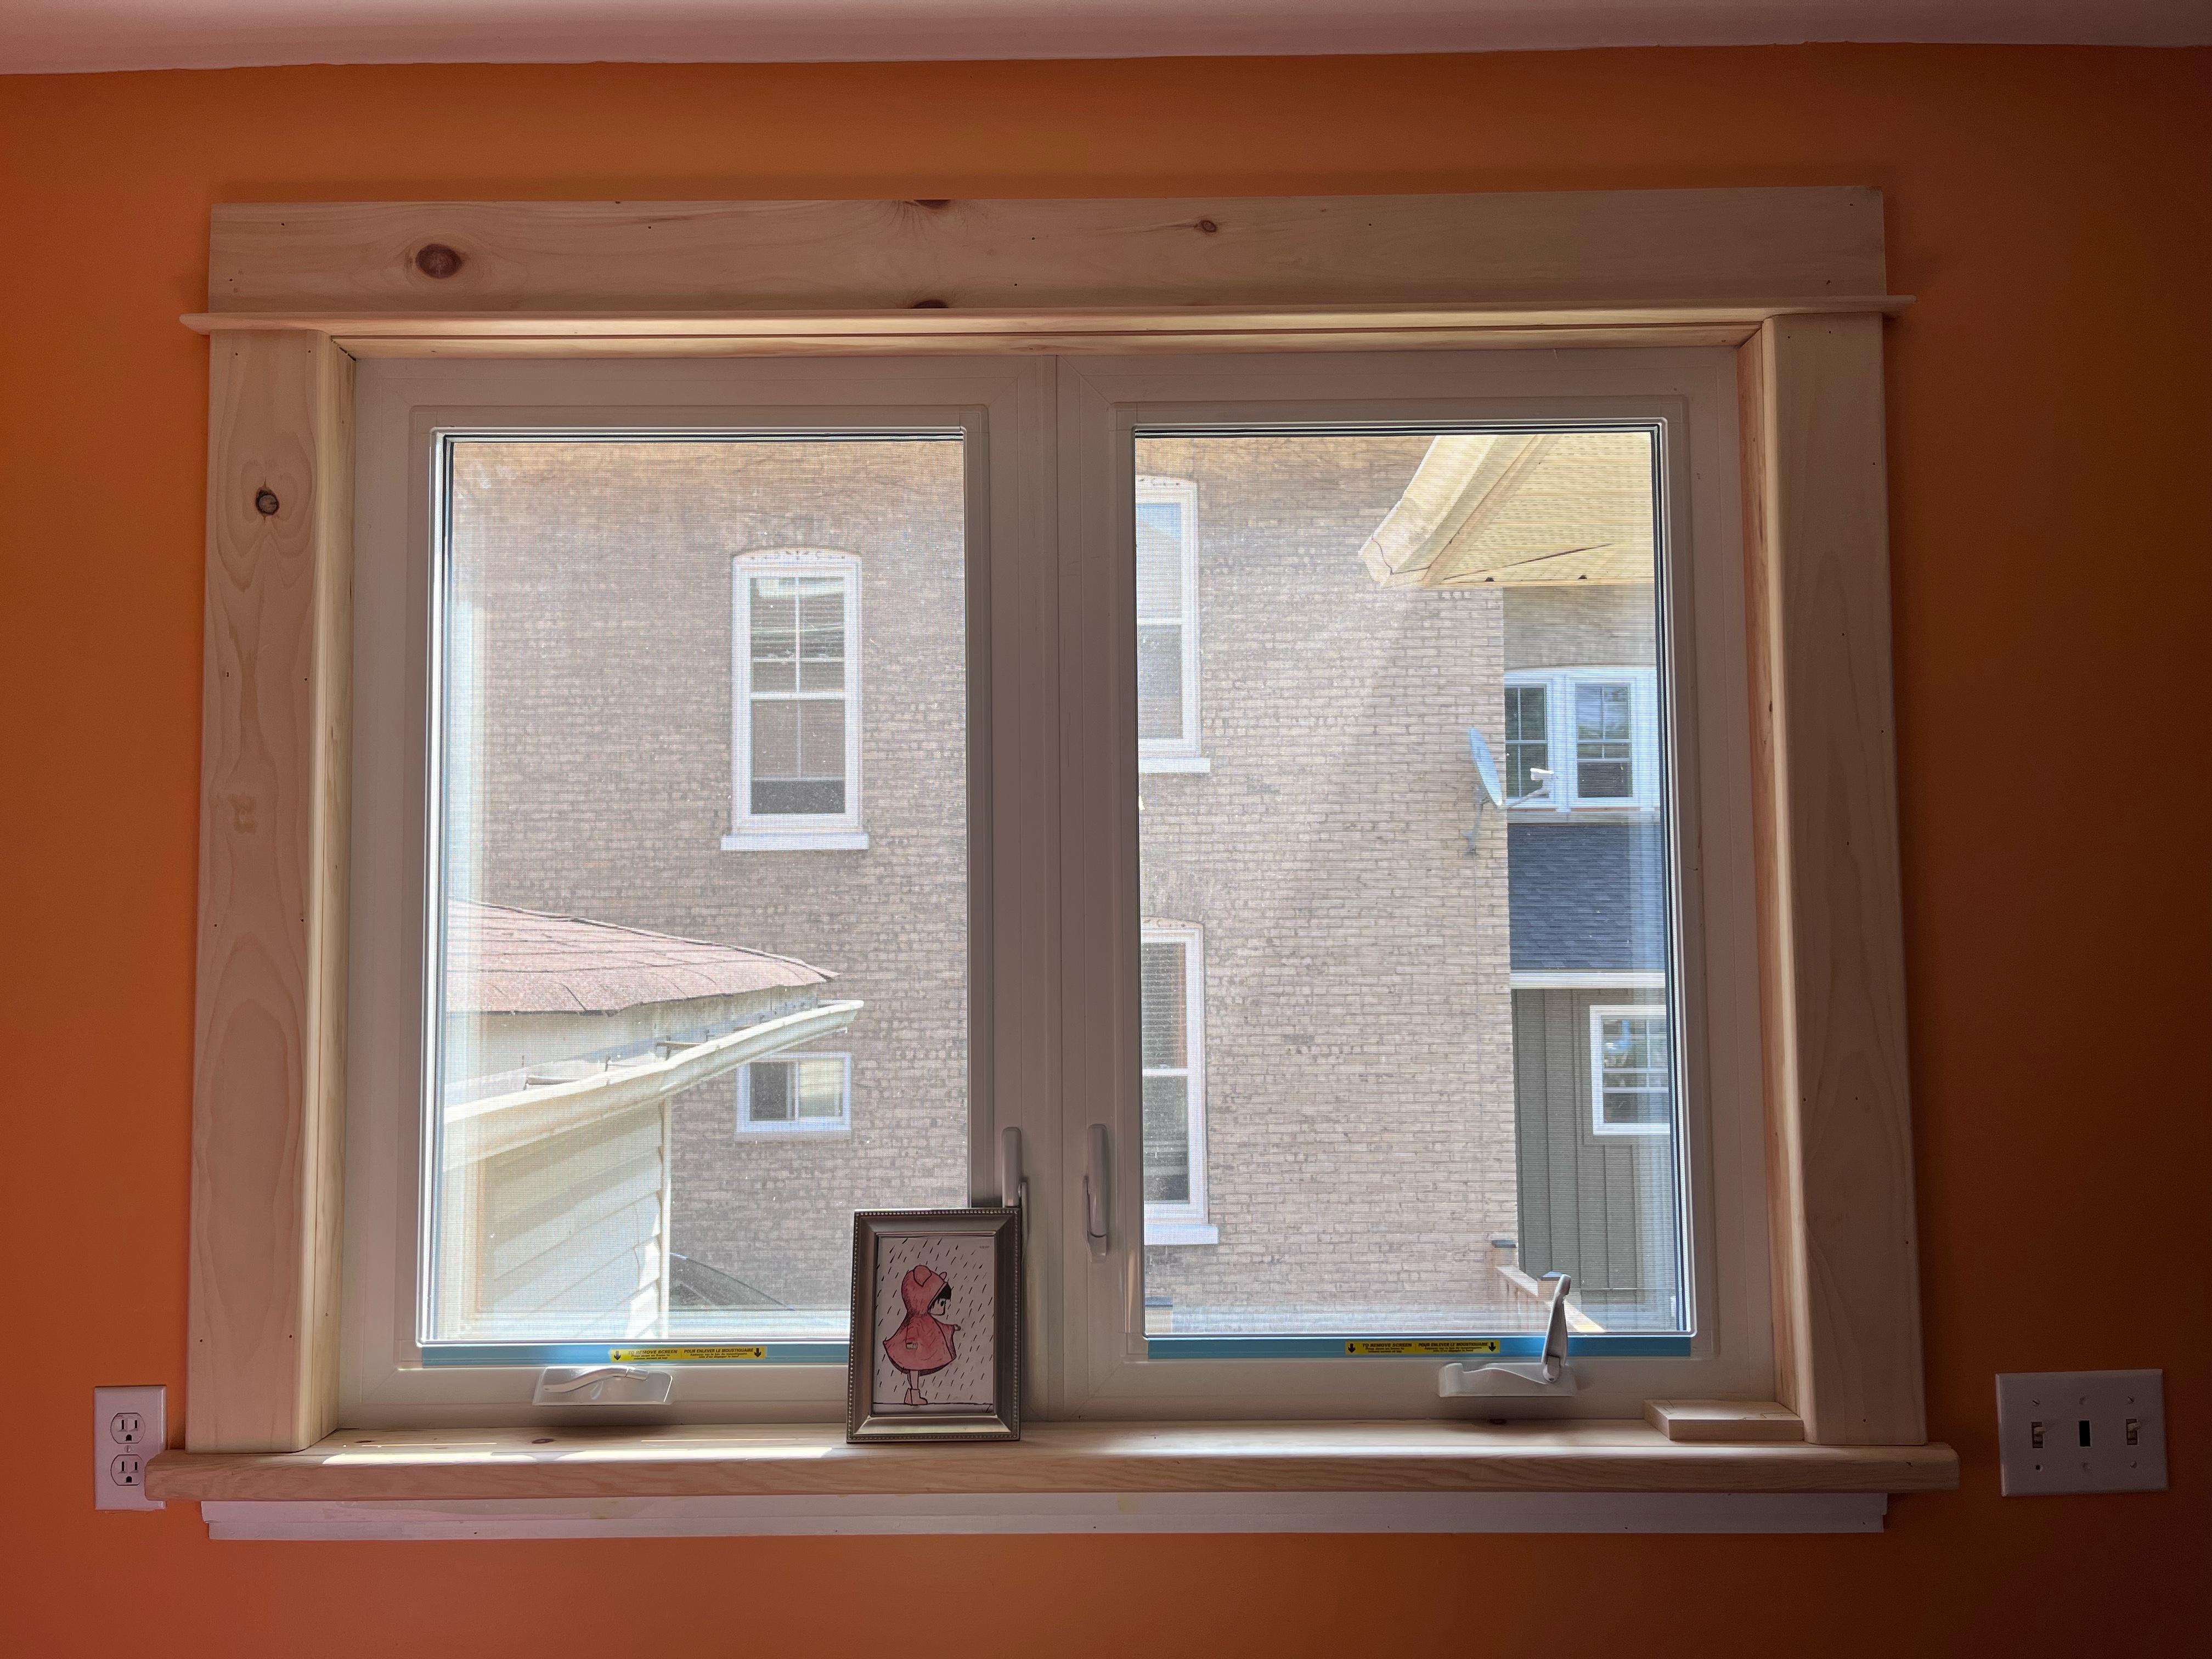
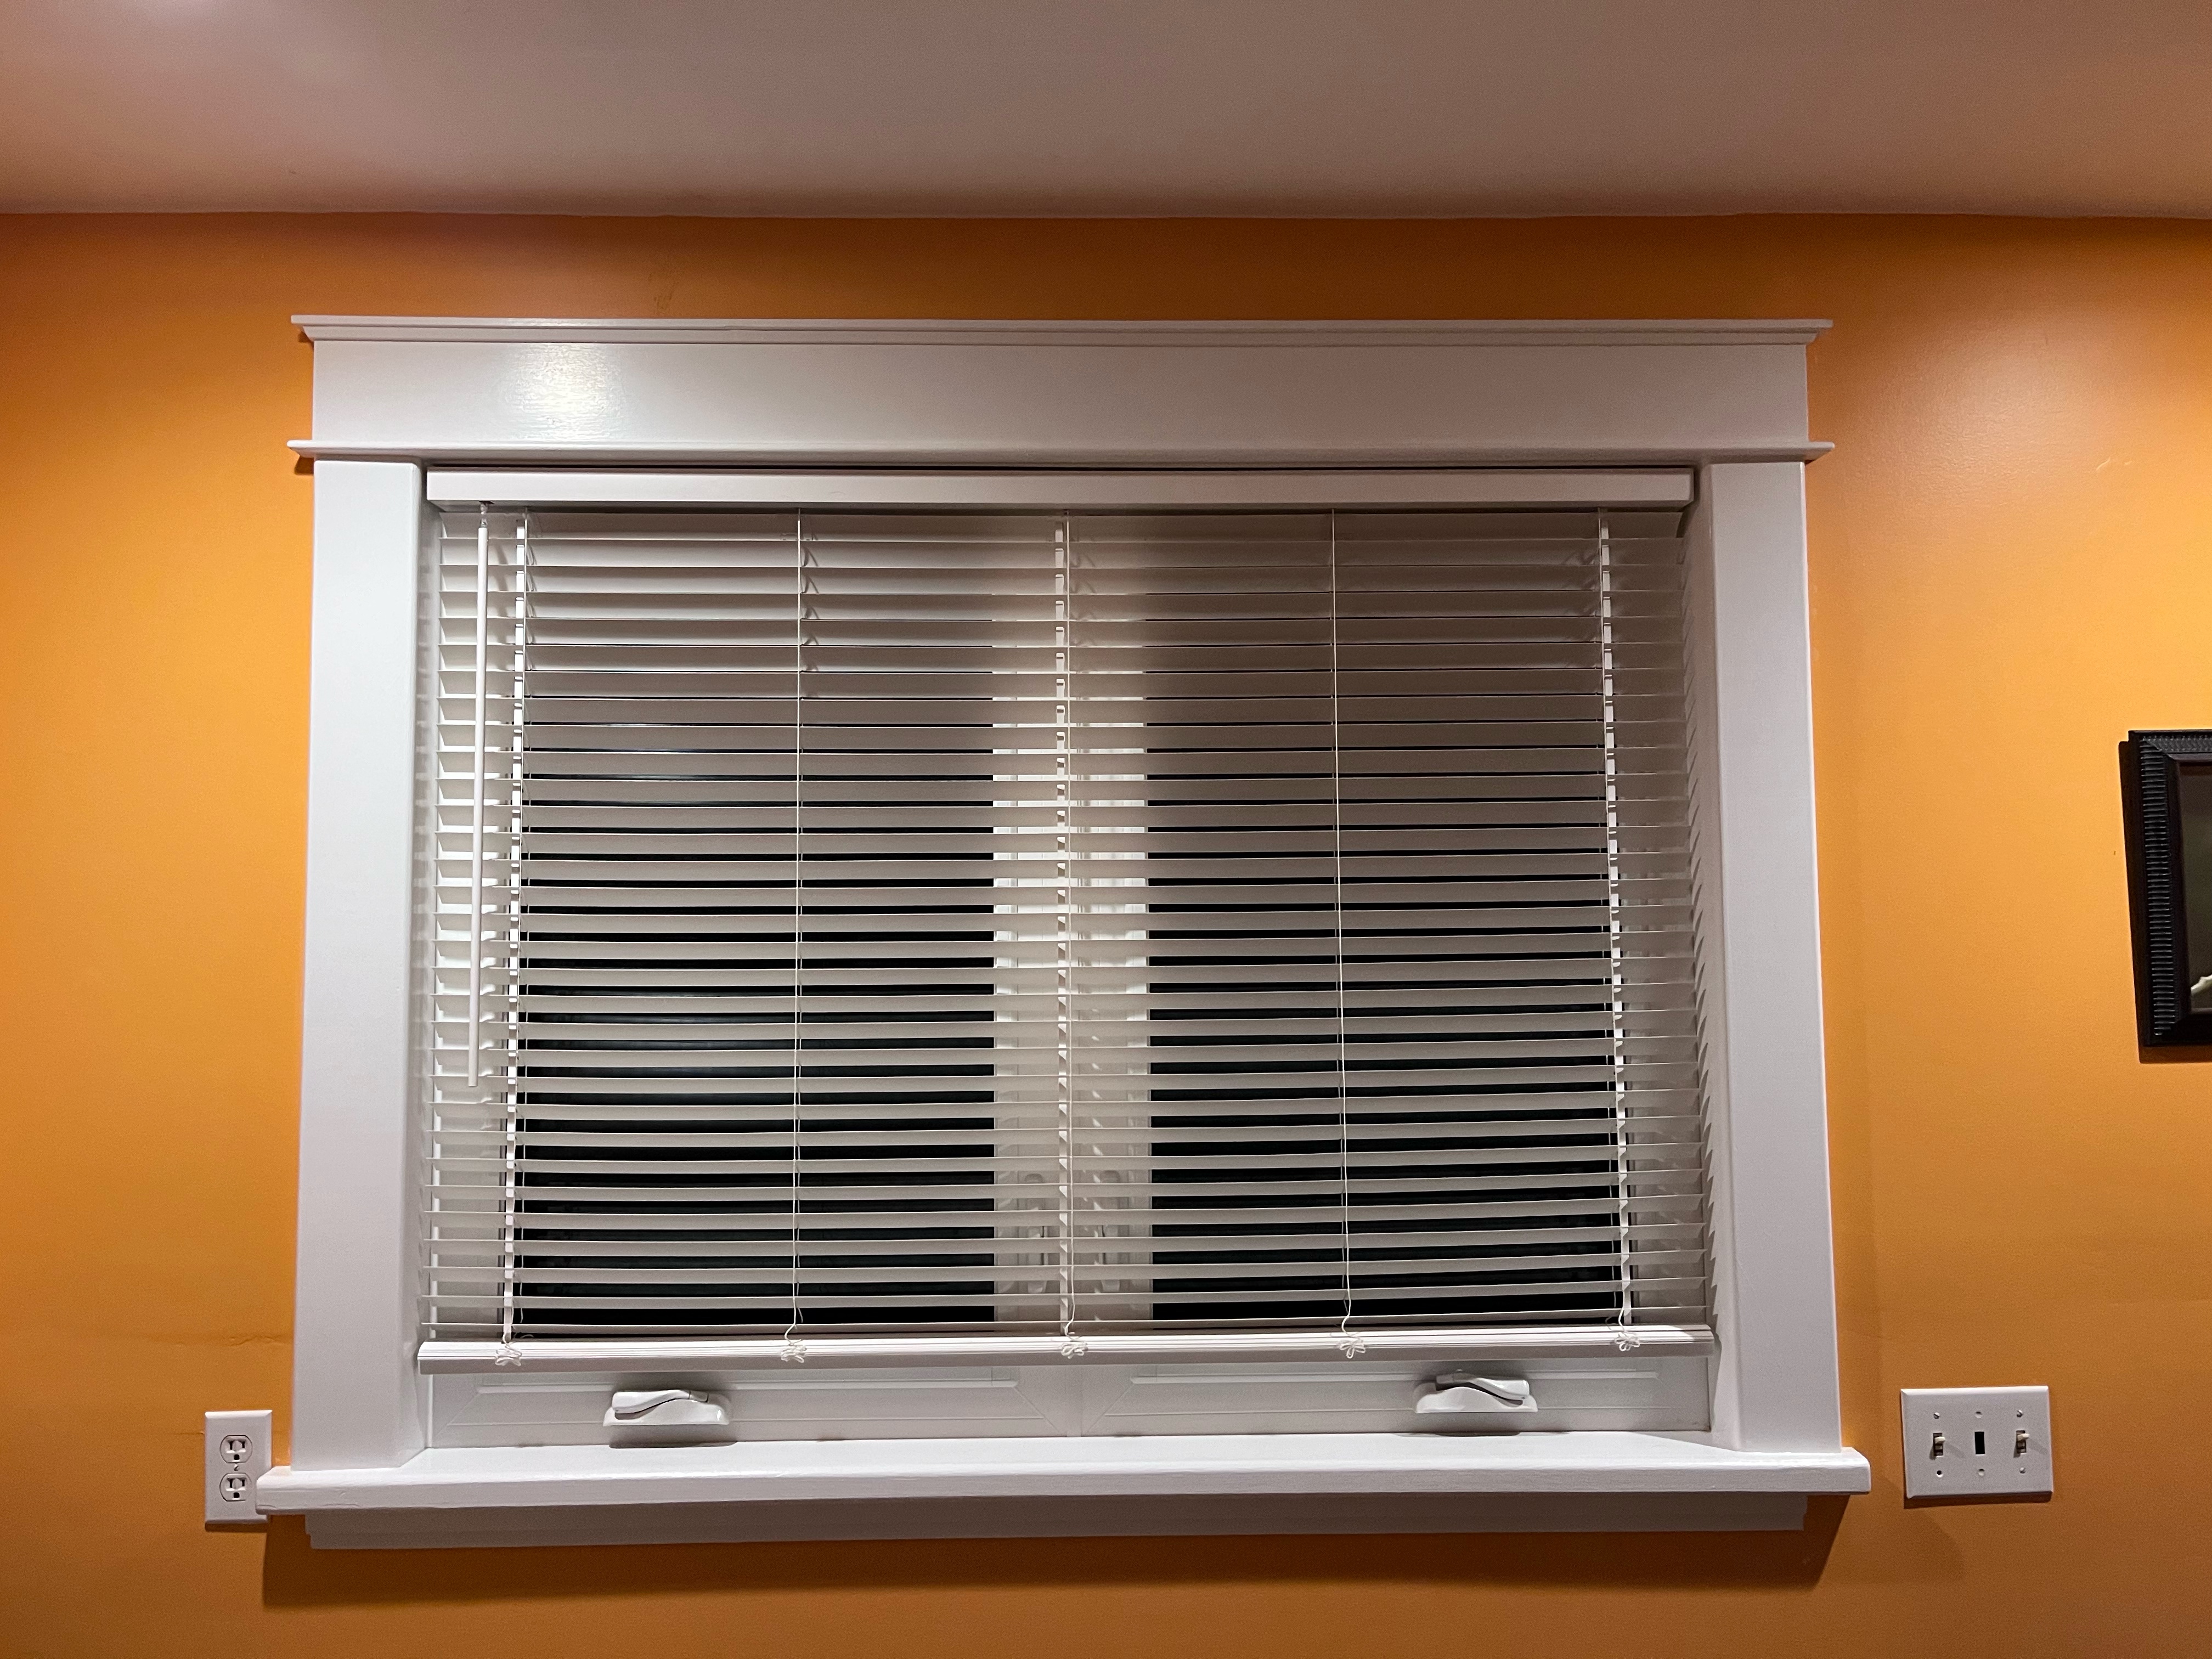
<p>We recentally had some old windows replaced with practical modern double glazing. Not only should this improve our winter fuel bills but it also means we can open the windows. But thanks to small a misunderstanding with the installers it was also an unexpected chance at some restoration. I had agreed with them to leave the inside of the window “unfished”, meaning I would put on the casing and paint it. Only they understood “unfinished” to mean no casing and no jambs.</p>

<p>Let’s have a quick review of the windows in our 1920s house. We have some original windows with gorgeous ornate frames (casings), that still look good even wearing 100 years of paint.</p>

<div class="imgWrapper imgBlock center" style="width: 50%; ">
  <figure>
    <picture class="imgPicture">
  <img alt="stair window" class="imgImg rounded shadow" src="/assets/posts/2025-08-23-Window-Frame/ref-stairwell.jpg" style="width: 100%; " title="Original frame on the stair case window" />
</picture>
    <figcaption class="imgFigCaption ">
  Original frame on the stair case window
</figcaption>
  </figure>
</div>

<p>But we have some 1970s windows that are a little less ornate. This is a picture of the windows we had replaced as it was when we were looking to move in.</p>

<div class="imgWrapper imgBlock center" style="width: 50%; ">
  <figure>
    <picture class="imgPicture">
  <img alt="stair window" class="imgImg rounded shadow" src="/assets/posts/2025-08-23-Window-Frame/original.jpg" style="width: 100%; " title="When we moved in" />
</picture>
    <figcaption class="imgFigCaption ">
  When we moved in
</figcaption>
  </figure>
</div>

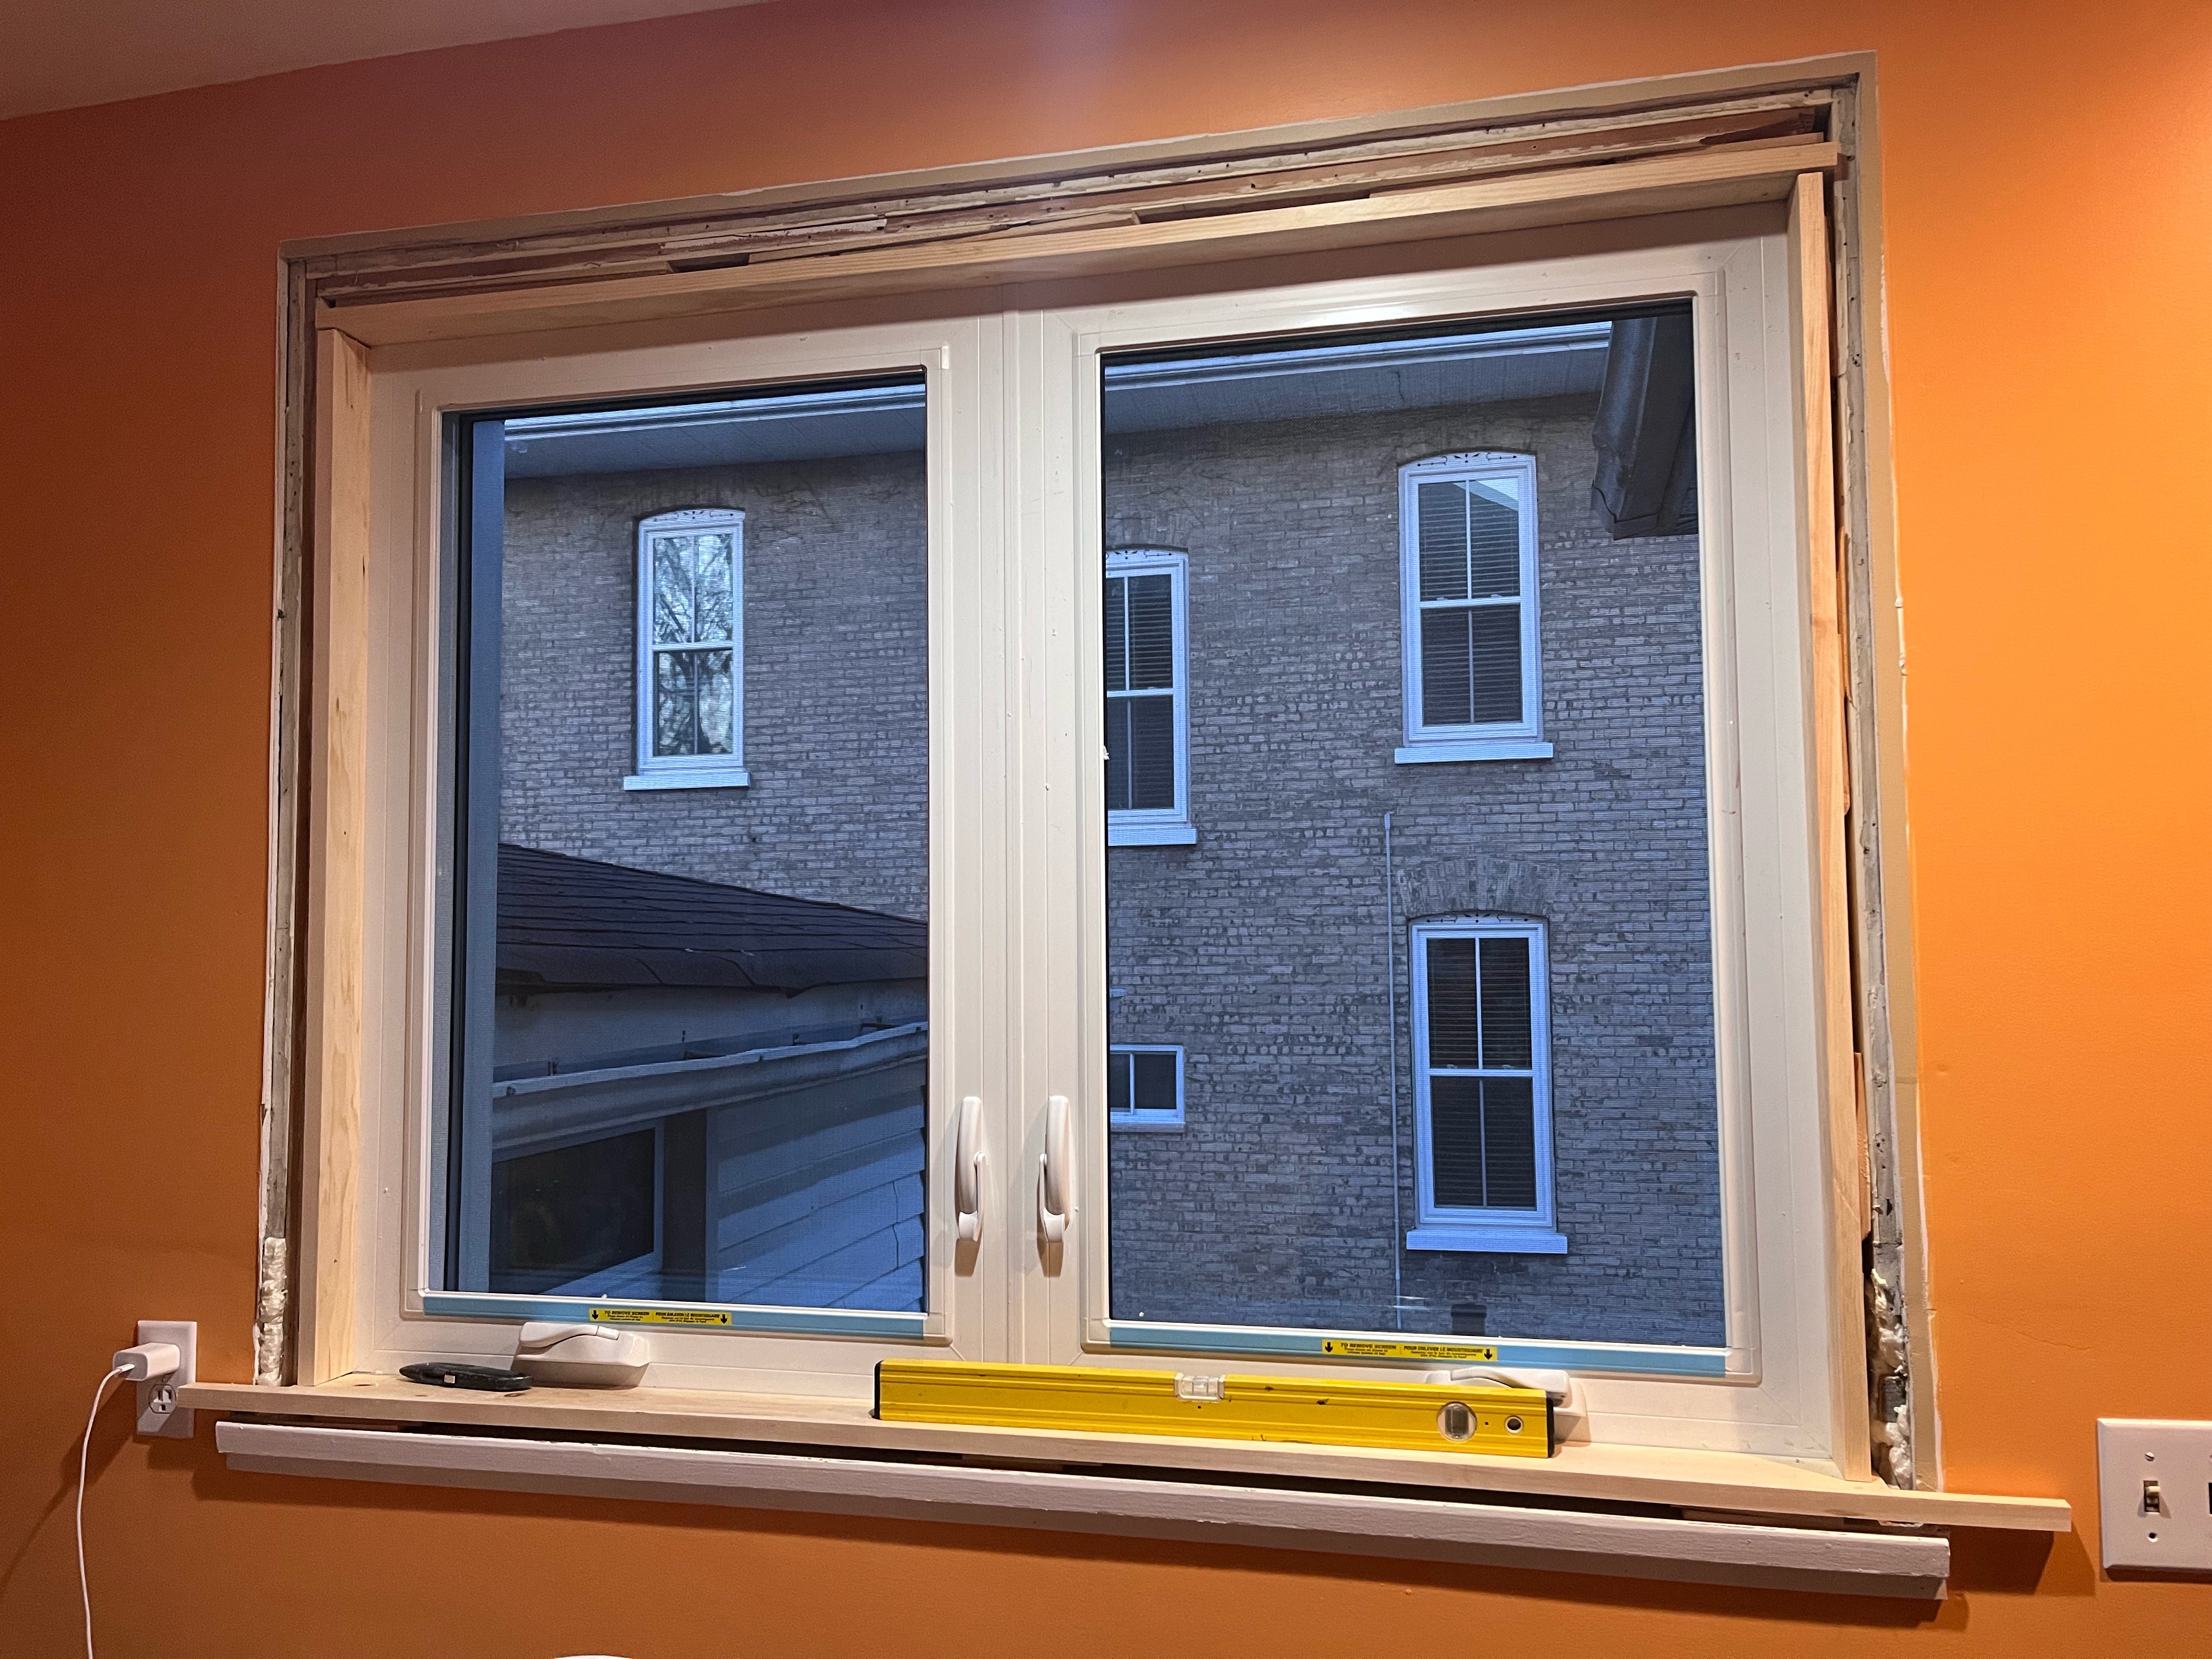
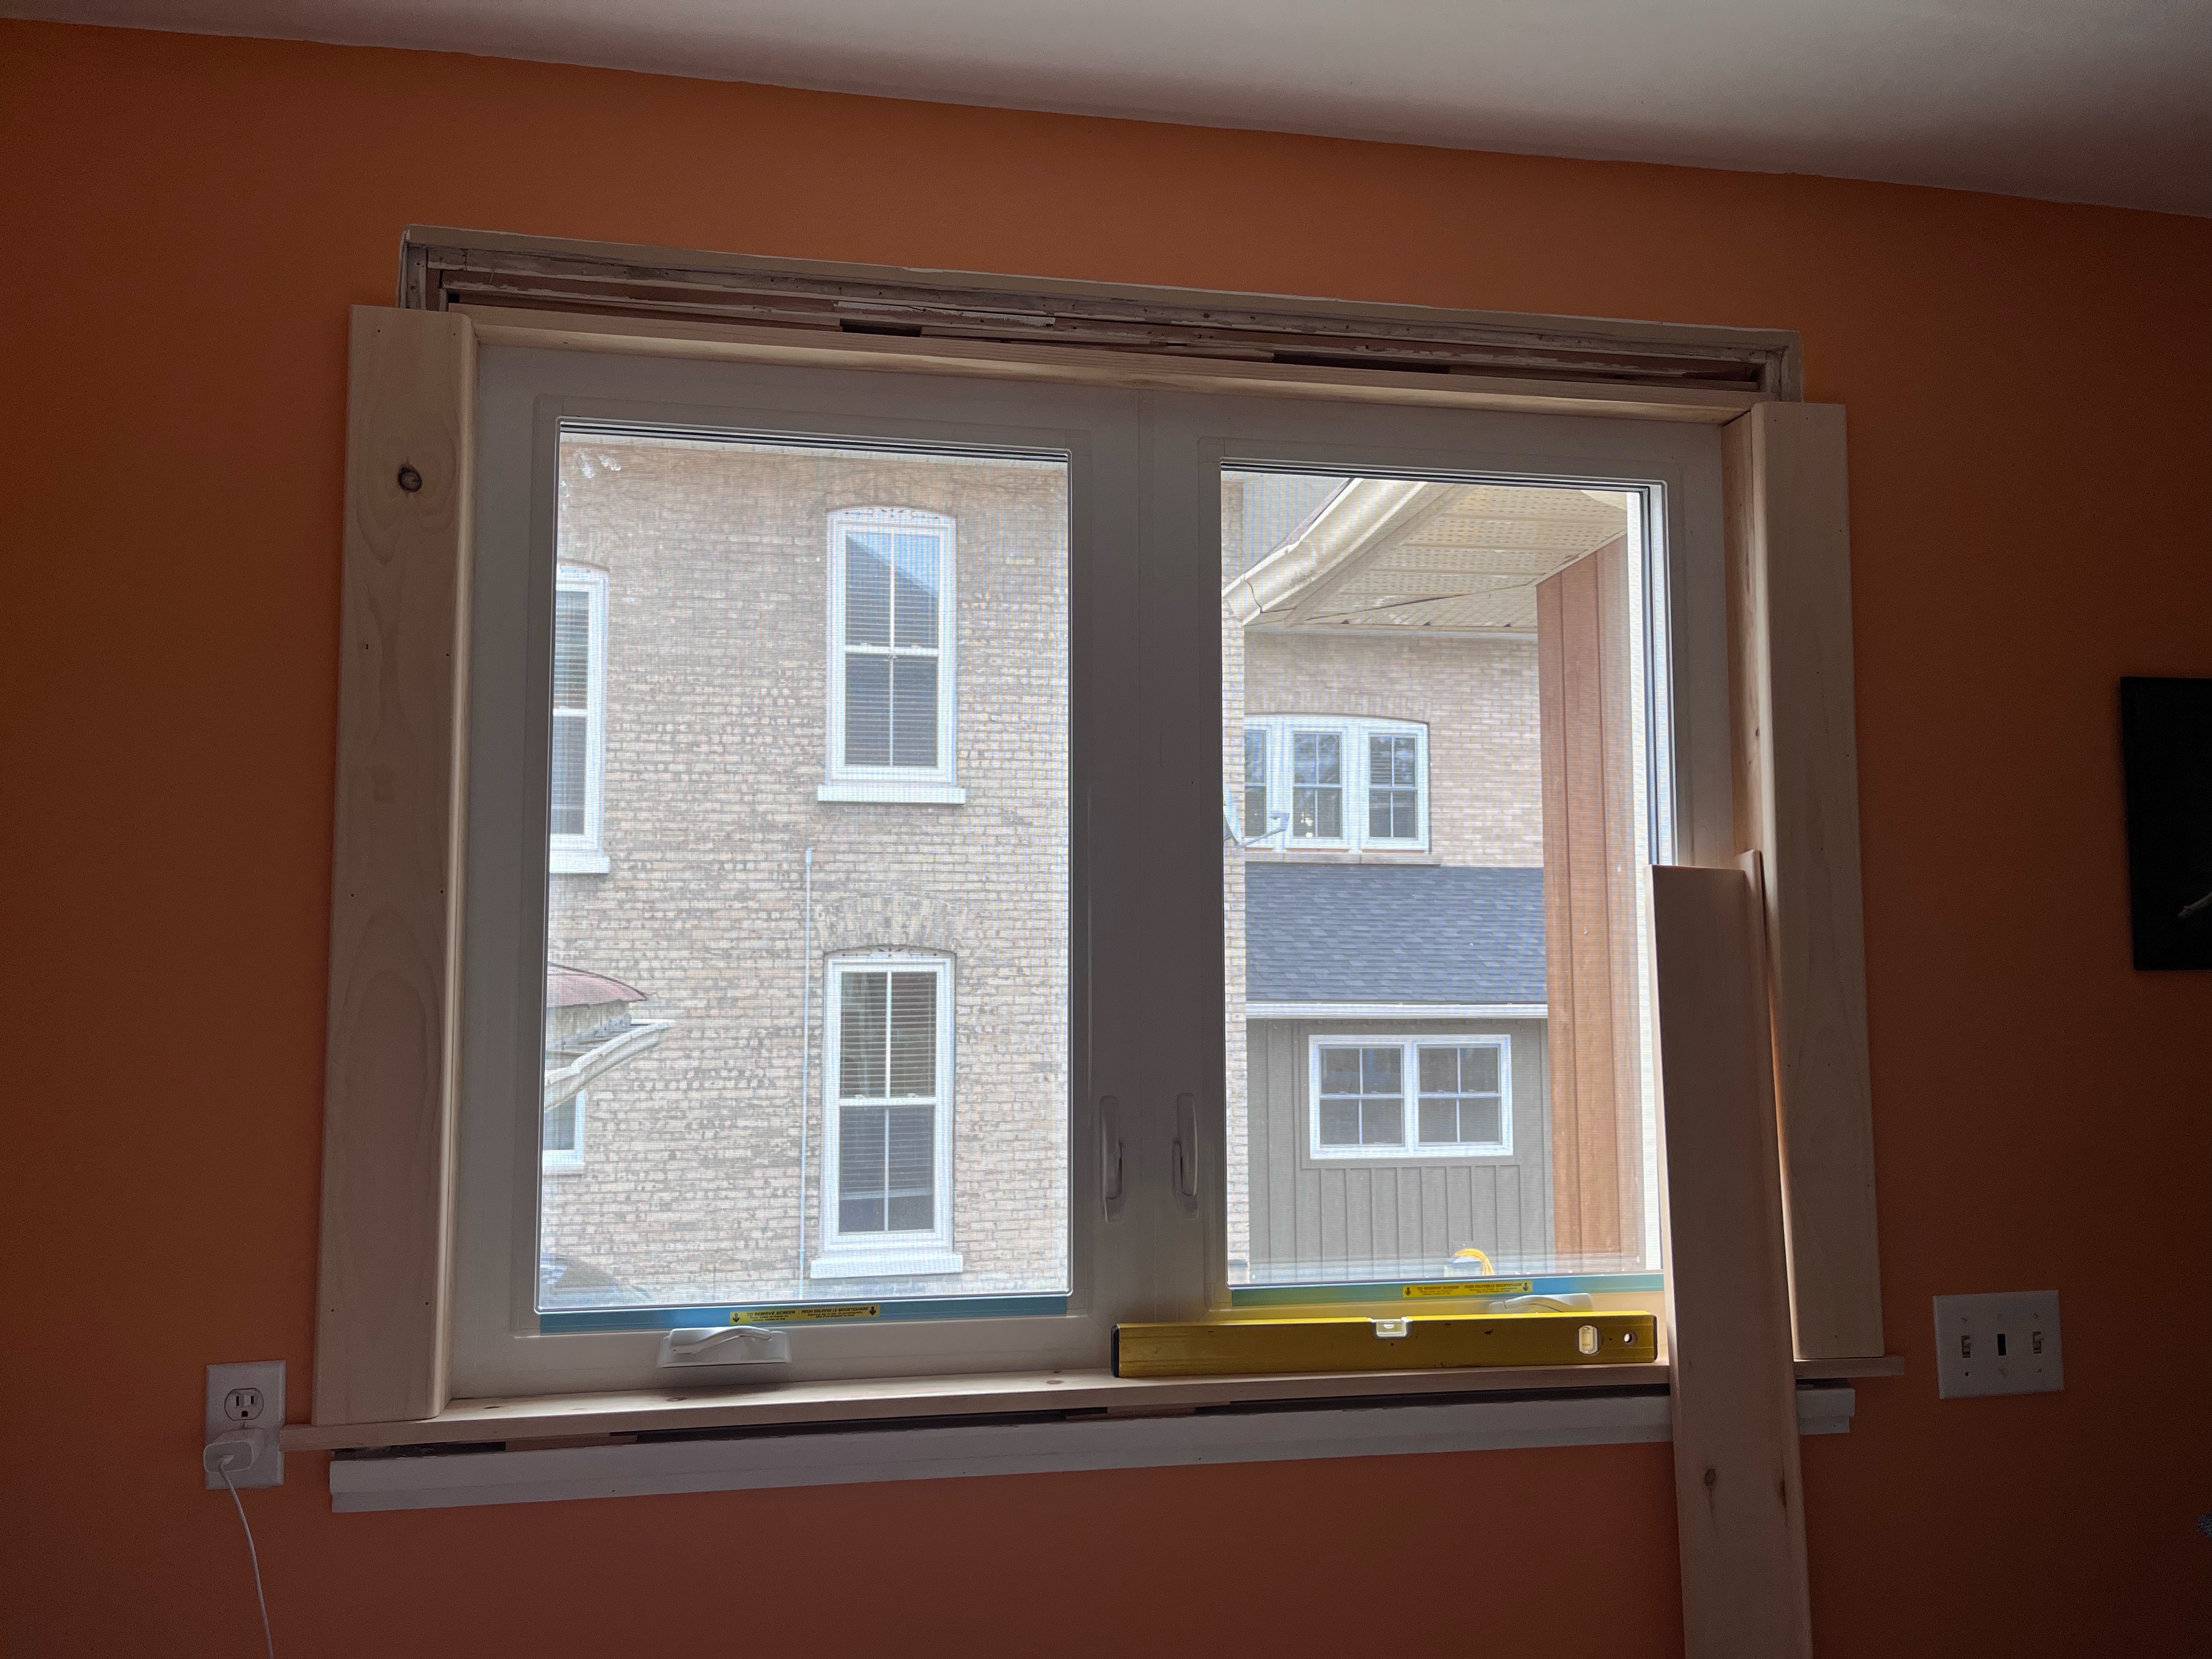
<p>This is the same window after it was replaced and I had added the jambs.</p>

<div class="imgWrapper imgBlock center" style="width: 80%; ">
  <figure>
    <picture class="imgPicture">
  <img alt="Frame with jambs" class="imgImg rounded shadow" src="/assets/posts/2025-08-23-Window-Frame/jambs.jpg" style="width: 100%; " title="Ready for the casings" />
</picture>
    <figcaption class="imgFigCaption ">
  Ready for the casings
</figcaption>
  </figure>
</div>

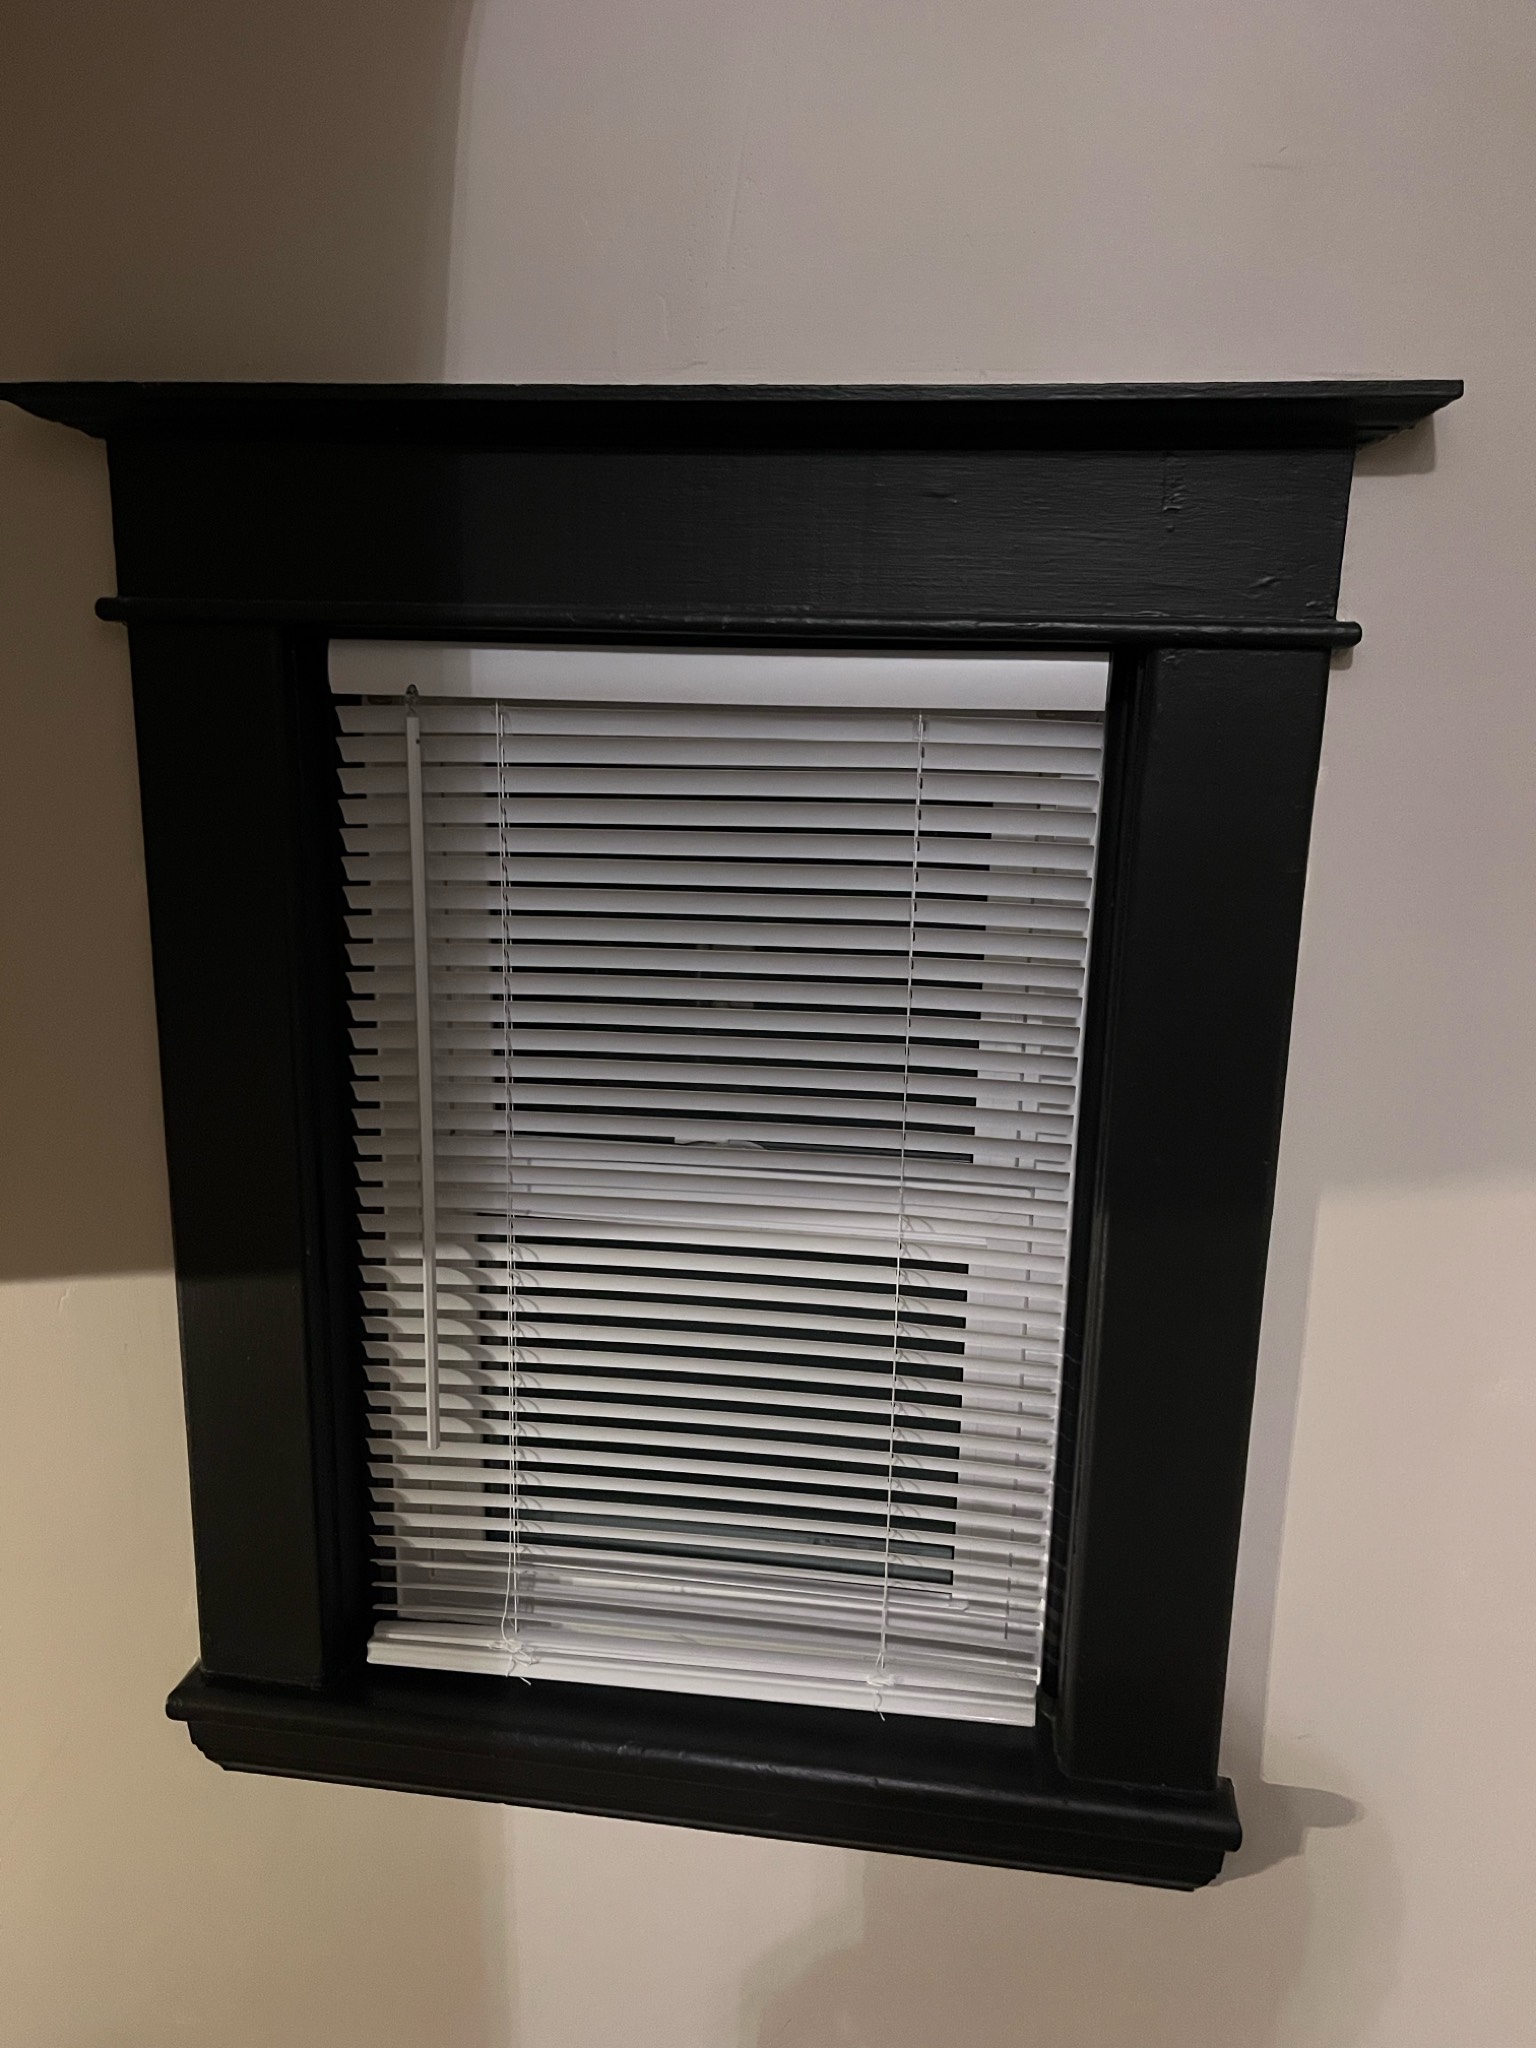
<p>Now the question was, what kind of casing should we add to match the period style windows?  There were two main styles in the house. Both styles had wide casings, but some had a very slanted top piece and some were more squared.  The stair window pictured above was an example of the slanted, and here is a close up of the other style. Generally speaking, the downstairs doors had the squared style, and all the windows and the upstairs doors had the slanted style.</p>

<div class="imgWrapper imgBlock center" style="width: 50%; ">
  <figure>
    <picture class="imgPicture">
  <img alt="door casing" class="imgImg rounded shadow" src="/assets/posts/2025-08-23-Window-Frame/ref-door.jpg" style="width: 100%; " title="Squared off top casing" />
</picture>
    <figcaption class="imgFigCaption ">
  Squared off top casing
</figcaption>
  </figure>
</div>

<p>Our local hardware stores didnt’t have anything like it in stock, so my options were to either find some second hand or make my own. The problem with the restoration shops is that even if you find a piece of matching casing it’s unlikely they have enough of it to complete the project.</p>

<p>To make my own I needed a router bit to match the profile of the casing.  I was unable to find a router piece that matched the slanted style so it was an easy decision to match the squared style.  I should say I was unable to find a router piece within my budget.  If I had really looked for professional style router bits I’m sure I would have found a match.</p>

<p>The side casings were cut from pine and rounded on each side.</p>

<div class="imgWrapper imgBlock center" style="width: 80%; ">
  <figure>
    <picture class="imgPicture">
  <img alt="Side casings" class="imgImg rounded shadow" src="/assets/posts/2025-08-23-Window-Frame/side-casings.jpg" style="width: 100%; " title="Side casings added" />
</picture>
    <figcaption class="imgFigCaption ">
  Side casings added
</figcaption>
  </figure>
</div>

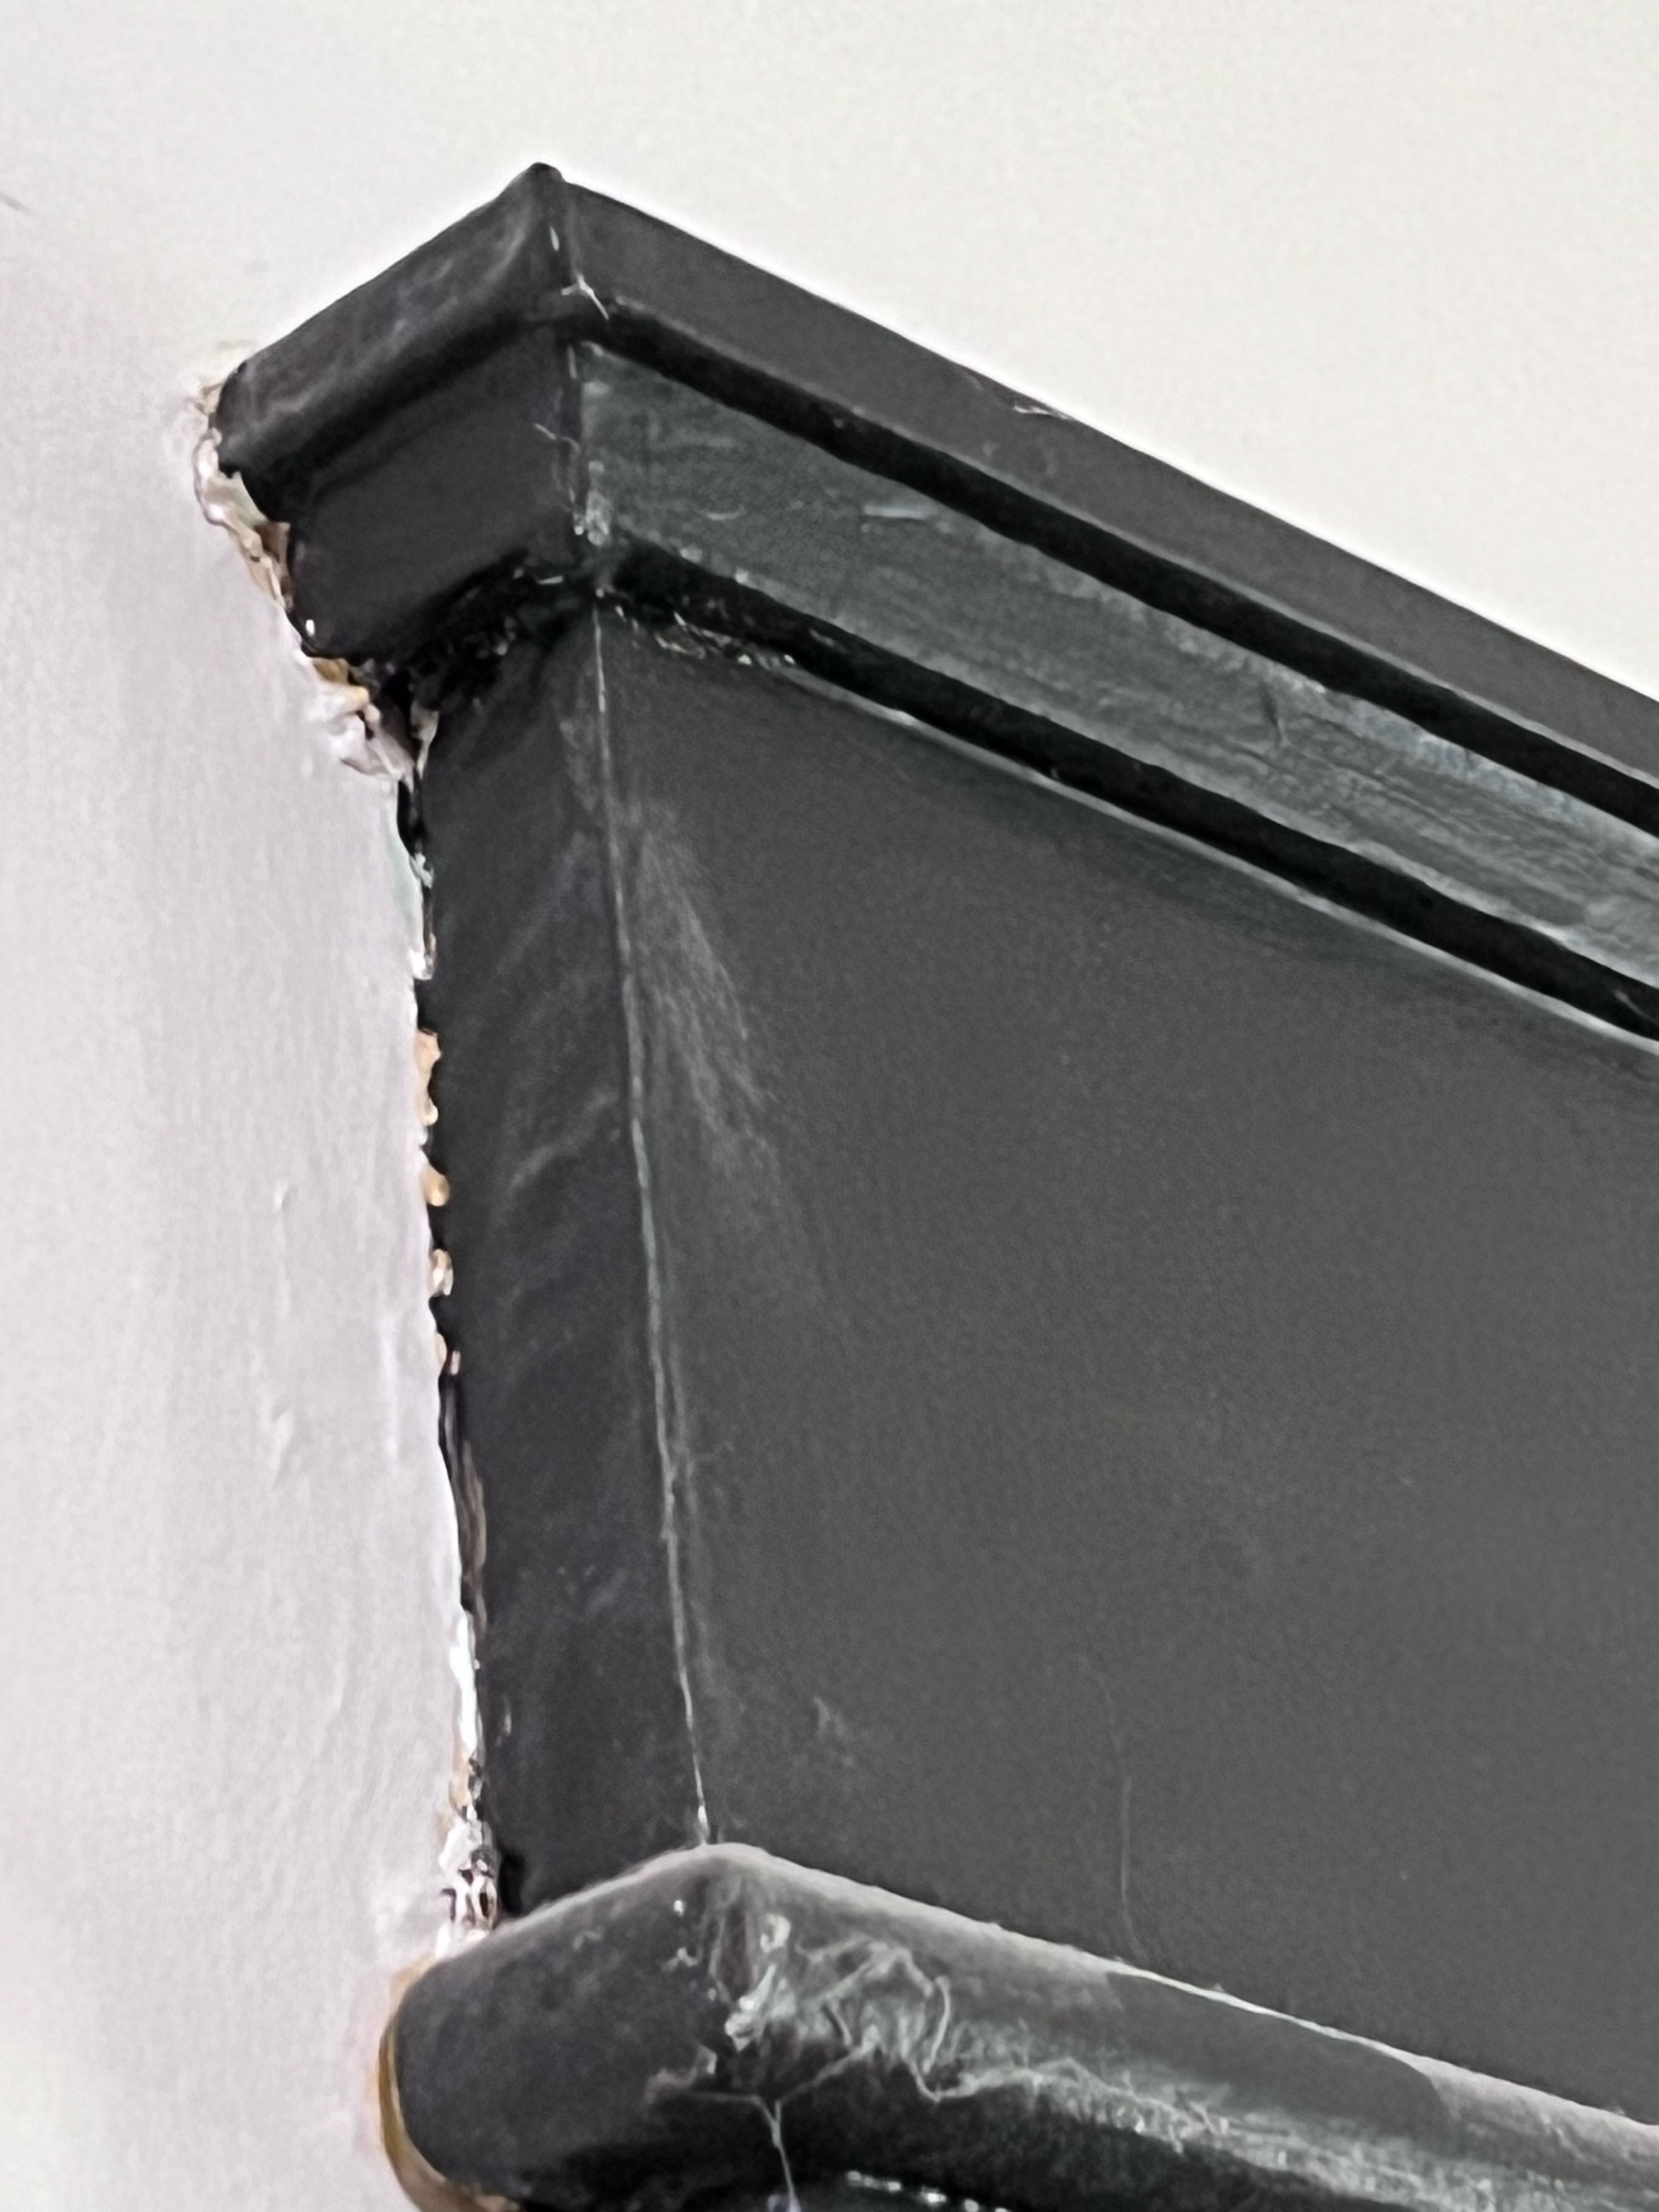
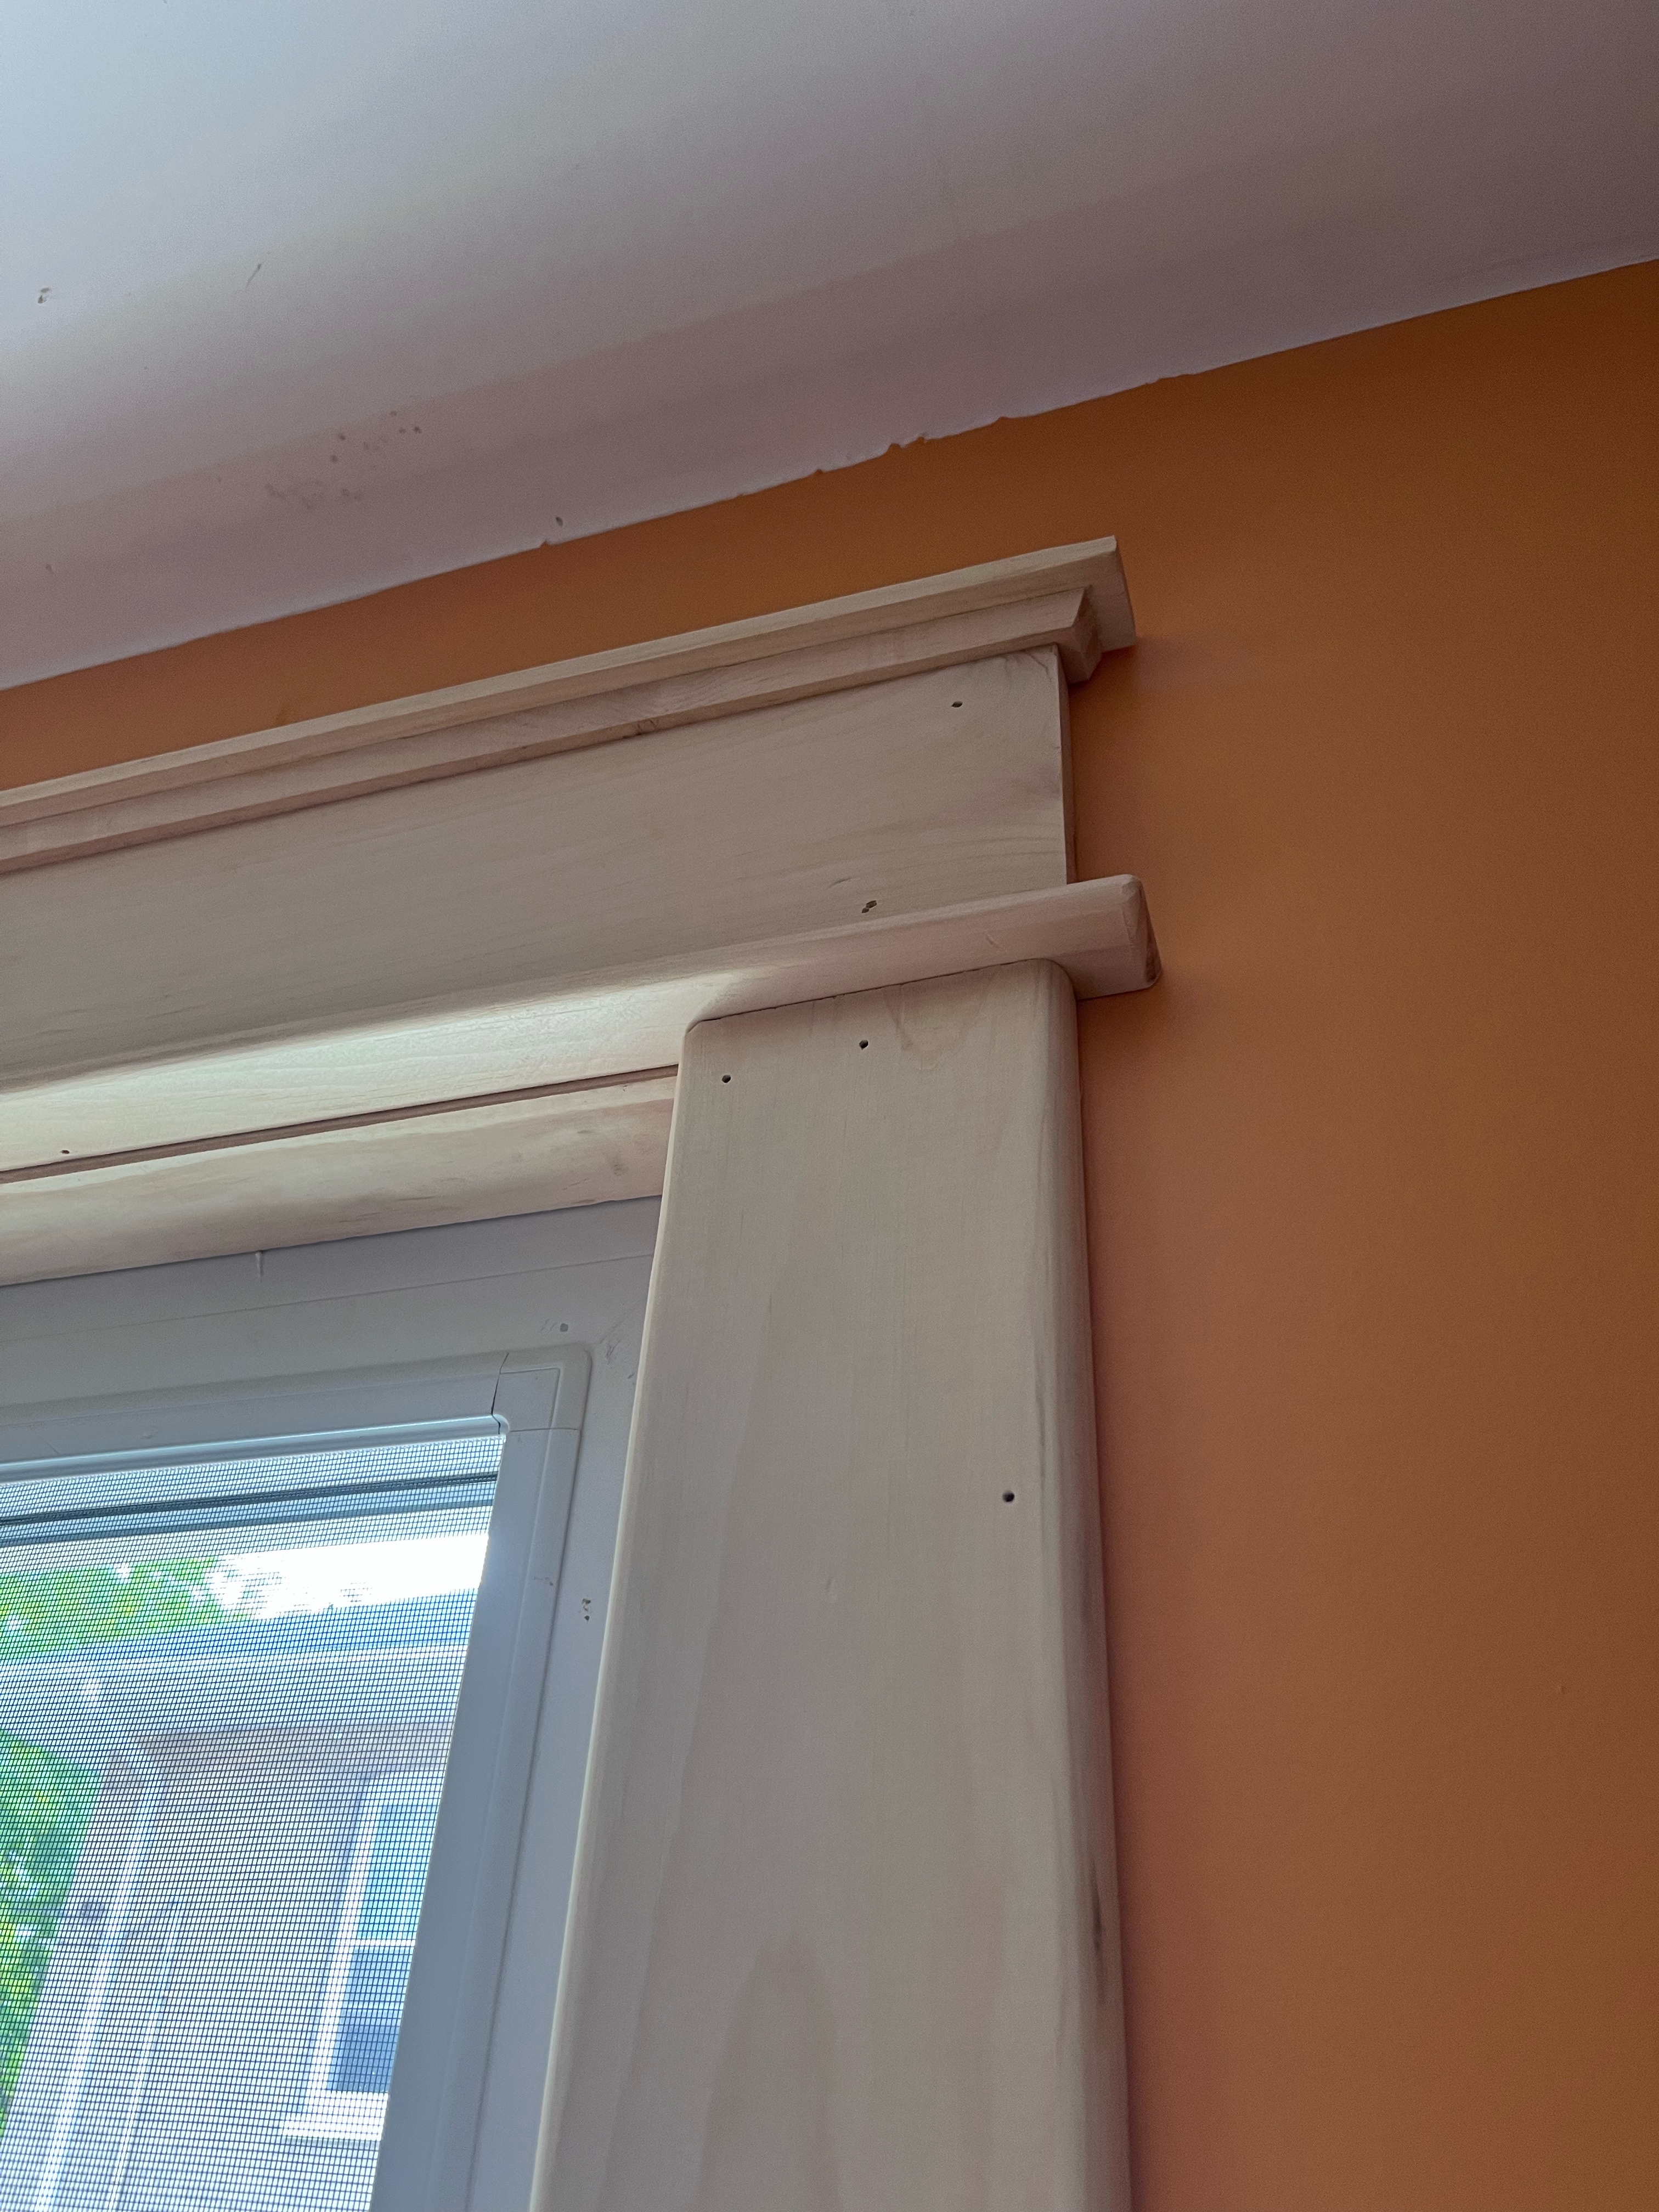
<p>The top casing was a smaller piece rounded on both sides, matched with two separate pieces on top to give the required profile. You can also see the nail holes before they were filled in.</p>

<div class="imgWrapper imgBlock center" style="width: 80%; ">
  <figure>
    <picture class="imgPicture">
  <img alt="Top casing" class="imgImg rounded shadow" src="/assets/posts/2025-08-23-Window-Frame/corner-close-up.jpg" style="width: 100%; " title="Close up of top profile" />
</picture>
    <figcaption class="imgFigCaption ">
  Close up of top profile
</figcaption>
  </figure>
</div>

<p>That left the bottom piece, which I think is called the apron.  I did not want to remove the existing apron as I am very much am amateur at this and I don’t have the skill set to replace it.  Instead, I created a bull nose piece, very similar to a stair tread. to go on the front and cover up the gap from the sill to the existing apron.  Smaller pieces of wood were ‘stuffed’ in the gaps that were left over.</p>

<div class="imgWrapper imgBlock center" style="width: 80%; ">
  <figure>
    <picture class="imgPicture">
  <img alt="unpainted casing" class="imgImg rounded shadow" src="/assets/posts/2025-08-23-Window-Frame/top-casing.jpg" style="width: 100%; " title="Finished casing" />
</picture>
    <figcaption class="imgFigCaption ">
  Finished casing
</figcaption>
  </figure>
</div>

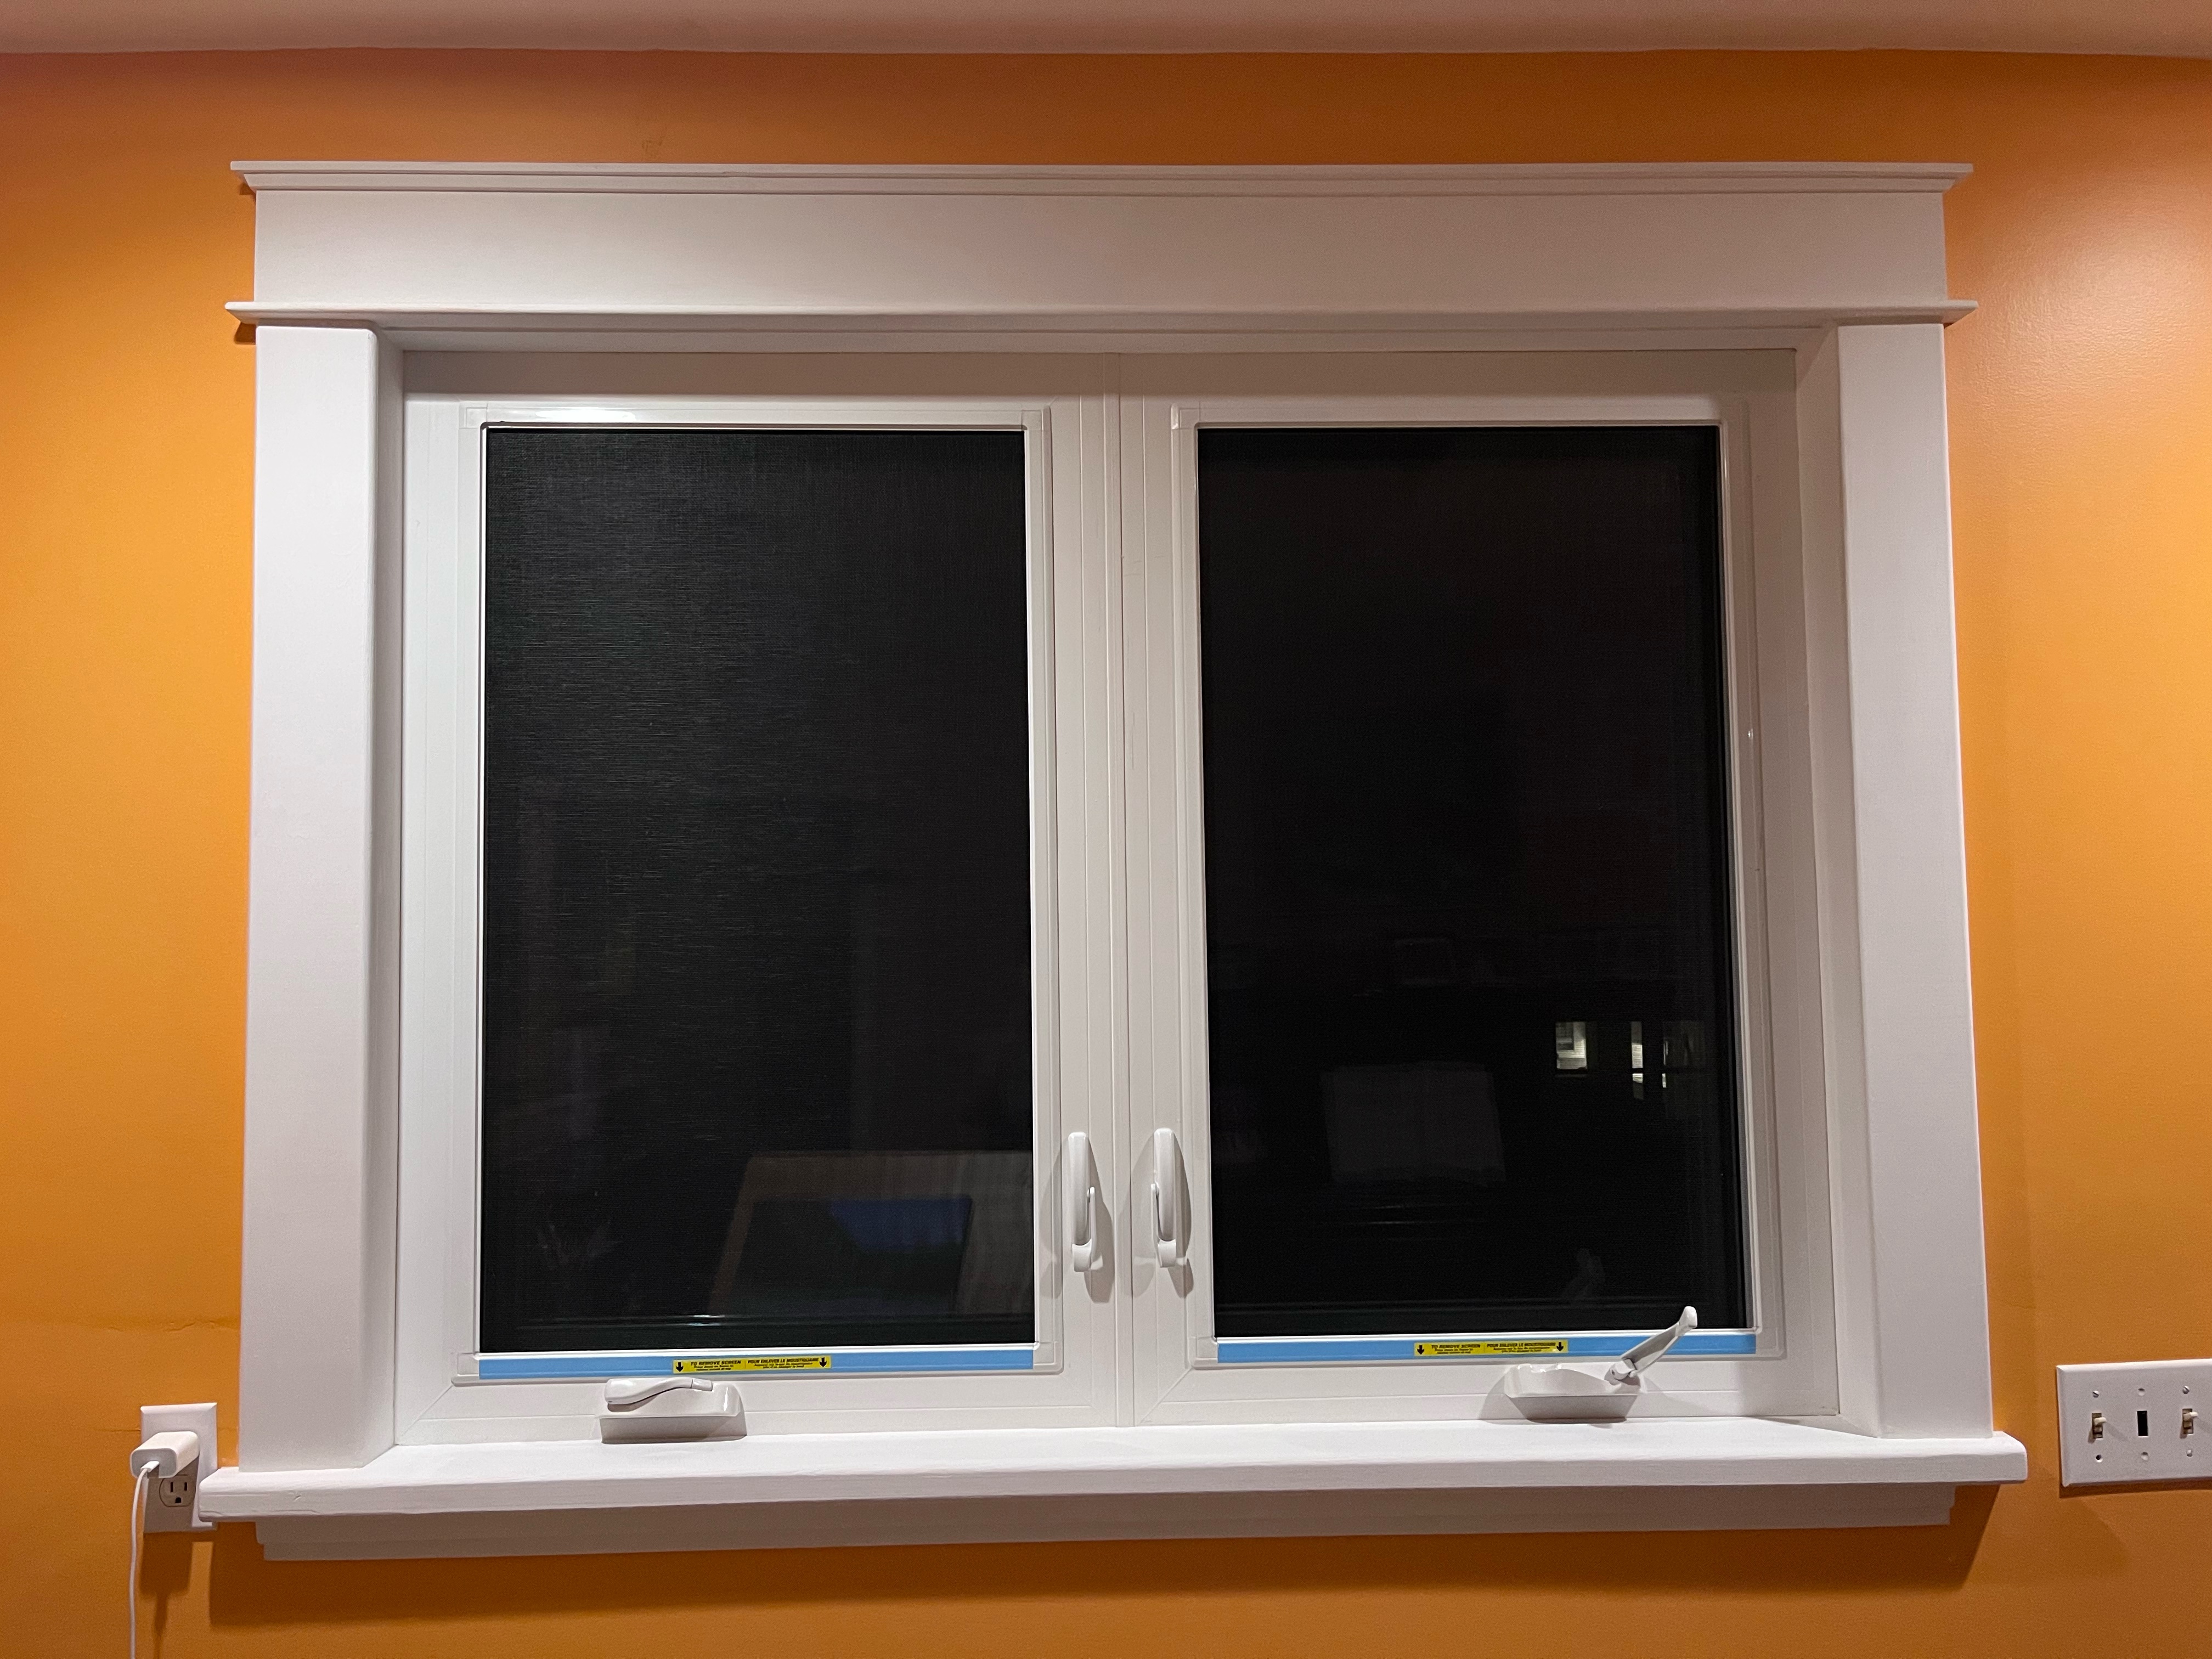
<p>Then it was just the usual work of filling in the holes and sanding with multiple grits; then two coats of primer and finally a semi-gloss.</p>

<div class="imgWrapper imgBlock center" style="width: 80%; ">
  <figure>
    <picture class="imgPicture">
  <img alt="Finished window frame" class="imgImg rounded shadow" src="/assets/posts/2025-08-23-Window-Frame/painted.jpg" style="width: 100%; " />
</picture>
    <figcaption class="imgFigCaption ">
</figcaption>
  </figure>
</div>

<p>I was quite keen to paint it the same dark colour as the existing windows - but my better half made a very persuavive argument for (boring) white.</p>

<p>Overall, I am very happy with how this one turned out. Along the way I improved my skills with working with the router and I think I’m going to try to restore some of the other trim work in the house.</p>]]></content><author><name></name></author><category term="House" /><category term="window" /><category term="wood" /><category term="projects" /><category term="restoration" /><category term="trim" /><category term="casing" /><category term="router" /><summary type="html"><![CDATA[Study window with period appropiate casing]]></summary></entry><entry><title type="html">Firepit at the Trailer</title><link href="/garden/2025/08/03/Firepit.html" rel="alternate" type="text/html" title="Firepit at the Trailer" /><published>2025-08-03T00:00:00+00:00</published><updated>2025-08-03T00:00:00+00:00</updated><id>/garden/2025/08/03/Firepit</id><content type="html" xml:base="/garden/2025/08/03/Firepit.html"><![CDATA[<p>No longer is our trailer the only one in the Park without a firepit.</p>

<div class="imgWrapper imgFlex center" style="width: 80%; ">
    <picture class="imgPicture">
  <img alt="Firepit" class="imgImg rounded shadow" src="/assets/posts/2025-08-03-Firepit/firepit.jpg" style="width: 100%; " title="Firepit" />
</picture>
</div>

<p>It’s not really been a priority for use before as we’ve never been that good at dodging mosquitoes and smoke.  But our pregnant daughter was coming up and she really likes <a href="https://en.wikipedia.org/wiki/S%27more">S’mores</a>. So it was time.</p>

<p>Not really a lot going on here, just remove the turf, add a base of sand and lay down the slabs. As you can see from the picture I did a pretty bad job of levelling the slabs.</p>

<div class="imgWrapper imgFlex center" style="width: 80%; ">
    <picture class="imgPicture">
  <img alt="Firepit and trailer" class="imgImg rounded shadow" src="/assets/posts/2025-08-03-Firepit/firepit+trailer.jpg" style="width: 100%; " title="Firepit and trailer" />
</picture>
</div>

<p>But it was done in time for the visit and it the S’mores were very tasty.</p>]]></content><author><name></name></author><category term="Garden" /><category term="firepit" /><category term="trailer" /><summary type="html"><![CDATA[No longer is our trailer the only one in the Park without a firepit.]]></summary></entry><entry><title type="html">Moving Day</title><link href="/misc/2025/07/01/Moving-Day.html" rel="alternate" type="text/html" title="Moving Day" /><published>2025-07-01T00:00:00+00:00</published><updated>2025-07-01T00:00:00+00:00</updated><id>/misc/2025/07/01/Moving-Day</id><content type="html" xml:base="/misc/2025/07/01/Moving-Day.html"><![CDATA[<p>It’s Moving Day for the blog.</p>

<p>Welcome to the new home, which has a lovely new domain (clutteredspaces.com) and is a <a href="https://jekyllrb.com">Jekyl</a> site hosted on GitHub Pages.</p>

<p>The old site was on a <a href="https://wordpress.com">Wordpress</a> free site.  That meant the images needed to be hosted externally so I was using <a href="https://www.flickr.com">Flickr</a>. However, over time Flickr started reducing the amount of images that can be hosted for free so I needed another option.  I was also struggling with uploading the images to flickr, extracting the image URL and posting into wordpress.</p>

<p>I’d read about static sites so I thought I would give it a go.  I really liked the idea of hosting everything in one place (github). Jekyl was a little harder to get setup than I was expected, probably because it took a while to understand how Jekyl wants things to work.  That’s always the hard part with new frameworks, trying to work with it instead of against it.</p>

<p>So we here we are, all set up and ready to go.</p>]]></content><author><name></name></author><category term="Misc" /><category term="coding" /><summary type="html"><![CDATA[It’s Moving Day for the blog.]]></summary></entry><entry><title type="html">Stair Gallery</title><link href="/house/2025/01/26/Stair-Gallery.html" rel="alternate" type="text/html" title="Stair Gallery" /><published>2025-01-26T00:00:00+00:00</published><updated>2025-01-26T00:00:00+00:00</updated><id>/house/2025/01/26/Stair-Gallery</id><content type="html" xml:base="/house/2025/01/26/Stair-Gallery.html"><![CDATA[<p>We converted the attic stairs in to a gallery.</p>

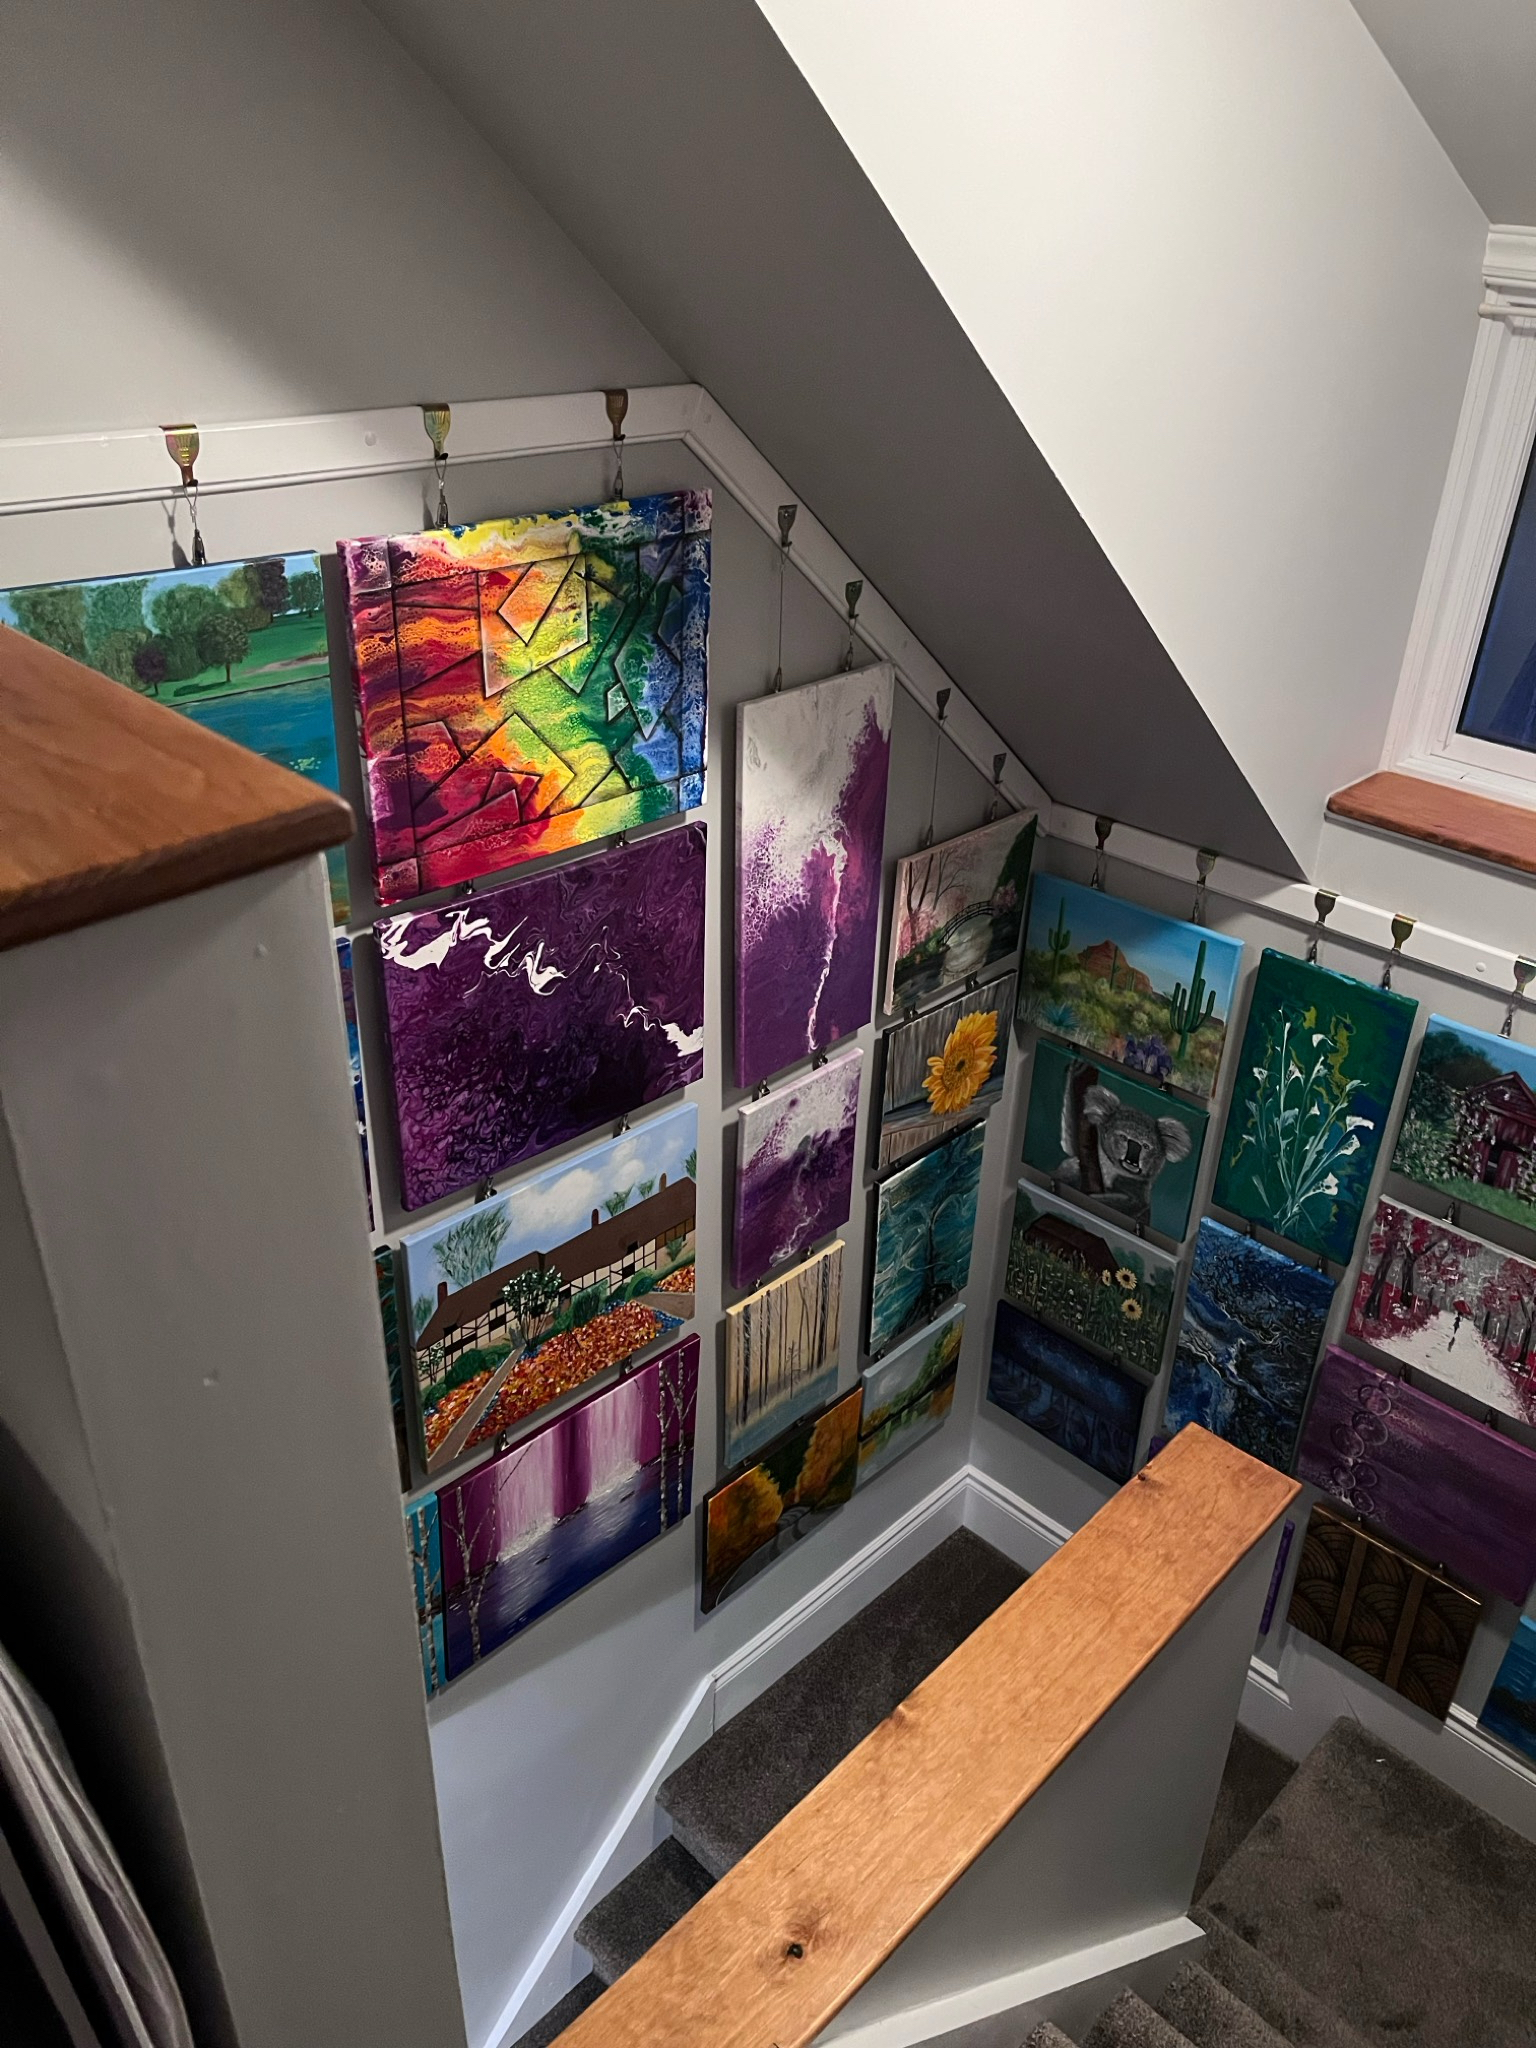
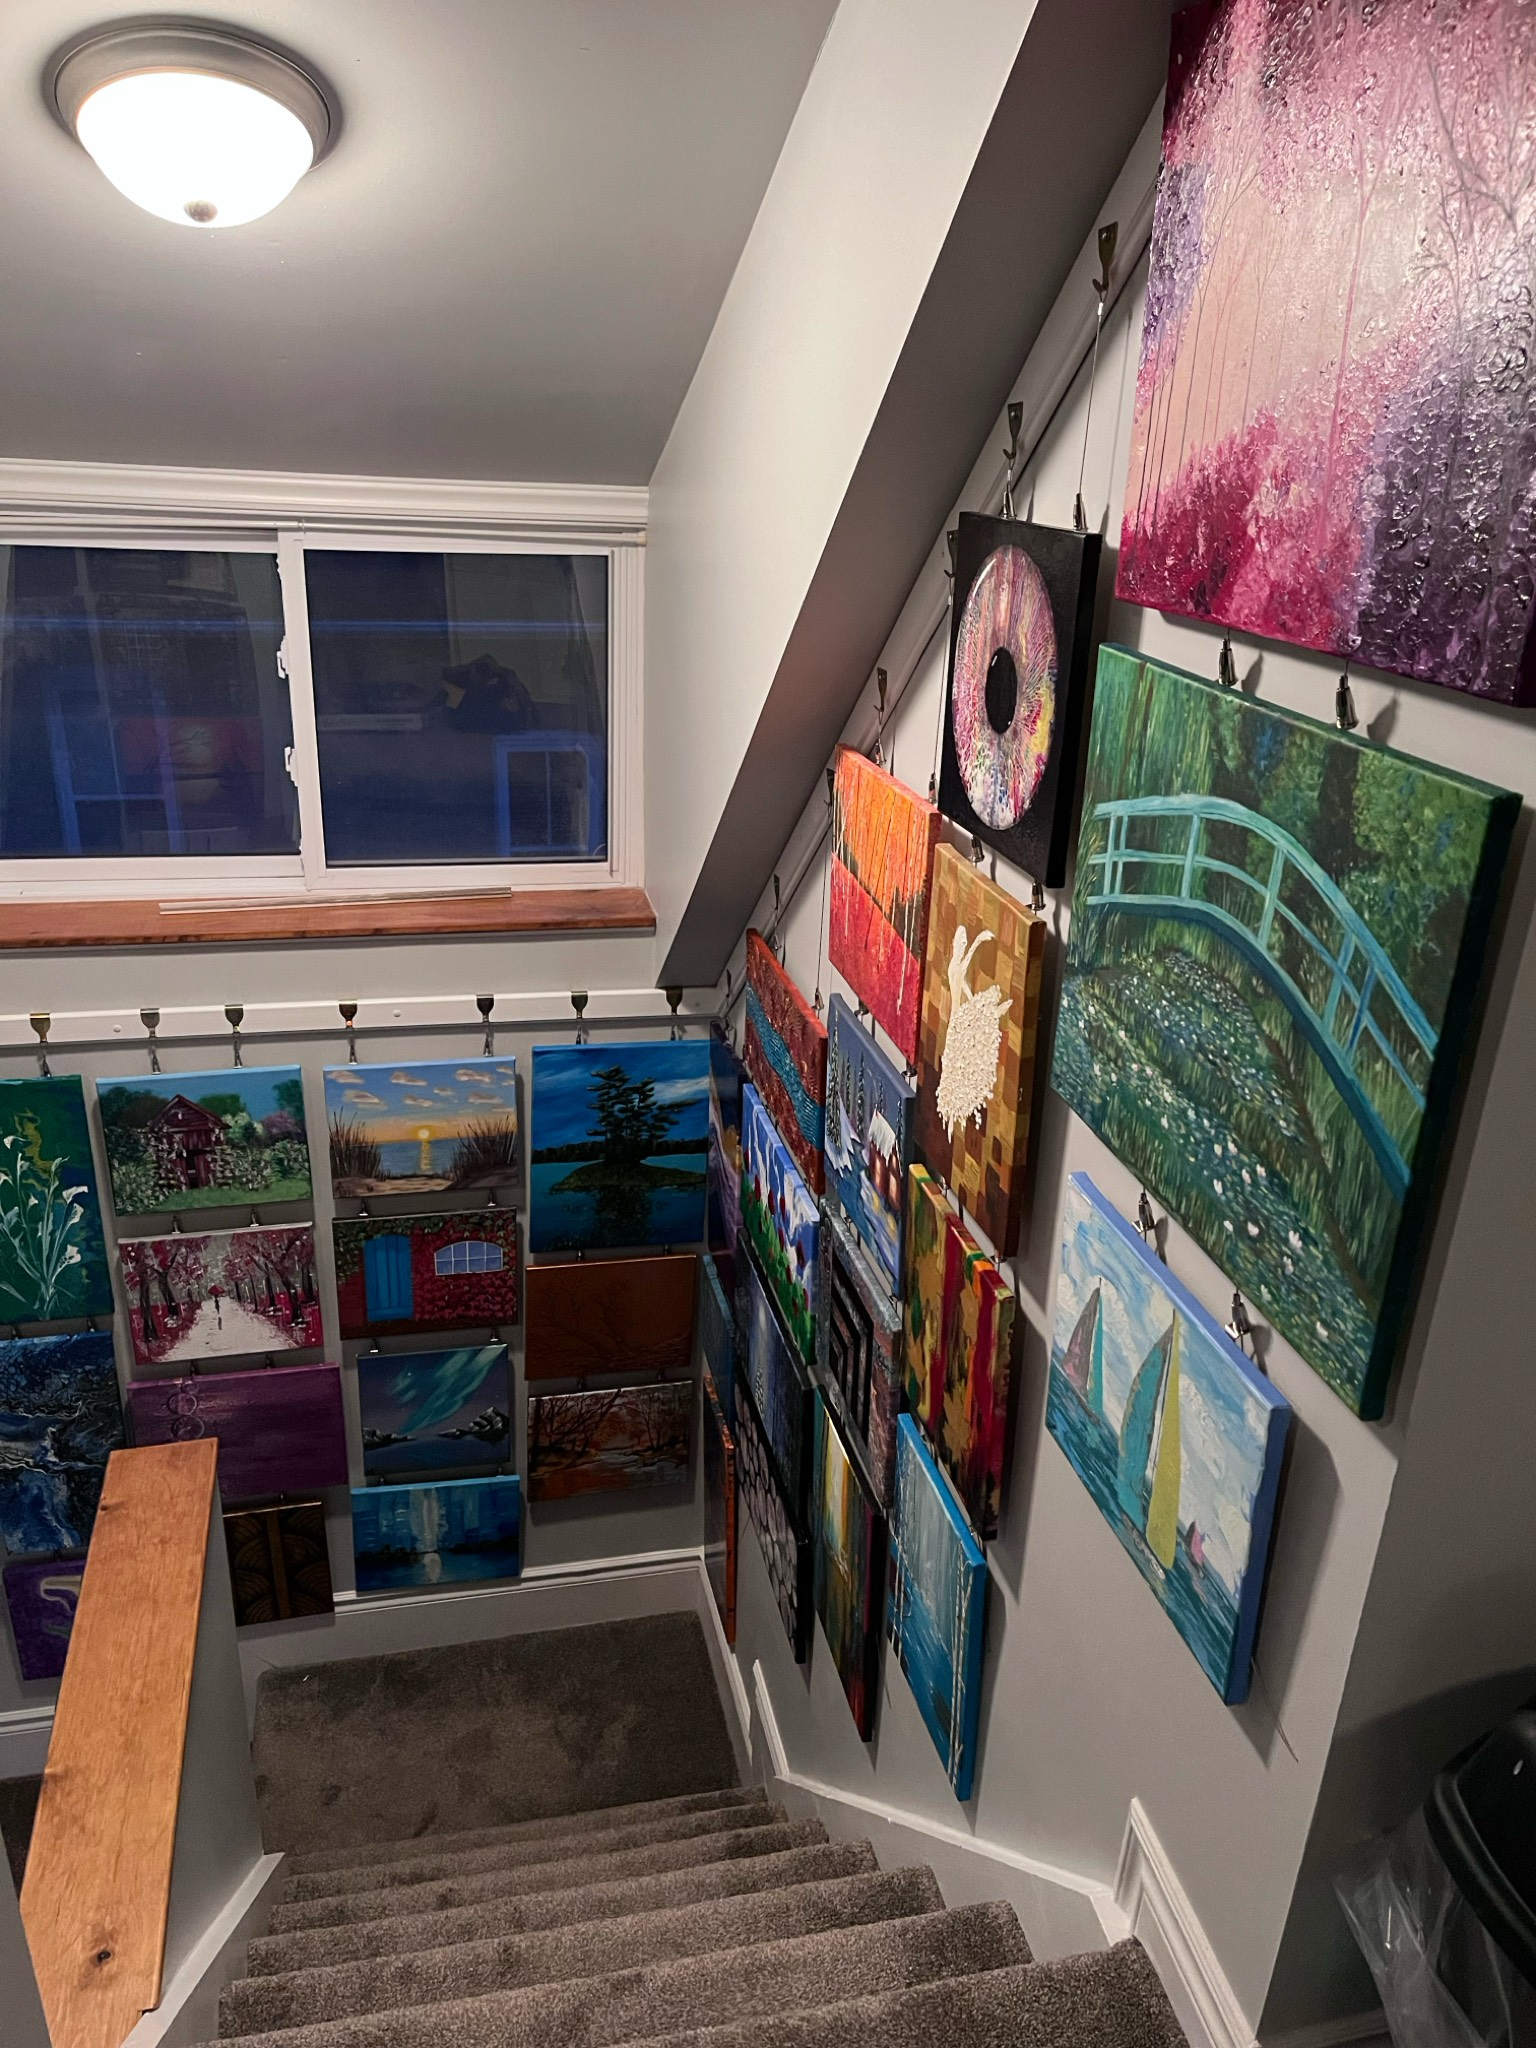
<div class="imgWrapper imgFlex center" style="width: 80%; ">
    <a href="/assets/posts/2025-01-26-Stair-Gallery/img_9180_54290430270_o.jpg" target="_blank" class="imgImgUrl">
  <picture class="imgPicture">
  <img class="imgImg rounded shadow" src="/assets/posts/2025-01-26-Stair-Gallery/img_9180_54290430270_o.jpg" style="width: 100%; " />
</picture>
</a>
</div>

<div class="imgWrapper imgFlex center" style="width: 80%; ">
    <a href="/assets/posts/2025-01-26-Stair-Gallery/img_9182_54290239449_o.jpg" target="_blank" class="imgImgUrl">
  <picture class="imgPicture">
  <img class="imgImg rounded shadow" src="/assets/posts/2025-01-26-Stair-Gallery/img_9182_54290239449_o.jpg" style="width: 100%; " />
</picture>
</a>
</div>

<div class="imgWrapper imgFlex center" style="width: 80%; ">
    <a href="/assets/posts/2025-01-26-Stair-Gallery/img_9177_54289119162_o.jpg" target="_blank" class="imgImgUrl">
  <picture class="imgPicture">
  <img class="imgImg rounded shadow" src="/assets/posts/2025-01-26-Stair-Gallery/img_9177_54289119162_o.jpg" style="width: 100%; " />
</picture>
</a>
</div>

<p>The effect is quite striking, there’s more walls not shown here.  And every one of the pictures was done by Suzanne, so that’s pretty awesome.</p>

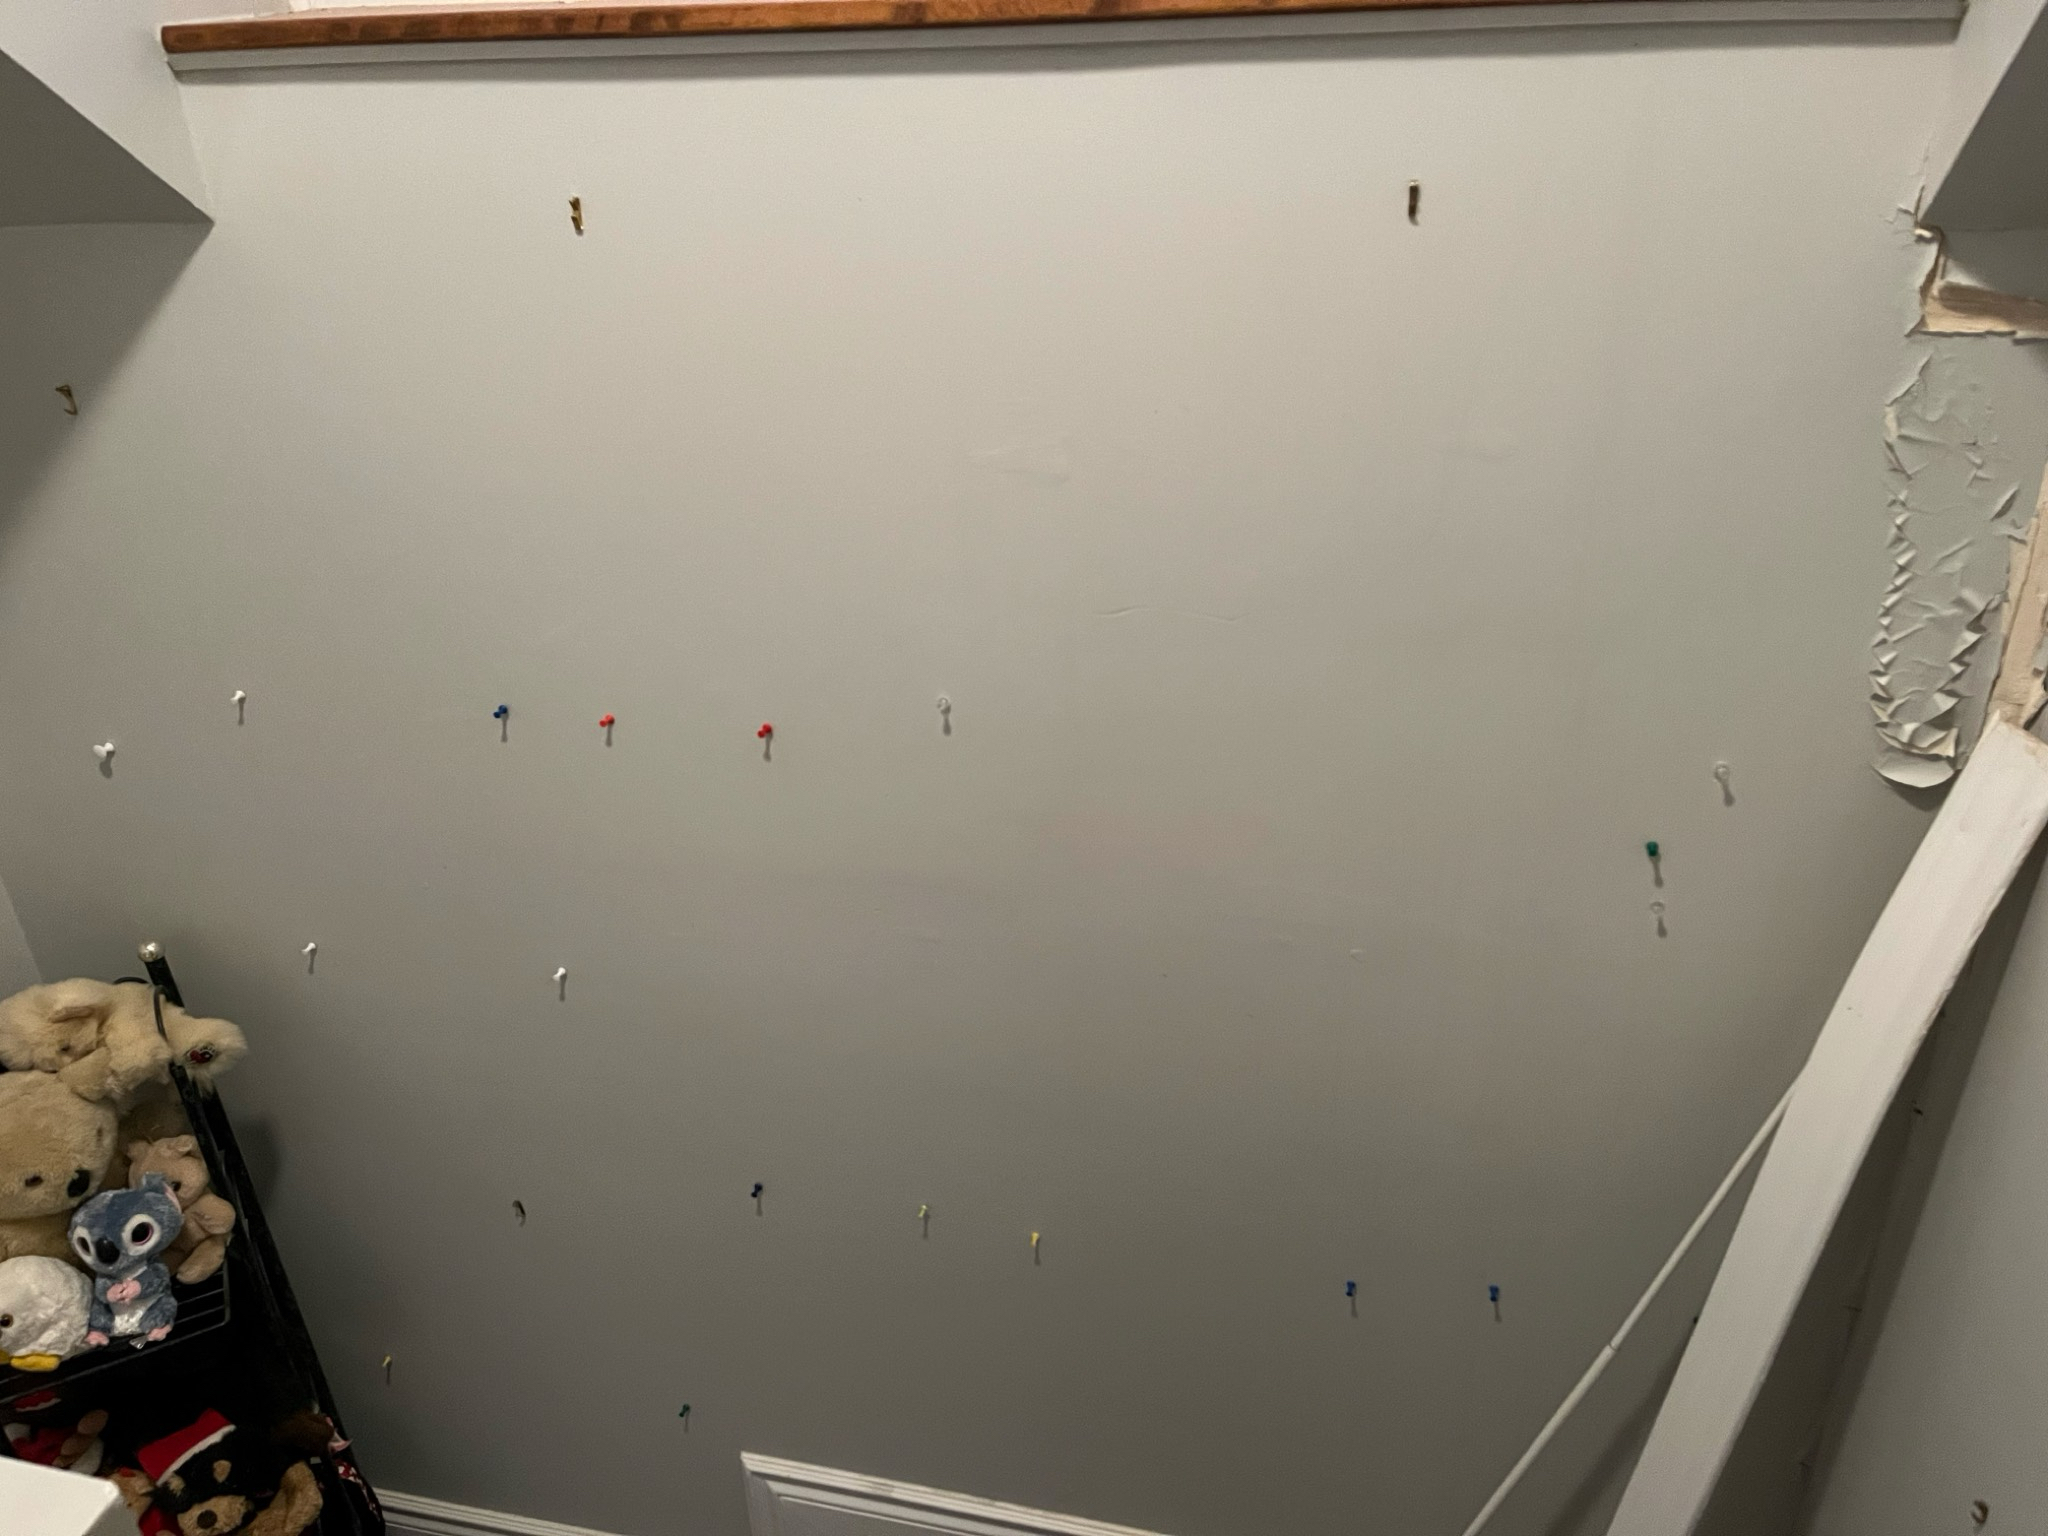
<p>We had put pictures up directly to the walls, but it was a pain to put each one up individually. It also left a lot of clean up, as you can see from pictures when took all the picture hooks out.</p>

<div class="imgWrapper imgFlex center" style="width: 80%; ">
    <a href="/assets/posts/2025-01-26-Stair-Gallery/img_8701_54290000916_o.jpg" target="_blank" class="imgImgUrl">
  <picture class="imgPicture">
  <img class="imgImg rounded shadow" src="/assets/posts/2025-01-26-Stair-Gallery/img_8701_54290000916_o.jpg" style="width: 100%; " />
</picture>
</a>
</div>

<p>There was also some water damage from a leaking window, which is why we took all the pictures down in the first place.  After we (finally) found a roofer to fix the leak, then replaced the damaged wallboard the question was what to do next.  We wanted the pictures back, but not all the hooks.</p>

<p>After some looking around we realized that a gallery hanging system could be worth it.  That would give us the freedom to move pictures around without picture hooks.  I would have liked to get a professional system, but the prices were just too high.  But of course, Amazon and China were happy to oblige with cheap picture hooks, picture wire, and S-hooks.  Due to the amount of hooks we put up, it still wasn’t cheap, maybe around $200 Cad in total, but still way cheaper than the gallery grade equivalent.</p>

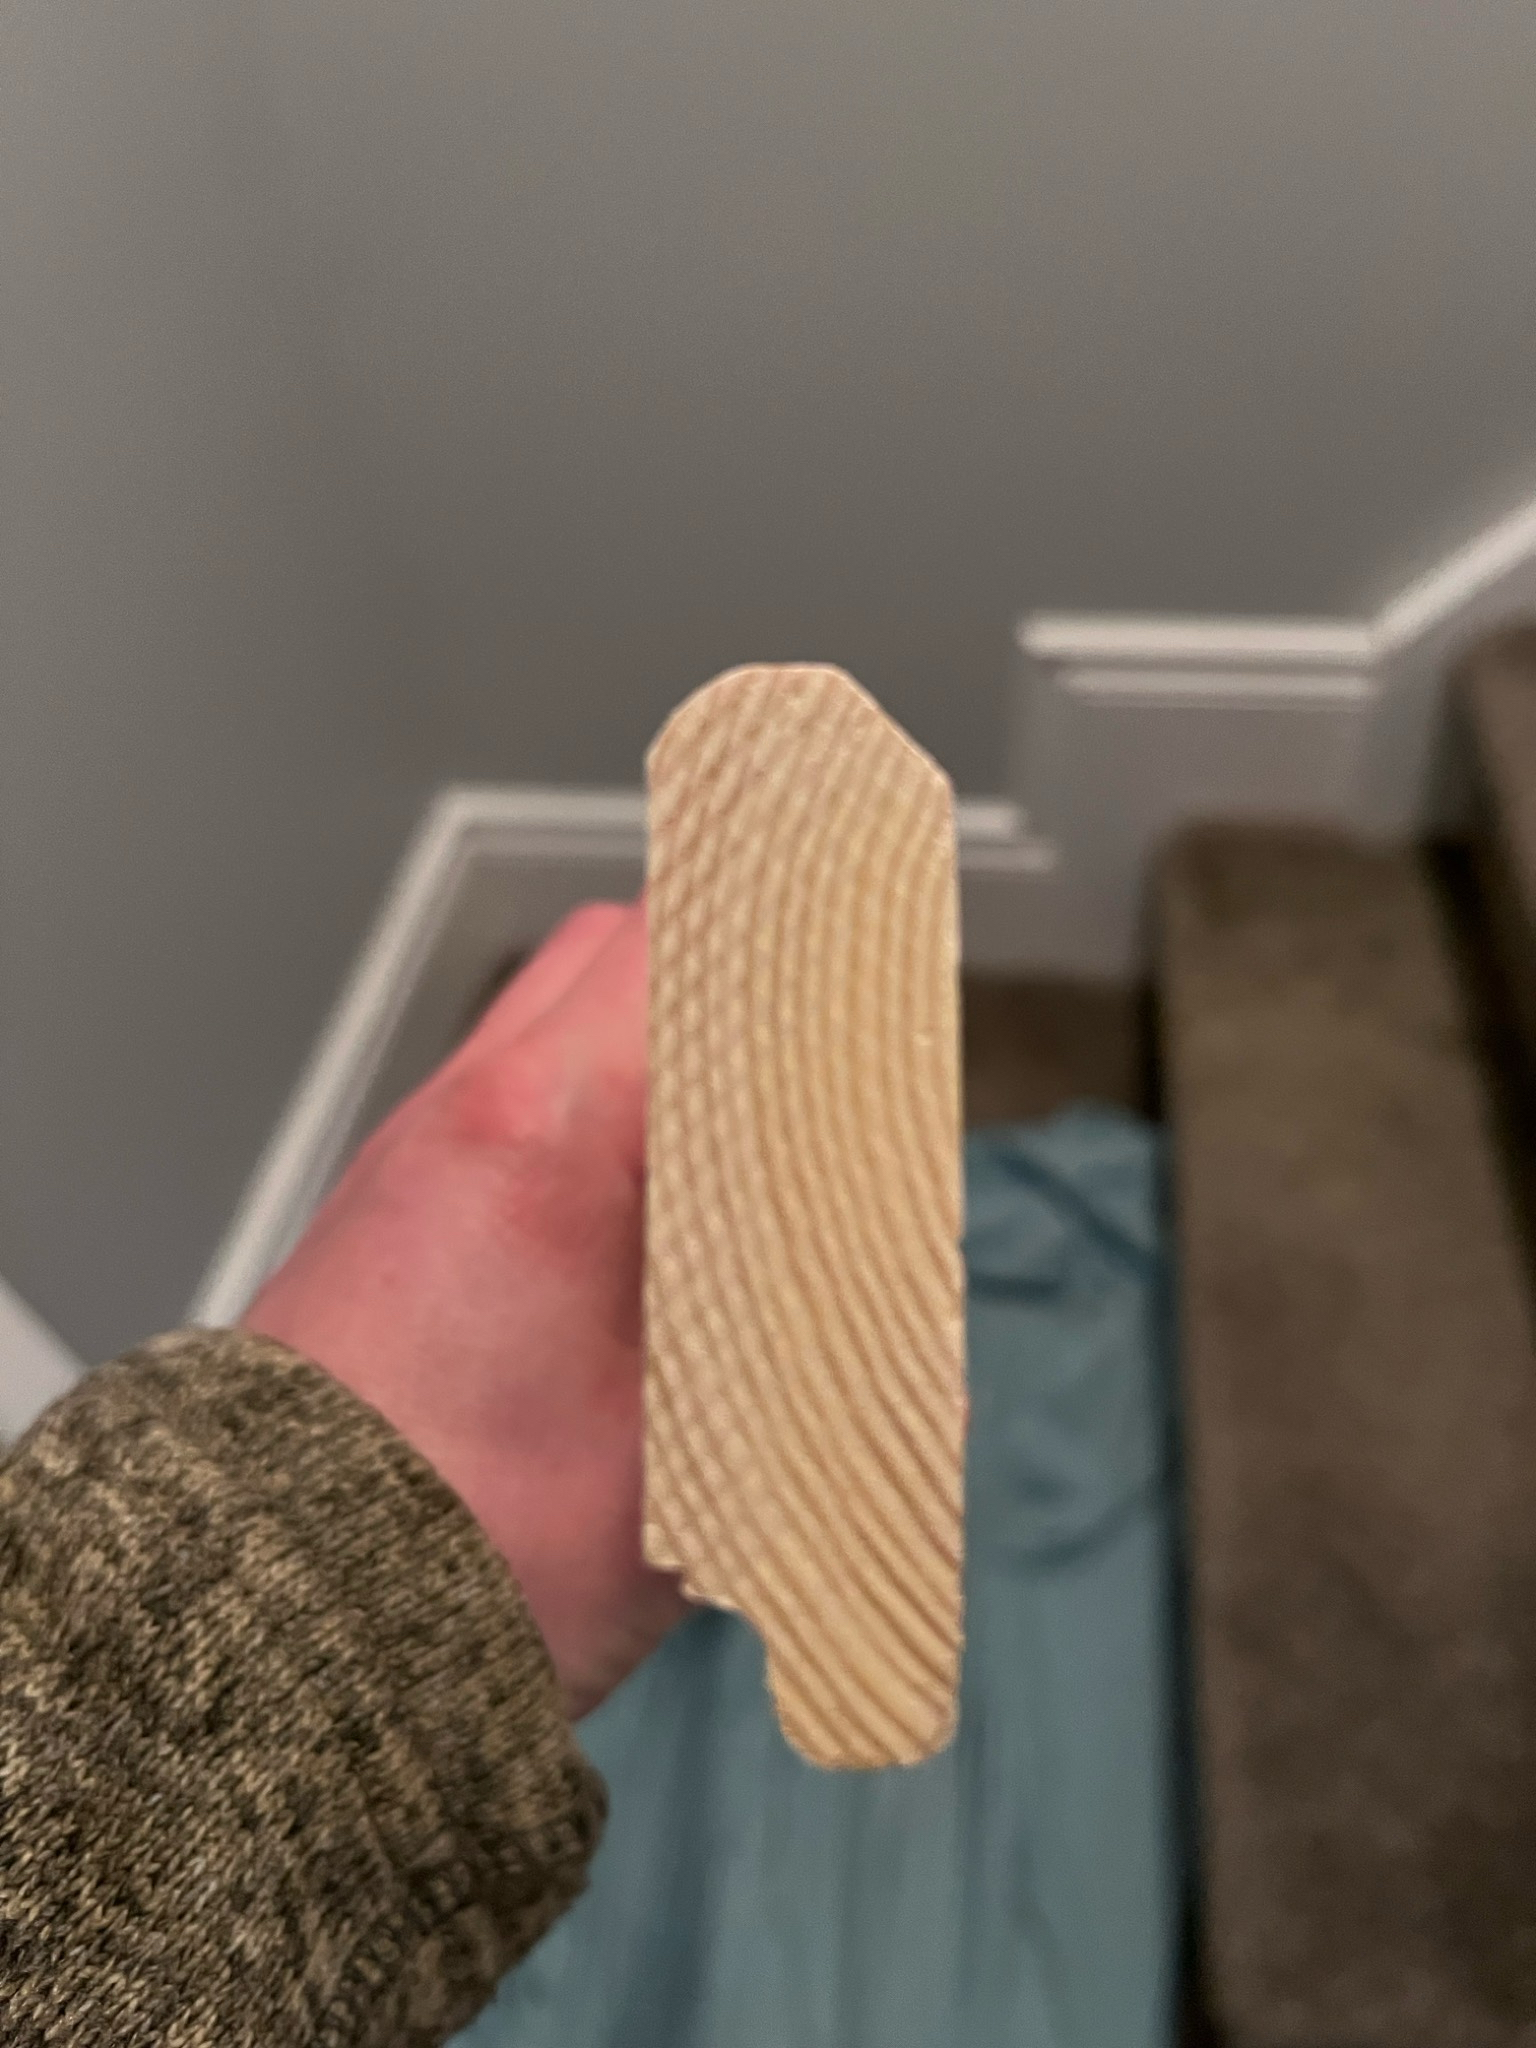
<p>We did save some money by making the picture rails from (really) cheap 1x3” lumber.  I used a router to make a profile for holding the hooks.  I tried to make the bottom part a little fancy, but lets say my routing skills were not entirely up to the job.</p>

<div class="imgWrapper imgFlex center" style="width: 80%; ">
    <a href="/assets/posts/2025-01-26-Stair-Gallery/img_9079_54290244003_o.jpg" target="_blank" class="imgImgUrl">
  <picture class="imgPicture">
  <img class="imgImg rounded shadow" src="/assets/posts/2025-01-26-Stair-Gallery/img_9079_54290244003_o.jpg" style="width: 100%; " />
</picture>
</a>
</div>

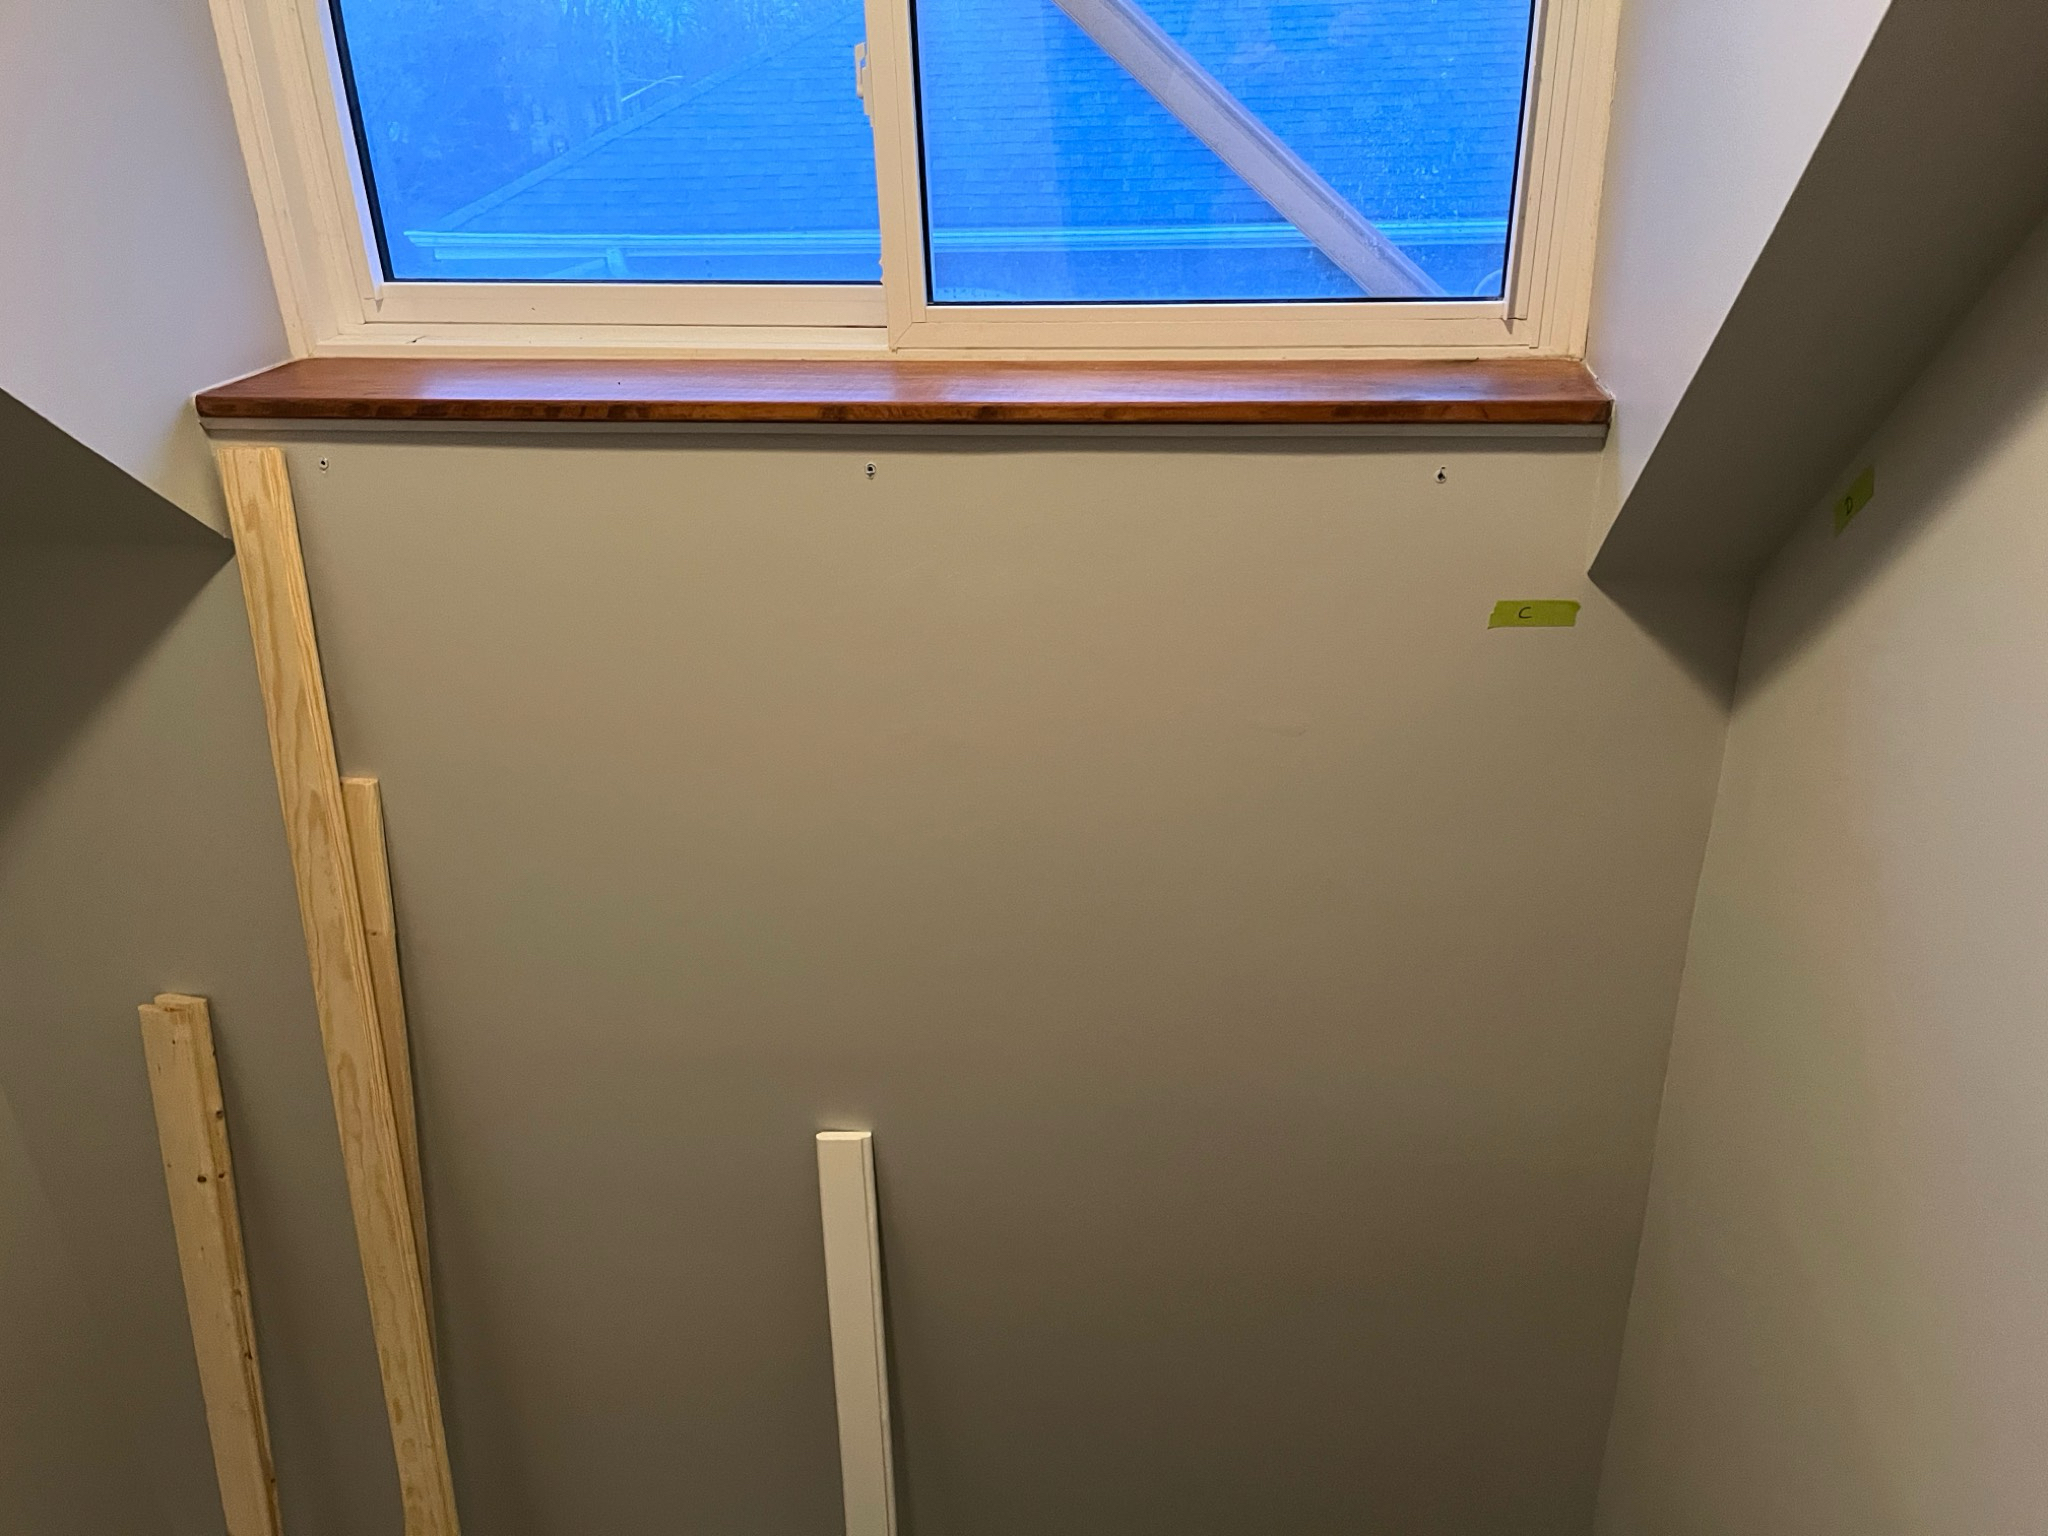
<p>Here you can see some of the rails getting ready to put up.  Actually you can see I didn’t get enough of the cheap stuff to the left, and had to get some spruce pine to finish (on the right). I used green masking tap to label each wall and rail so I wouldn’t get them mixed them up.</p>

<div class="imgWrapper imgFlex center" style="width: 80%; ">
    <a href="/assets/posts/2025-01-26-Stair-Gallery/img_9076_54290239509_o.jpg" target="_blank" class="imgImgUrl">
  <picture class="imgPicture">
  <img class="imgImg rounded shadow" src="/assets/posts/2025-01-26-Stair-Gallery/img_9076_54290239509_o.jpg" style="width: 100%; " />
</picture>
</a>
</div>

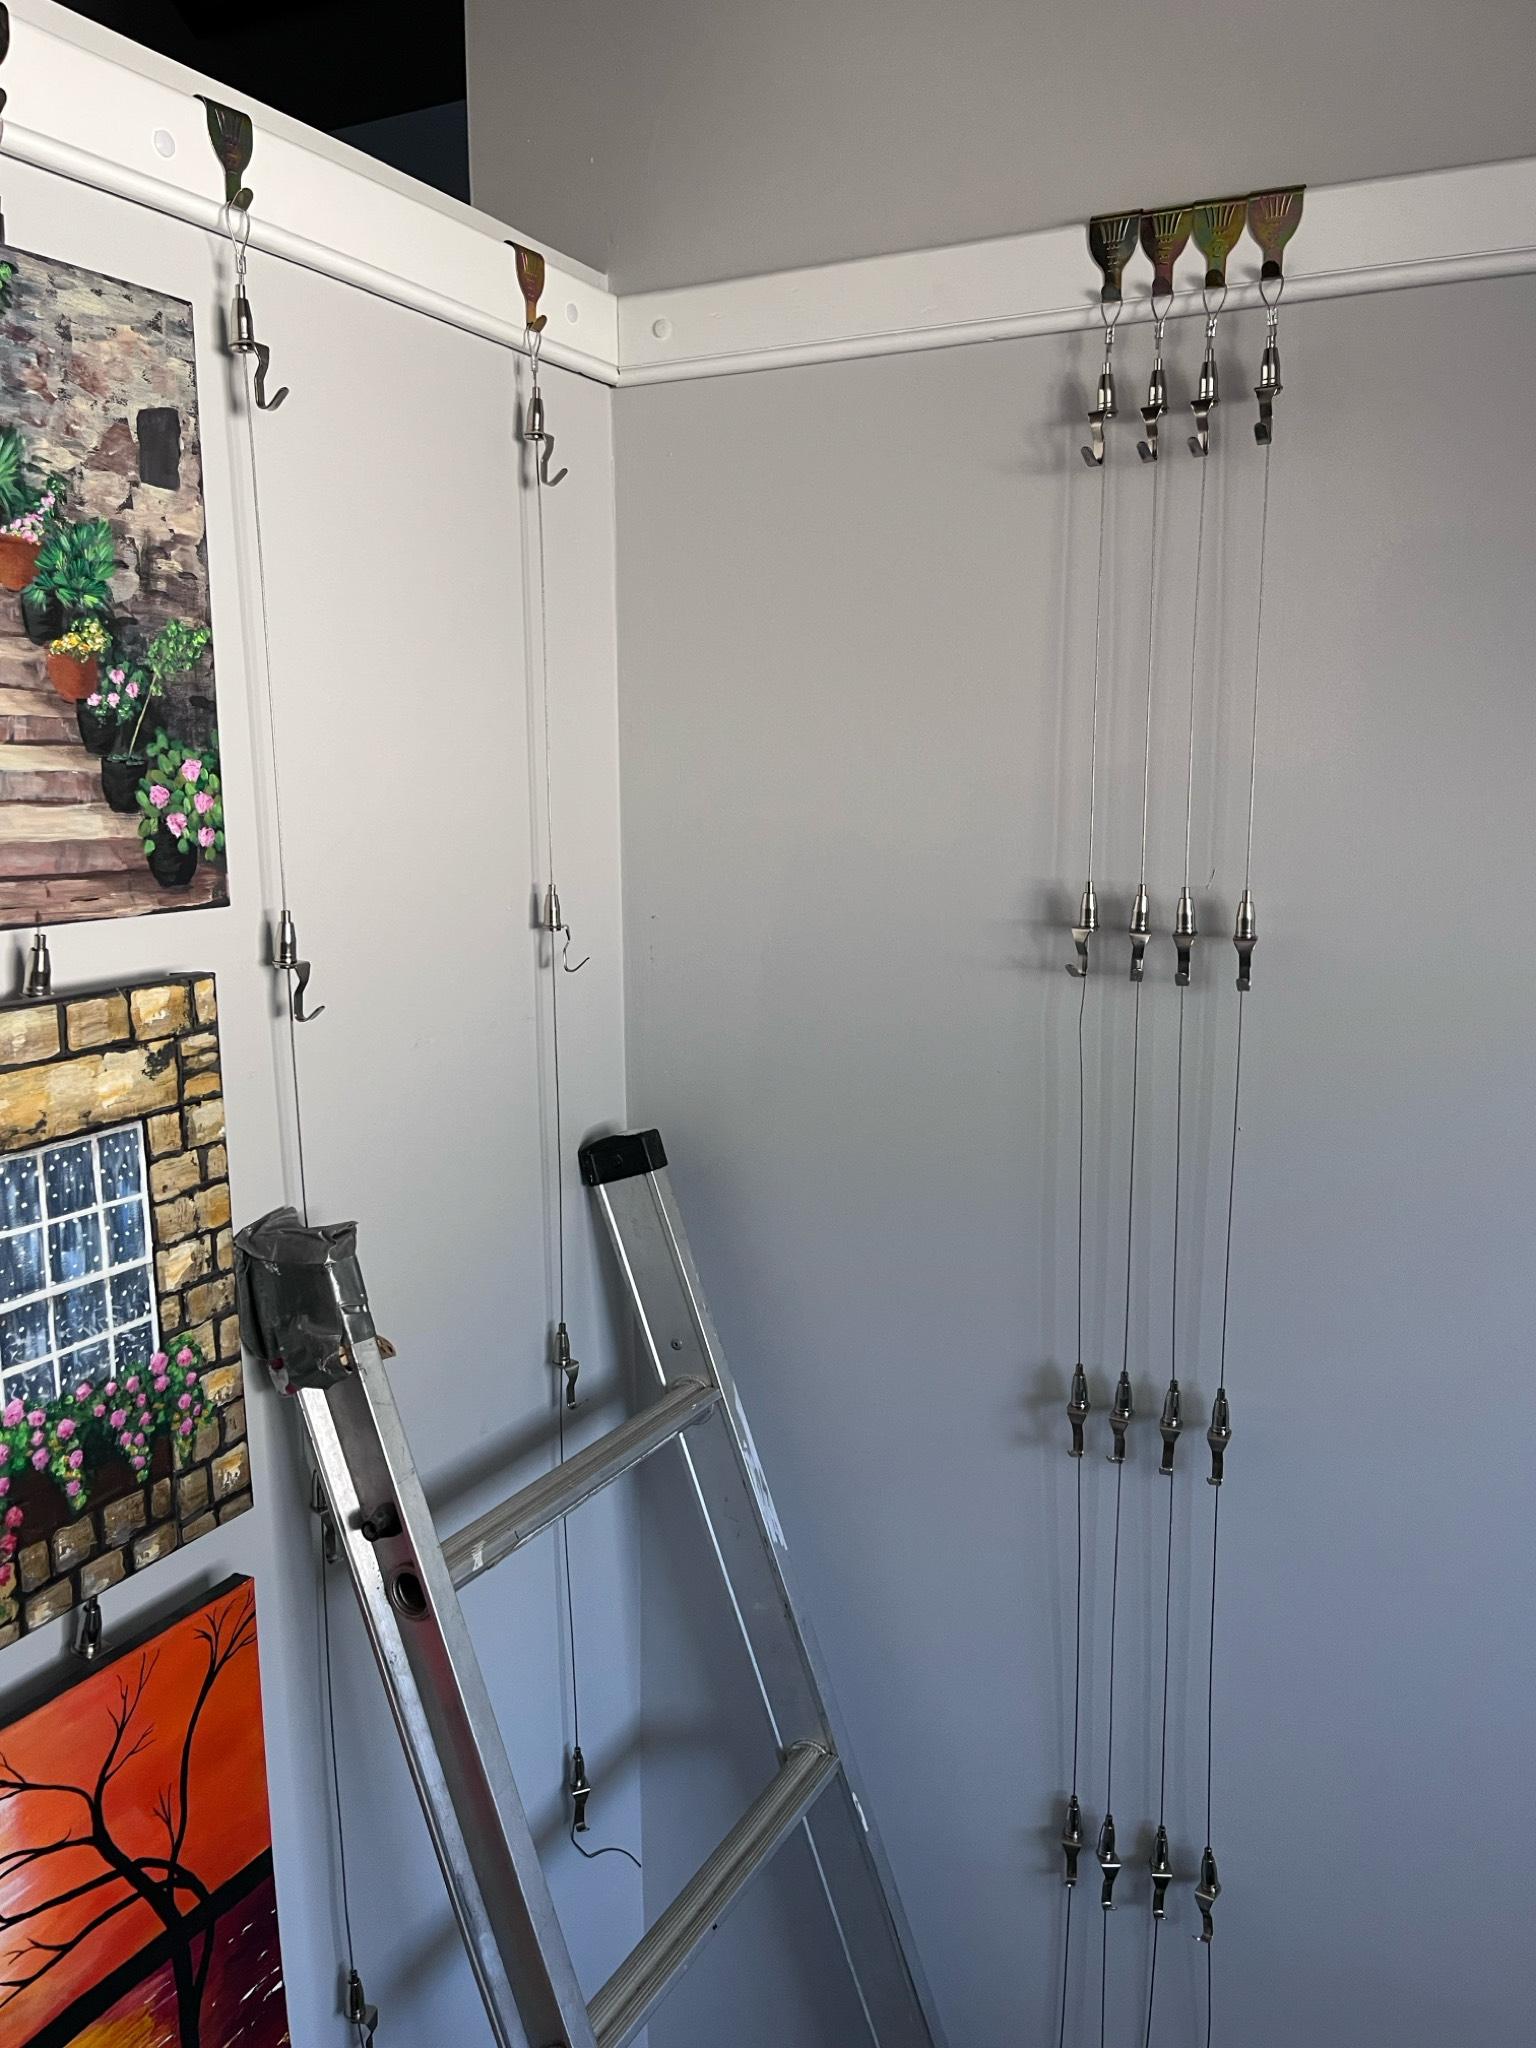
<p>The rails were primed and painted, and then the picture wire was attached to the S hooks and cut to length.  Here you can see an early test fitting.</p>

<div class="imgWrapper imgFlex center" style="width: 80%; ">
    <a href="/assets/posts/2025-01-26-Stair-Gallery/img_9087_54290430320_o.jpg" target="_blank" class="imgImgUrl">
  <picture class="imgPicture">
  <img class="imgImg rounded shadow" src="/assets/posts/2025-01-26-Stair-Gallery/img_9087_54290430320_o.jpg" style="width: 100%; " />
</picture>
</a>
</div>

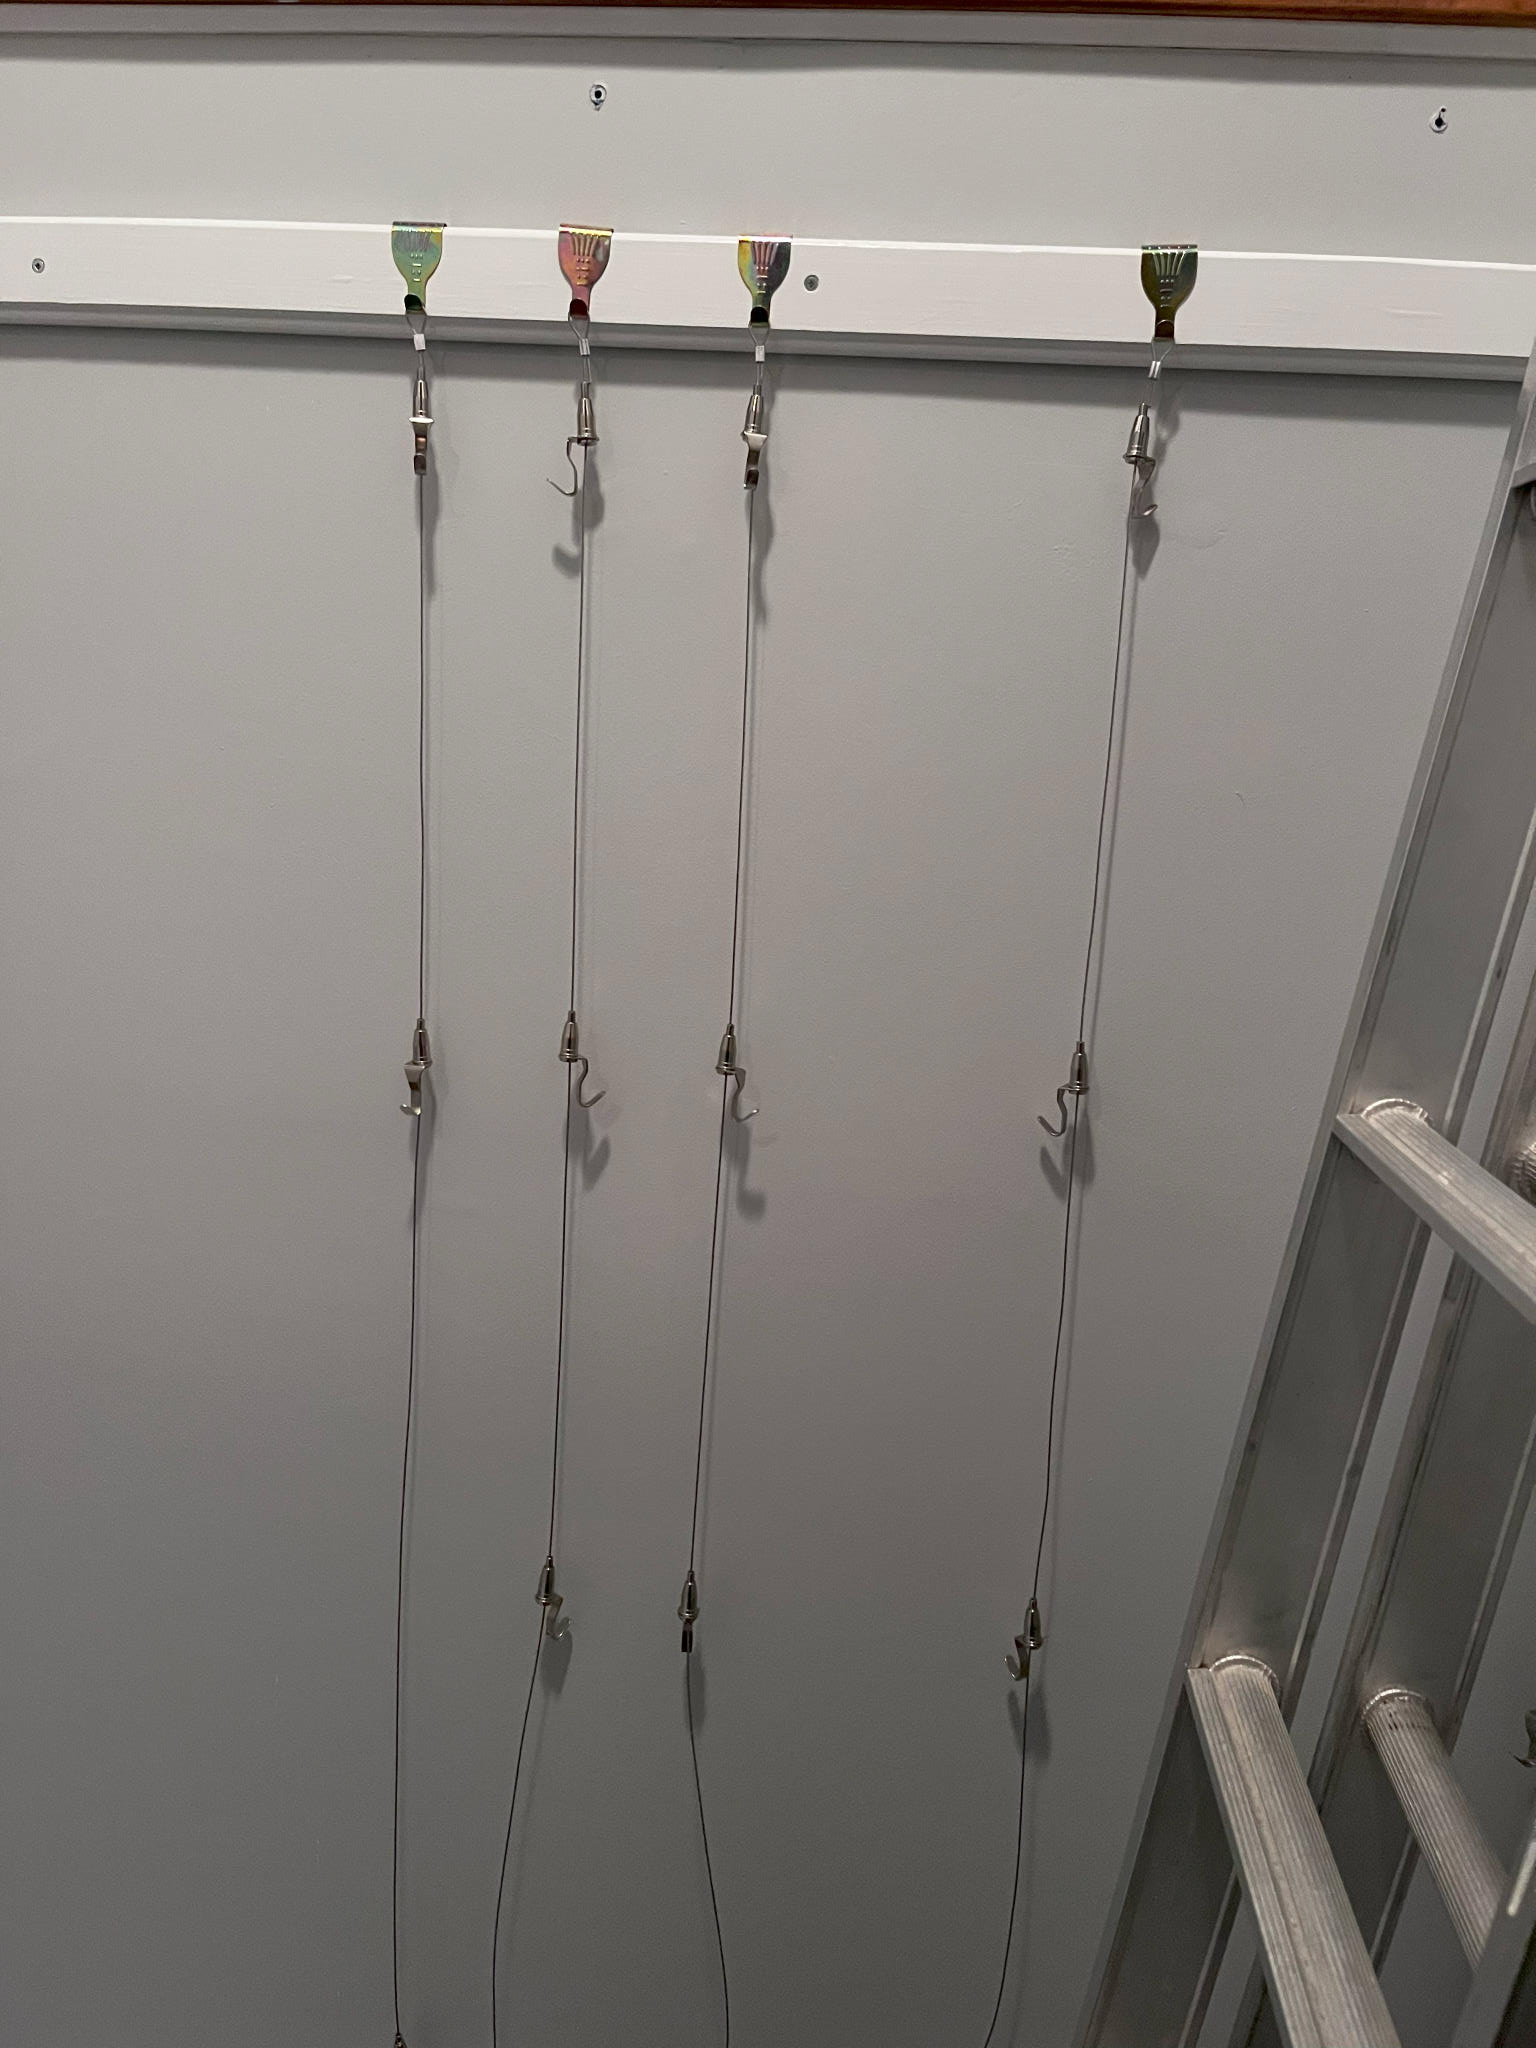
<p>The hooks on the wire are really interesting.  They have a gripper system where they can pushed up the wire easily, but they can’t be pushed down without pushing in the bottom first.  Theoretically it means they can be repositioned at will.</p>

<p>Here’s one of the longer walls with the hooks being lined up before pictures were added.</p>

<div class="imgWrapper imgFlex center" style="width: 80%; ">
    <a href="/assets/posts/2025-01-26-Stair-Gallery/img_9093_54290430325_o.jpg" target="_blank" class="imgImgUrl">
  <picture class="imgPicture">
  <img class="imgImg rounded shadow" src="/assets/posts/2025-01-26-Stair-Gallery/img_9093_54290430325_o.jpg" style="width: 100%; " />
</picture>
</a>
</div>

<p>Hanging the pictures was not quite as easy as we hoped. Each picture needs two wires, and the hooks have to be lined up horizontally or else the picture hangs crooked.  And adjusting the hooks on the wires is not difficult if there are no pictures on the wire - but when there are pictures it was too easy to knock off the pictures whilst adjusting.</p>

<p>In the end though, we were very pleased with the result and managed to squeeze more pictures on the wall than we thought.</p>]]></content><author><name></name></author><category term="house" /><category term="diy" /><category term="gallery" /><category term="hanging pictures" /><category term="home" /><category term="home-decor" /><category term="organization" /><category term="paintings" /><category term="picture hook" /><category term="picture rail" /><category term="project" /><category term="stairs" /><summary type="html"><![CDATA[We converted the attic stairs in to a gallery.]]></summary></entry><entry><title type="html">Magnetic Storage for Models</title><link href="/fun/2024/10/14/Magnetic-Storage-for-Models.html" rel="alternate" type="text/html" title="Magnetic Storage for Models" /><published>2024-10-14T00:00:00+00:00</published><updated>2024-10-14T00:00:00+00:00</updated><id>/fun/2024/10/14/Magnetic-Storage-for-Models</id><content type="html" xml:base="/fun/2024/10/14/Magnetic-Storage-for-Models.html"><![CDATA[<div class="imgWrapper imgFlex center" style="width: 80%; ">
    <picture class="imgPicture">
  <img class="imgImg rounded shadow" src="/assets/posts/2024-10-14-Magnetic-Storage-for-Models/img_8761_54067983909_o.jpg" style="width: 100%; " />
</picture>
</div>

<p>I’ve been doing some cleanup of old stuff and came across the collection of Warhammer models from when I was a teenager.  They were kept in old shoe boxes and time had not been kind to them. There were some breakages of arms and plenty of bits of paint knocked off.  I didn’t really want to put them back into the boxes if I was going to keep them for much longer.  Luckily the Internet (in this case Reddit I think) had plenty of solutions on how store figures.  My favourite was to glue little earth magnets onto the bottom of the figures and stick them to some metal.  It did take a few tries to get it right.</p>

<div class="imgWrapper imgFlex center" style="width: 80%; ">
    <picture class="imgPicture">
  <img class="imgImg rounded shadow" src="/assets/posts/2024-10-14-Magnetic-Storage-for-Models/img_8744_54066776782_o.jpg" style="width: 100%; " />
</picture>
</div>

<p>The first thing I tried was a set of <a href="https://www.amazon.ca/s?k=magnetic+sheets&amp;crid=LPE2R5IVMQVG&amp;sprefix=magnetic+sheets%2Caps%2C93&amp;ref=nb_sb_noss_1">Magnetic Sheets</a>. These are A4 slightly magnetic self-adhesive sheets and the fit very nicely into the 4L <a href="https://www.staples.ca/products/772032-en-really-useful-boxes-4l-storage-box-clear?listId=collection">Really Useful Boxes</a> I brought. Unfortunately, the models did not stick very well at all. The lightweight plastic ones started sliding if the box was tipped over 30 degrees or so; and the metal ones hardly gripped at all. Not quite what I was looking for.</p>

<div class="imgWrapper imgFlex center" style="width: 80%; ">
    <picture class="imgPicture">
  <img class="imgImg rounded shadow" src="/assets/posts/2024-10-14-Magnetic-Storage-for-Models/img_8746_54067912493_o.jpg" style="width: 100%; " />
</picture>
</div>

<p>Another idea I had seen online was to use the magnets but place the figures in something that would stop them sliding, such as guide holes in a piece of MDF.  Since I happened to have some lying around I thought that was worth a go. If it worked I would need multiple guides so I thought I would mark out a template for where the holes should be drilled.</p>

<div class="imgWrapper imgFlex center" style="width: 80%; ">
    <picture class="imgPicture">
  <img class="imgImg rounded shadow" src="/assets/posts/2024-10-14-Magnetic-Storage-for-Models/img_8747_54067983999_o.jpg" style="width: 100%; " />
</picture>
</div>

<p>With the template and a handy permanent marker I transferred the hole pattern to another piece of MDF and drilled out 1” holes.  Drilling out the holes was a bit tedious. But sometime later I had a lovely guide glued onto one of the magnetic sheets.</p>

<div class="imgWrapper imgFlex center" style="width: 80%; ">
    <picture class="imgPicture">
  <img class="imgImg rounded shadow" src="/assets/posts/2024-10-14-Magnetic-Storage-for-Models/img_8748_54066776747_o.jpg" style="width: 100%; " />
</picture>
</div>

<p>This looks pretty spiffy.  With some test models in I tried the tip test.  The box went to about 45 degrees before the models started falling out.  To be fair, this was an improvement over just the magnetic sheet, but still not what was desired.  Also, the guide was very limiting, in that only models on the smaller 1” could be stored. Time to abandon this one and try again.</p>

<div class="imgWrapper imgFlex center" style="width: 80%; ">
    <picture class="imgPicture">
  <img class="imgImg rounded shadow" src="/assets/posts/2024-10-14-Magnetic-Storage-for-Models/img_8759_54068114735_o.jpg" style="width: 100%; " />
</picture>
</div>

<p>At this point I was getting a bit tired of searching amazon for magnetic sheets and thought it was time to do what I should have done in the beginning.  Taking a plastic and metal figure that had the magnets in the base I went to my local Home Depot looking for any metal the figures would stick to.  This was really interesting as it was a good reminder to me that not all metals are magnetic :)  I found some steel hobby sheets with good ‘sticking power’ but they were relatively expensive to buy.  But after surreptitiously tapping every shiny surface in the store I found that some thin sheets sold for <a href="https://www.homedepot.ca/product/imperial-16-x-36-inch-joist-panning-lining/1000403937">duct lining</a> was perfect.  It was cheap, plentiful, and could be cut by a pair of tin snips.</p>

<div class="imgWrapper imgFlex center" style="width: 80%; ">
    <picture class="imgPicture">
  <img class="imgImg rounded shadow" src="/assets/posts/2024-10-14-Magnetic-Storage-for-Models/img_8760_54067654076_o.jpg" style="width: 100%; " />
</picture>
</div>

<p>As an added bonus, the thin sheets could be put on top of the magnetic sheets, so no glue was required. As you can see, both plastic and metal figures stuck wonderfully to this.  The boxes can tip to 90 degrees without the models moving at all, and most of them still stick upside down.  (There are a few bigger ones that fall of, but that’s not really a problem).</p>

<p>Overall, I’m pretty pleased with this solution.  I have 4 boxes done so far, and it really is nice to know the models will keep safe from damage now.</p>]]></content><author><name></name></author><category term="fun" /><category term="crafts" /><category term="diy" /><category term="magnet" /><category term="magnets" /><category term="miniatures" /><category term="model" /><category term="stoage" /><category term="storage" /><category term="warhammer" /><summary type="html"><![CDATA[]]></summary></entry><entry><title type="html">Sliding Picture Shelf</title><link href="/2024/02/19/Sliding-Picture-Shelf.html" rel="alternate" type="text/html" title="Sliding Picture Shelf" /><published>2024-02-19T00:00:00+00:00</published><updated>2024-02-19T00:00:00+00:00</updated><id>/2024/02/19/Sliding-Picture-Shelf</id><content type="html" xml:base="/2024/02/19/Sliding-Picture-Shelf.html"><![CDATA[<div class="imgWrapper imgFlex center" style="width: 80%; ">
    <picture class="imgPicture">
  <img class="imgImg rounded shadow" src="/assets/posts/2024-02-19-Sliding-Picture-Shelf/img_7818_53540309058_o.jpg" style="width: 100%; " />
</picture>
</div>

<p>Here’s our take on a picture shelf where the pictures can be slid along two tracks. We saw them in someone’s living room during a local house tour, and later on I noticed they’re easily available online.</p>

<p>We weren’t allowed to take photos during the house tour so I don’t recall if the shelf was U-shaped, with a high back, like these ones one Amazon (link may be broken if you’re reading this in the future).</p>

<div class="imgWrapper imgFlex center" style="width: 80%; ">
    <img class="imgImg rounded shadow" src="https://m.media-amazon.com/images/I/71ctM9rZA5L._AC_SL1500_.jpg" style="width: 100%; " />
</div>

<p>The mounting screws go into the high back. I probably should have built ours like that, then I could have hidden the screws more easily. But at the time I thought some small L-shape brackets would be fine.</p>

<p>This project gave me the opportunity to learn how to use a router. I put two V groves in the base for the sliding pictures, and rounded off the corners. Don’t look too closely, Mistakes Were Made. But that’s the point of learning, isn’t it?</p>

<div class="imgWrapper imgFlex center" style="width: 80%; ">
    <picture class="imgPicture">
  <img class="imgImg rounded shadow" src="/assets/posts/2024-02-19-Sliding-Picture-Shelf/img_7821_53540454729_o.jpg" style="width: 100%; " />
</picture>
</div>

<p>I was concerned about the depth of the shelves, as they are going into a narrow corridor that links the front of the house to the back. In the end they are about 4” deep, any shallower and the pictures would rest at a very steep angle.</p>

<div class="imgWrapper imgFlex center" style="width: 80%; ">
    <picture class="imgPicture">
  <img class="imgImg rounded shadow" src="/assets/posts/2024-02-19-Sliding-Picture-Shelf/img_7823_53539244537_o.jpg" style="width: 100%; " />
</picture>
</div>

<p>To finish, I sanded and varnished.  If you zoom in on the top shelf you can see varnish drips. After I first noticed them, I sanded from 60 grit back to 220 and revarnished.  Either I failed to sand them off … or I just put a different set of drips back with the revarnish. hmmmm.</p>

<p>Luckily my wife is not a perfectionist, so she thinks the shelves are great :)</p>]]></content><author><name></name></author><category term="house" /><category term="photo" /><category term="picture" /><category term="project" /><category term="shelf" /><category term="wood" /><summary type="html"><![CDATA[]]></summary></entry><entry><title type="html">Handy Card Holder</title><link href="/house/2023/12/31/Handy-Card-Holder.html" rel="alternate" type="text/html" title="Handy Card Holder" /><published>2023-12-31T00:00:00+00:00</published><updated>2023-12-31T00:00:00+00:00</updated><id>/house/2023/12/31/Handy-Card-Holder</id><content type="html" xml:base="/house/2023/12/31/Handy-Card-Holder.html"><![CDATA[<div class="imgWrapper imgFlex center" style="width: 80%; ">
    <picture class="imgPicture">
  <img class="imgImg rounded shadow" src="/assets/posts/2023-12-31-Handy-Card-Holder/img_7651_53432778197_o.jpg" style="width: 100%; " />
</picture>
</div>

<p>Sometimes you have good ideas when tidying up. I needed a space to store a membership card that I only used occasionally, and I was worried/knew that putting it in a drawer would cause it to move to the Place that Lost Things go to.</p>

<p>It’s a piece of scrap wood with 45 degree angles, lightly sanded and varnished.</p>

<div class="imgWrapper imgFlex center" style="width: 80%; ">
    <picture class="imgPicture">
  <img class="imgImg rounded shadow" src="/assets/posts/2023-12-31-Handy-Card-Holder/dsc_0105_53433697936_o.jpg" style="width: 100%; " />
</picture>
</div>

<p>Here it is, attached to the wall by the front door with the membership card in. It does exactly what I want it do in a simple way.</p>]]></content><author><name></name></author><category term="house" /><category term="card" /><category term="holder" /><category term="project" /><category term="useful" /><category term="wood" /><summary type="html"><![CDATA[]]></summary></entry><entry><title type="html">Halloween Pressure Plate</title><link href="/fun/2023/11/02/Halloween-Pressure-Plate.html" rel="alternate" type="text/html" title="Halloween Pressure Plate" /><published>2023-11-02T00:00:00+00:00</published><updated>2023-11-02T00:00:00+00:00</updated><id>/fun/2023/11/02/Halloween-Pressure-Plate</id><content type="html" xml:base="/fun/2023/11/02/Halloween-Pressure-Plate.html"><![CDATA[<p>It’s a pressure plate used on halloween to make lights go on and off.  Like this</p>

<video width="640" height="360" controls="">
  <source src="/assets/posts/2022-10-22-Halloween-Boards/IMG_7583.mov" />
  Your browser does not support the video tag.
</video>

<p>This year I wanted to spice up the pumpkin booth with something interactive. Step on the board, make some lights happen, step off, back to where it was. Surprisingly I actually made it, even more surprisingly it lasted a few hundred kids stepping on it.  At the end I’ll go through what went right and should be improved.</p>

<div class="imgWrapper imgFlex center" style="width: 80%; ">
    <picture class="imgPicture">
  <img class="imgImg rounded shadow" src="/assets/posts/2023-11-02-Halloween-Pressure-Plate/img_7566_53303845881_o.jpg" style="width: 100%; " />
</picture>
</div>

<p>I had some plywood left over from something or over, enough for two boards of about 2’ by 5’. In retrospect, using some wood that had been lying around for a few years was a mistake. As you can see in  the picture it was a bit warped, which is going to cause some issues later.</p>

<p>The two pieces of plywood need to be kept separated when they are placed together, so I glued a plywood strip about 1/4” around the edge of one piece.</p>

<div class="imgWrapper imgFlex center" style="width: 80%; ">
    <picture class="imgPicture">
  <img class="imgImg rounded shadow" src="/assets/posts/2023-11-02-Halloween-Pressure-Plate/img_7569_53304321385_o.jpg" style="width: 100%; " />
</picture>
</div>

<p>To make the boards into a giant switch, I taped down some kitchen foil (with the shiny side up, no idea if that makes a difference) on each piece.  The extra piece at the ends is so I have some where to attach a wire.</p>

<div class="imgWrapper imgFlex center" style="width: 80%; ">
    <picture class="imgPicture">
  <img class="imgImg rounded shadow" src="/assets/posts/2023-11-02-Halloween-Pressure-Plate/img_7574_53303845926_o.jpg" style="width: 100%; " />
</picture>
</div>

<p>For each piece I soldered a piece of wire to the foil and used electrical tape to fix in place.  Soldering the wire to the foil took a few goes and I wasn’t convinced I had a good connection until I tested it.</p>

<p>Now the two pieces were put together and screwed down.  At this point it was clear the warped wood was going to be an issue.  The two pieces did not lie flat on the floor, they rocked. But the proof is in the pudding so I wired it up to check.</p>

<p>I had brought a <a href="https://www.sparkfun.com/products/14236">Spark Fun IoT Relay</a> for this job.  According to peoples on the internet, buying a cheap relay module and wiring it up is easy peasy, but I just wasn’t sure of my ability to safely work with mains voltage in outdoor setting.  The Spark Fun relay was a bit pricey but was a sealed unit and rated for outdoor use.  The relay works like a power switch, only the input is an electrical charge.  Apply a small charge to the input and the relay opens.  In my case, step on the pressure plate to complete a circuit powered by some AA batteries and turn on some spotlights.</p>

<div class="imgWrapper imgFlex center" style="width: 80%; ">
    <picture class="imgPicture">
  <img class="imgImg rounded shadow" src="/assets/posts/2023-11-02-Halloween-Pressure-Plate/img_7577_53304089463_o.jpg" style="width: 100%; " />
</picture>
</div>

<p>The relay and batteries for the circuit are in the plastic case. I turned everything and immediately the relay tripped and the spotlight turned on.  The boards were touching without being stepped on.  Over the next hour or so I tried combinations of loosening the screws holding the boards together, adding more height between the boards to separate them and finally some cardboard separators.</p>

<div class="imgWrapper imgFlex center" style="width: 80%; ">
    <picture class="imgPicture">
  <img class="imgImg rounded shadow" src="/assets/posts/2023-11-02-Halloween-Pressure-Plate/img_7576_53302982387_o.jpg" style="width: 100%; " />
</picture>
</div>

<p>The picture shows 3 strips, I think I finally ended with 2.  But it worked!  And it was incredibly satisfying to step on the wood and watch a light go on. Many, many times.</p>

<div class="imgWrapper imgFlex center" style="width: 80%; ">
    <picture class="imgPicture">
  <img class="imgImg rounded shadow" src="/assets/posts/2023-11-02-Halloween-Pressure-Plate/img_7582_53302982427_o.jpg" style="width: 100%; " />
</picture>
</div>

<p>Here’s the pressure plate in front of a table with pumpkins on.  The Spark Fun relay does some interesting things, so I had a strip of lights on when the pressure plate is not pressed, then when it is pressed those lights go off and the spotlights go on.  Go watch the video at the top of the page to see it in action.</p>

<p>In case you are wondering why go to all this effort for a couple of kids, you should know our house in on some kind of Trick or Treat Nexus and we easily got 300+ kids this year.</p>

<div class="imgWrapper imgFlex center" style="width: 80%; ">
    <picture class="imgPicture">
  <img class="imgImg rounded shadow" src="/assets/posts/2023-11-02-Halloween-Pressure-Plate/181254d0-f5fd-411e-8605-7ff4921dd6af_53304089578_o.jpg" style="width: 100%; " />
</picture>
</div>

<h2 class="wp-block-heading">Conclusion</h2>

<p>On the plus side, the pressure plate survived a cool Fall evening (around 4°C) and two hours of being constantly stepped on. Lights on, lights off, over and over again. But on the down side, it was thick enough that some kids tripped over it and worst of all, only two people mentioned the lights!  They were so focused on the candy they didn’t notice relatively subtle light changes.</p>

<p>Notes</p>

<ul>
<li>sound effects would be noticed more, especially loud, short ones</li>


<li>the pressure plate was too close to where the candy was.  If they were further down the drive then any affect would be more noticeable.  But then the pressure plate would need to be less obvious.</li>


<li>the pressure plate needs to be thinner, and preferably more flexible.  I'm wondering about using fabric.</li>
</ul>]]></content><author><name></name></author><category term="fun" /><category term="craft" /><category term="electrical" /><category term="halloween" /><category term="lights" /><category term="plate" /><category term="pressure" /><category term="project" /><category term="pumpkins" /><category term="wood" /><summary type="html"><![CDATA[It’s a pressure plate used on halloween to make lights go on and off. Like this]]></summary></entry><entry><title type="html">Comic Break</title><link href="/misc/2023/09/02/Comic-Break.html" rel="alternate" type="text/html" title="Comic Break" /><published>2023-09-02T00:00:00+00:00</published><updated>2023-09-02T00:00:00+00:00</updated><id>/misc/2023/09/02/Comic-Break</id><content type="html" xml:base="/misc/2023/09/02/Comic-Break.html"><![CDATA[<p>I happened on this comic link today.   In general, it’s a good idea to protect ideas long enough for the inventor/creator to get first dibs, but I’m not a fan of the current patent system that rewards lawyers for proving a tiny variation on a competitor’s product is something new and novel.</p>

<div class="imgWrapper imgFlex center" style="width: 80%; ">
    <img class="imgImg rounded shadow" src="http://mimiandeunice.com/wp-content/uploads/2011/08/ME_446_LegalExistence.png" style="width: 100%; " />
</div>]]></content><author><name></name></author><category term="Misc" /><category term="comic" /><summary type="html"><![CDATA[I happened on this comic link today. In general, it’s a good idea to protect ideas long enough for the inventor/creator to get first dibs, but I’m not a fan of the current patent system that rewards lawyers for proving a tiny variation on a competitor’s product is something new and novel.]]></summary></entry><entry><title type="html">Chain Link Fence</title><link href="/2023/08/30/Chain-Link-Fence.html" rel="alternate" type="text/html" title="Chain Link Fence" /><published>2023-08-30T00:00:00+00:00</published><updated>2023-08-30T00:00:00+00:00</updated><id>/2023/08/30/Chain-Link-Fence</id><content type="html" xml:base="/2023/08/30/Chain-Link-Fence.html"><![CDATA[<p>Once upon a time, all the houses on our street had no fences in their backyard.  Kids and dogs roamed freely and football games were played.  At least, that’s what our neighbours say who have lived there for many years.  By the time we moved in it was just our two houses with a shared backyard. This never really bothered us much until we got a dog, when the need for some secure fencing was more urgent.</p>

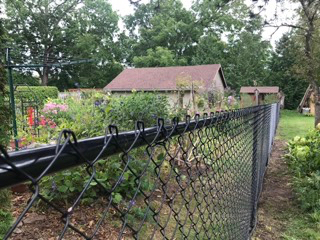
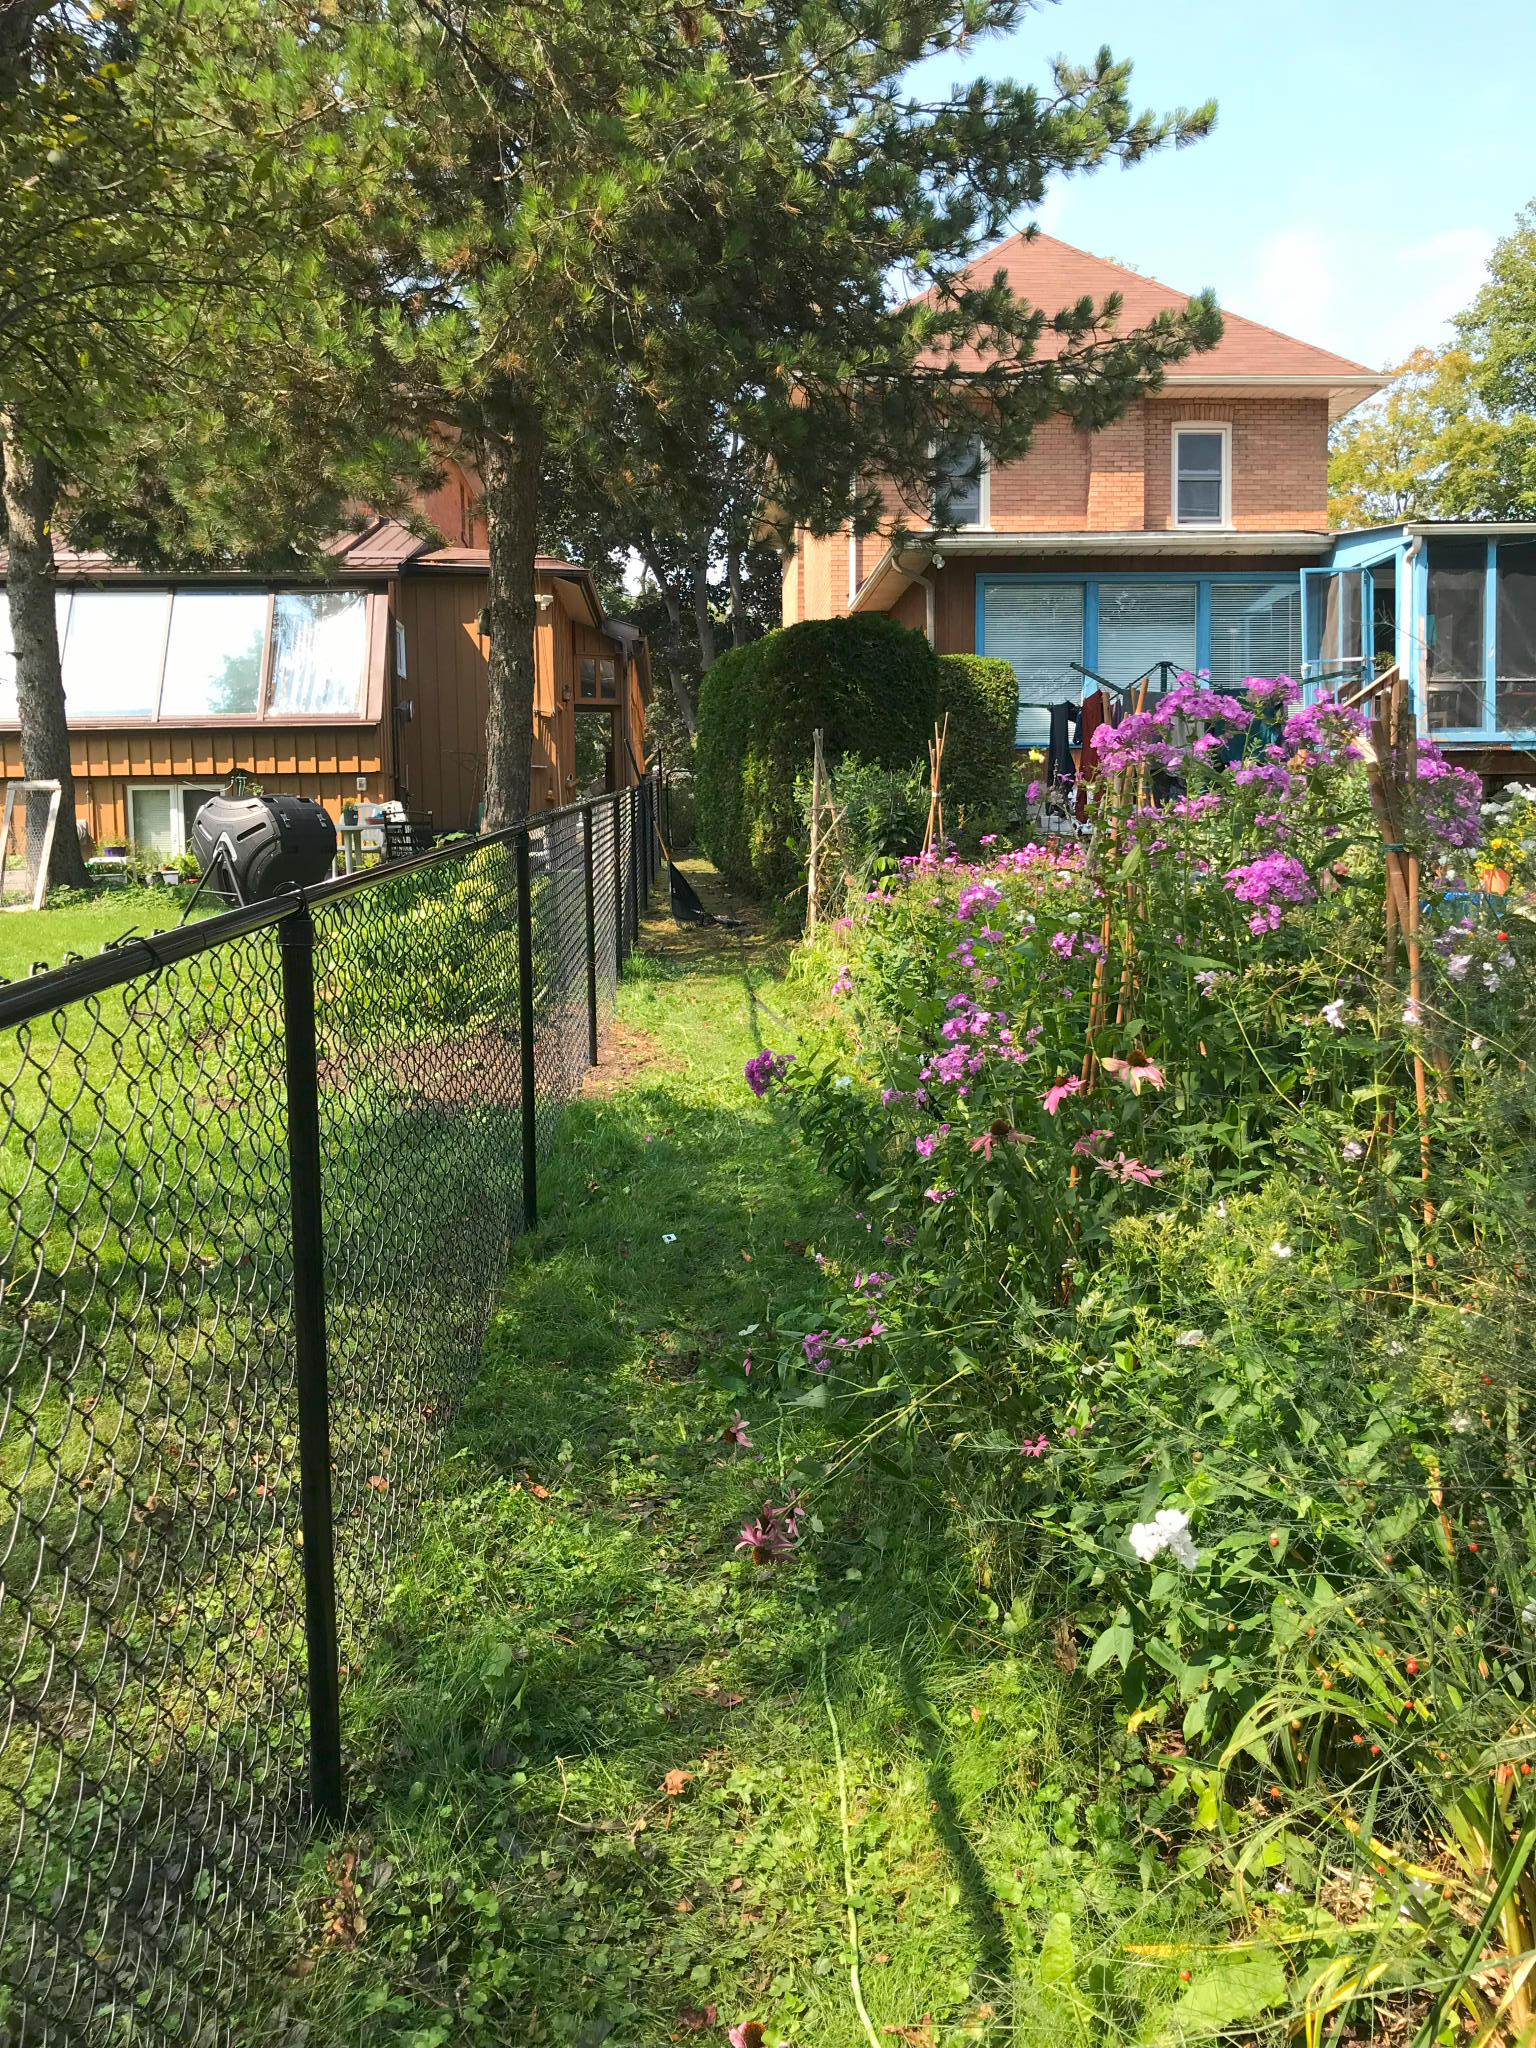
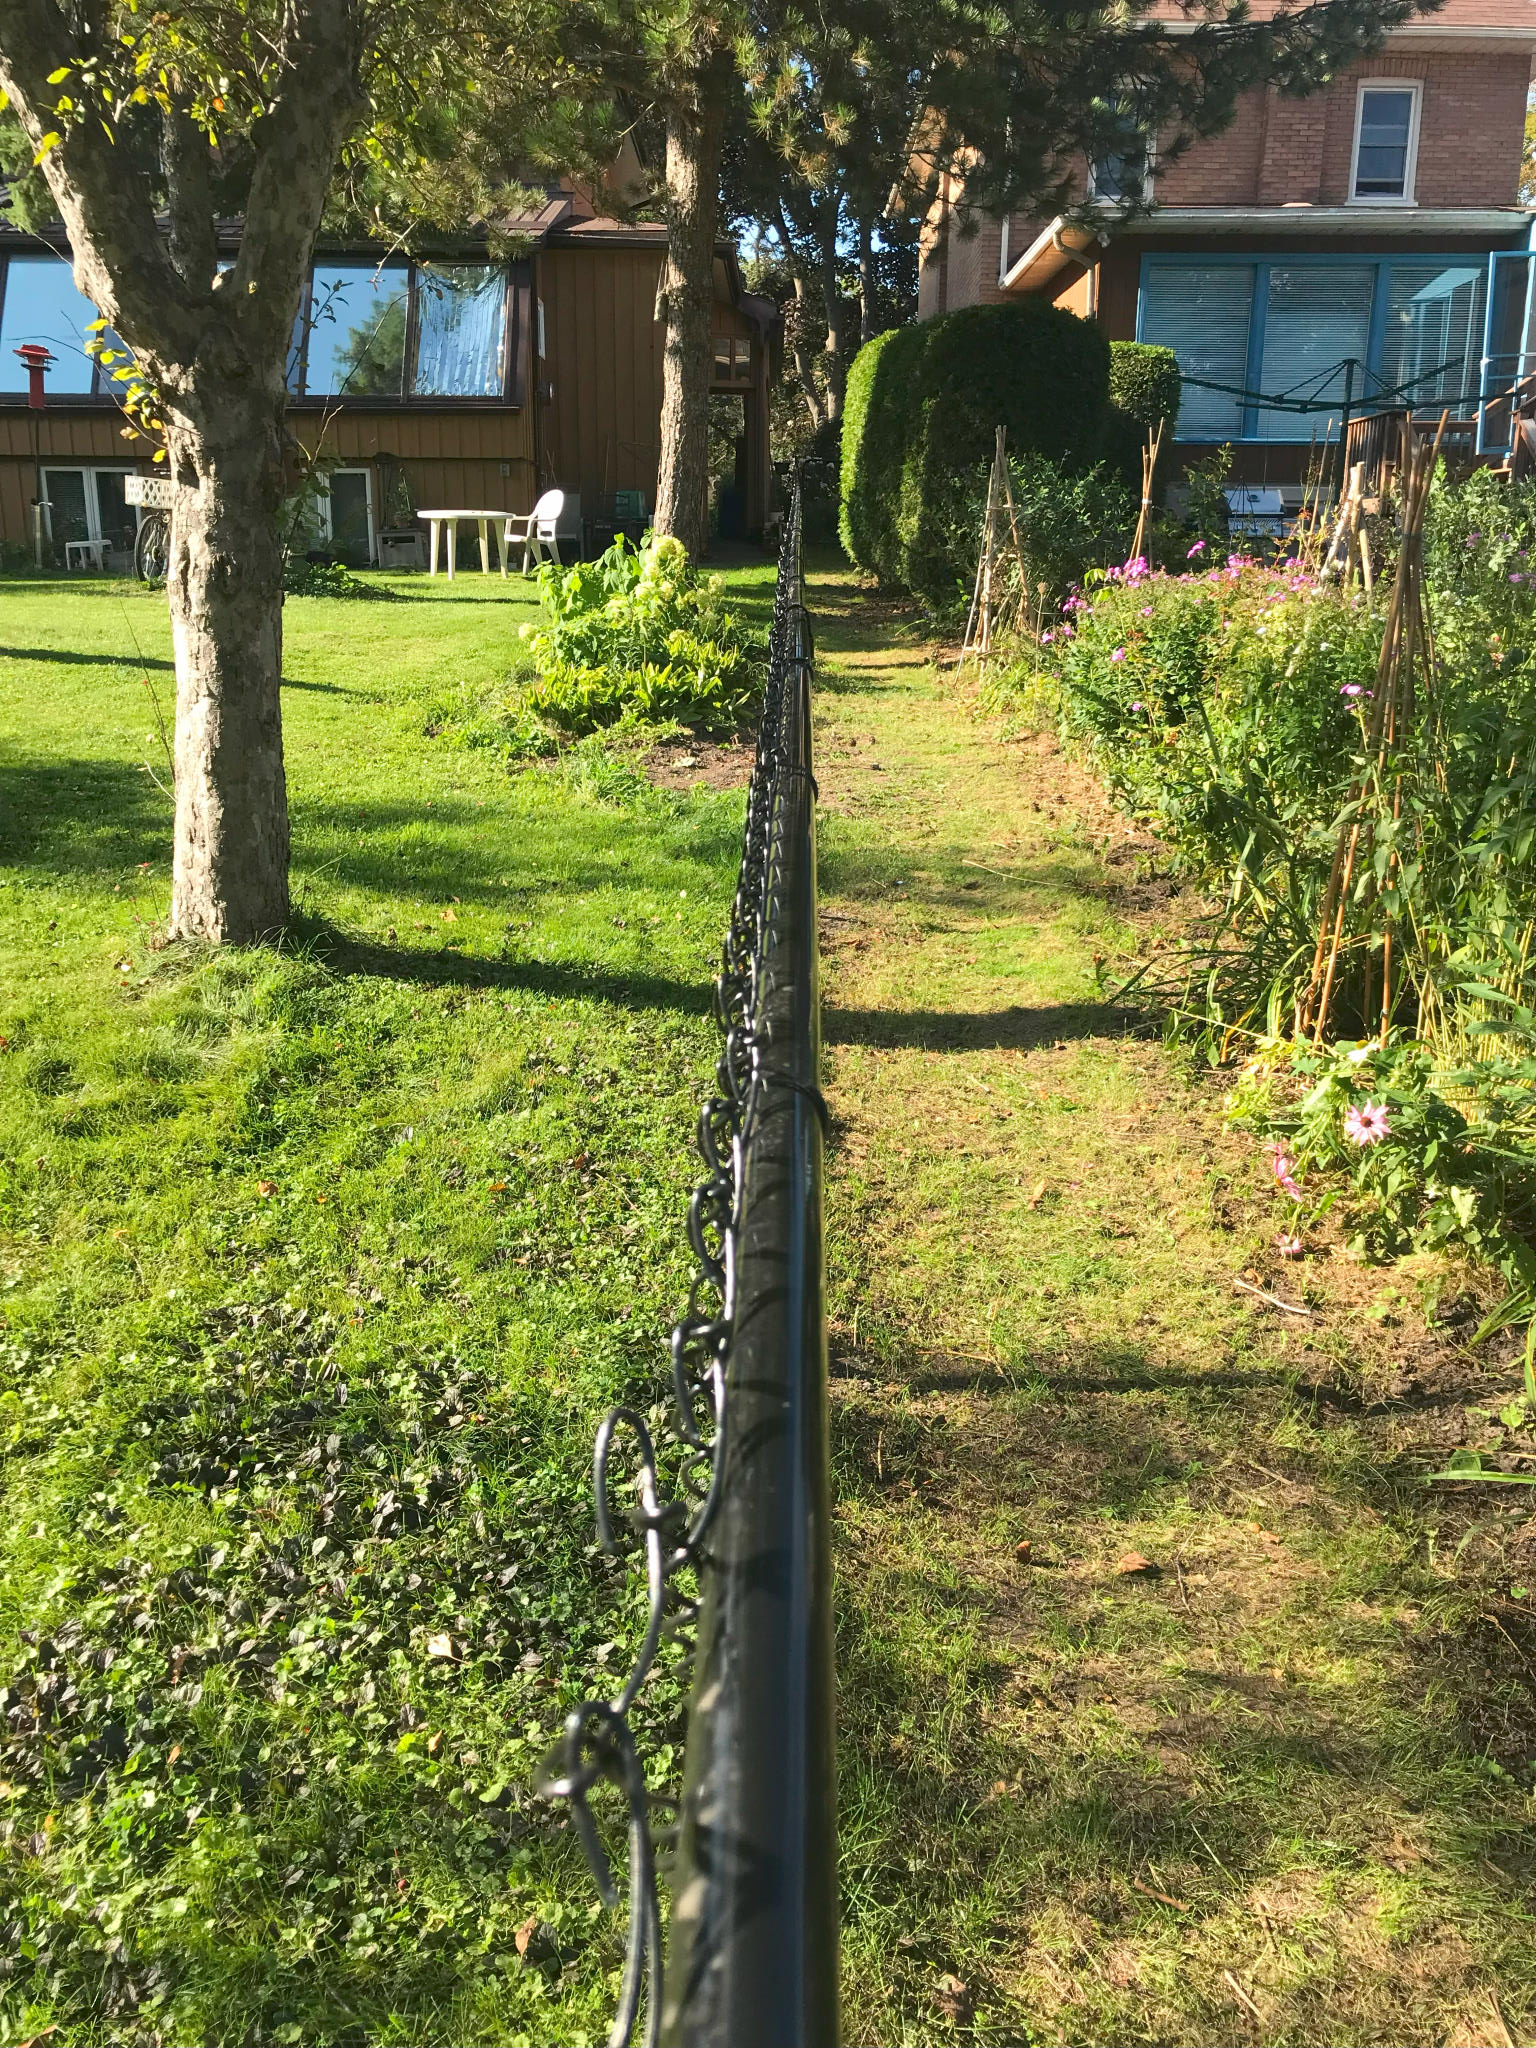
<p>It was time to join the rest of the street with some nifty black chain link fence. And here’s the finished article.</p>

<div class="imgWrapper imgFlex center" style="width: 80%; ">
    <picture class="imgPicture">
  <img class="imgImg rounded shadow" src="/assets/posts/2023-08-30-Chain-Link-Fence/img_7334_53153253452_o.jpg" style="width: 100%; " />
</picture>
</div>

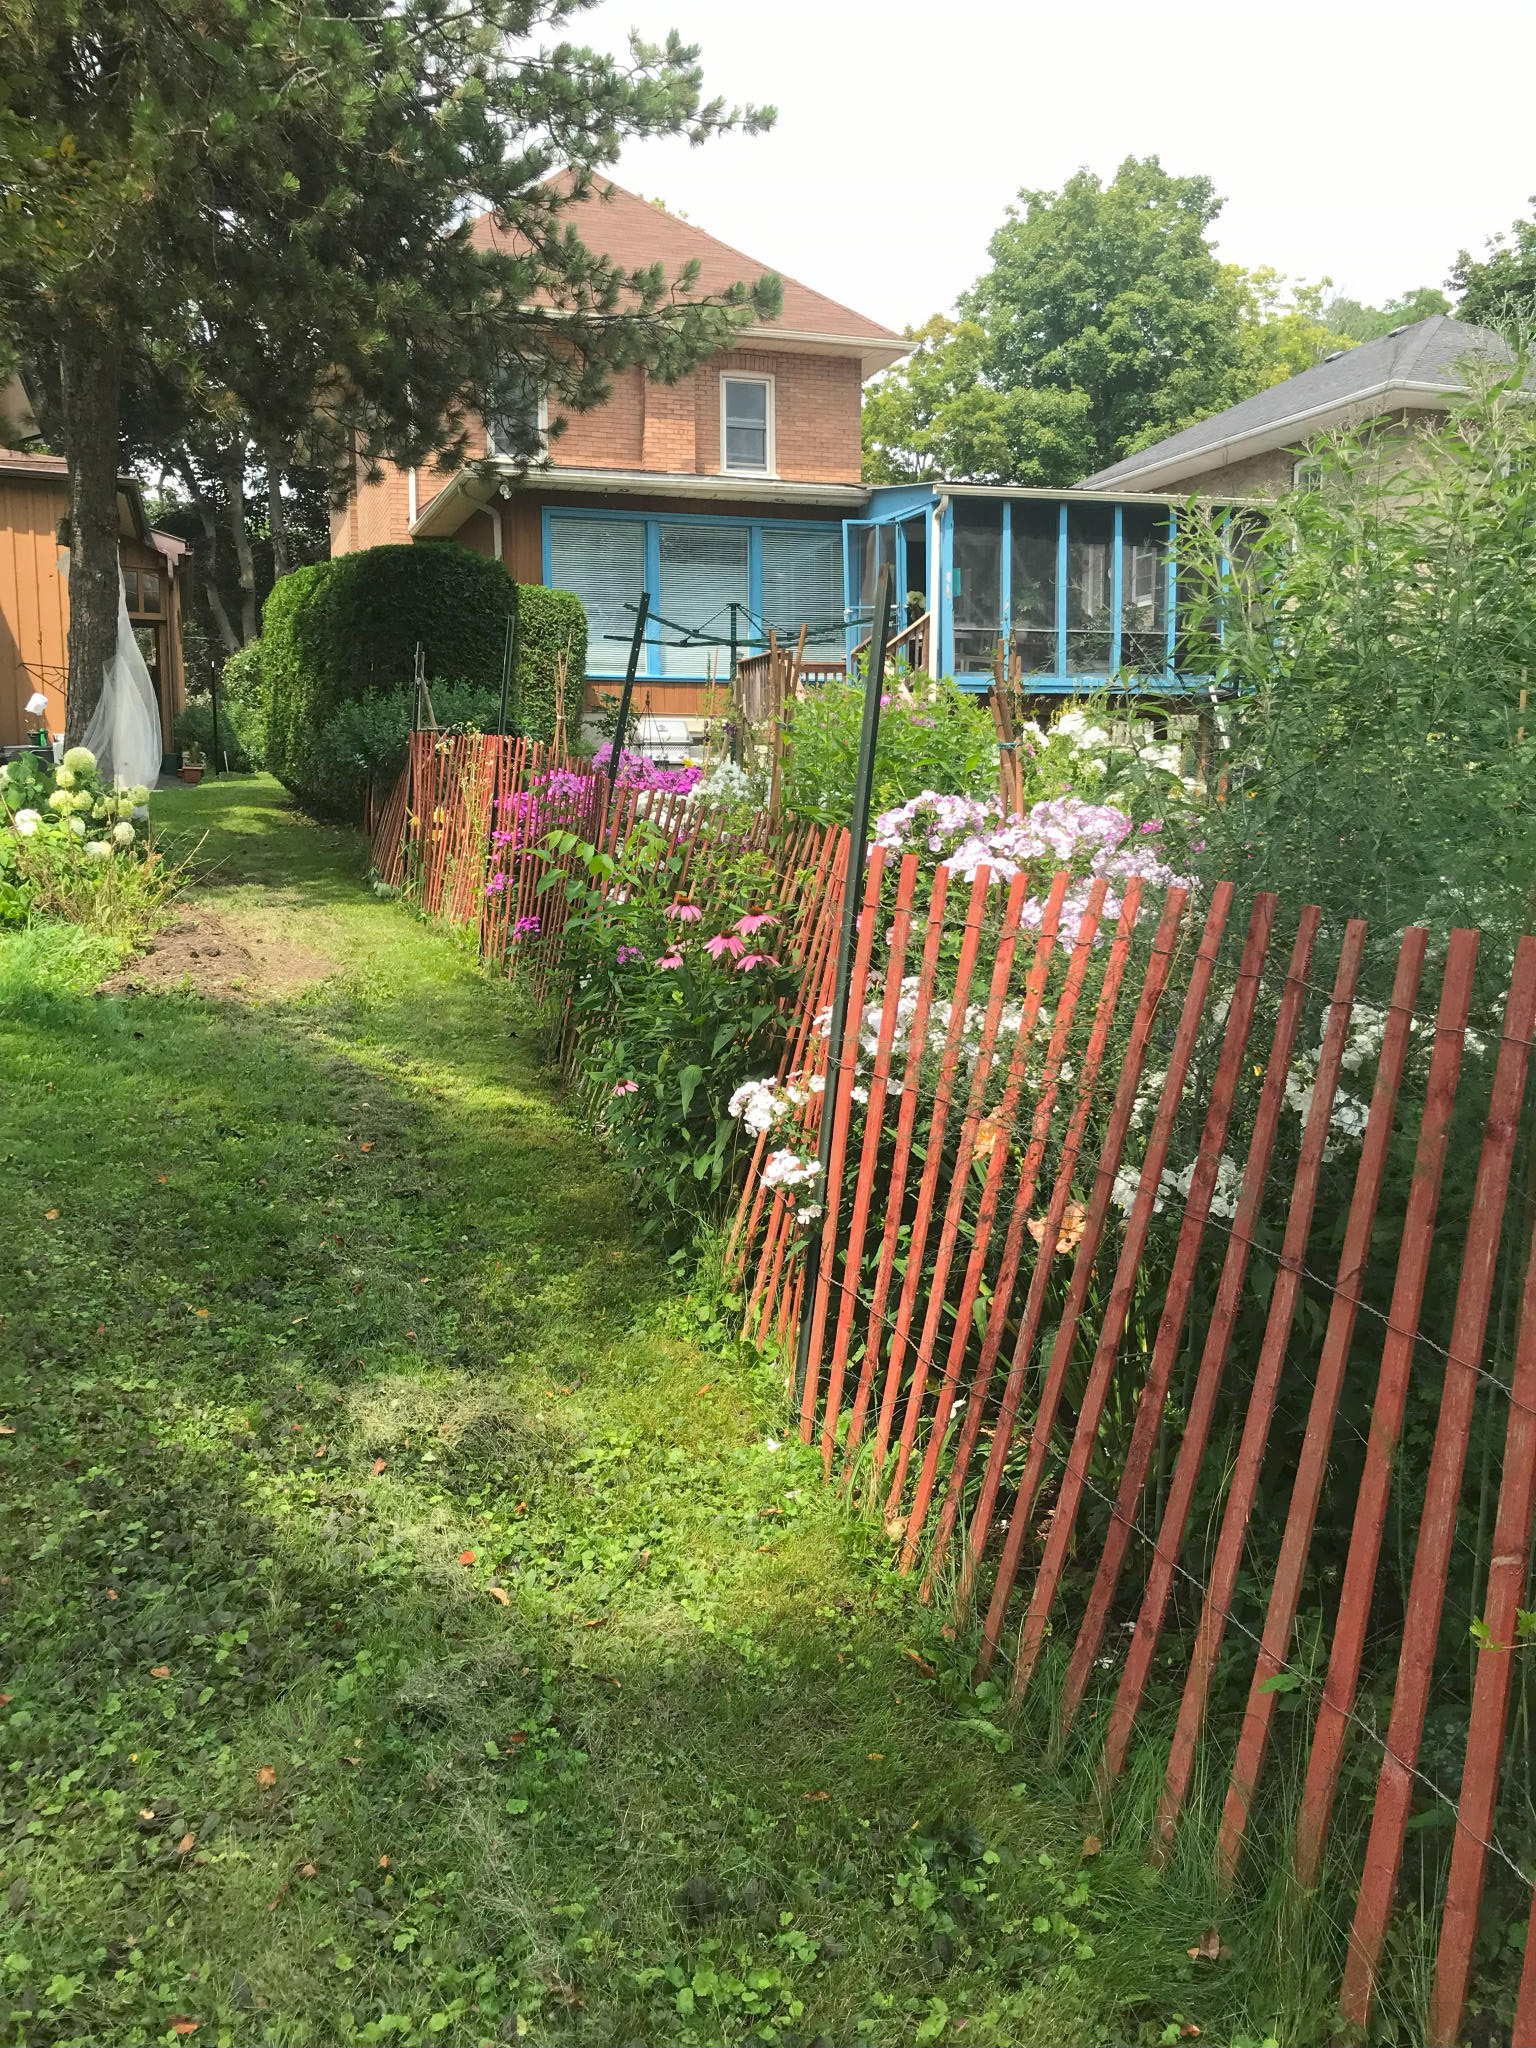
<p>This wasn’t the first fence we tried.  Our dog is a few years old and we had put up some snow fence as a quick deterrent.  Not the best, as you can see. But on the plus side this was a few feet within our property line, so the new fence could go up at the same time, then the old one taken down.</p>

<div class="imgWrapper imgFlex center" style="width: 80%; ">
    <picture class="imgPicture">
  <img class="imgImg rounded shadow" src="/assets/posts/2023-08-30-Chain-Link-Fence/img_7142_53154229035_o.jpg" style="width: 100%; " />
</picture>
</div>

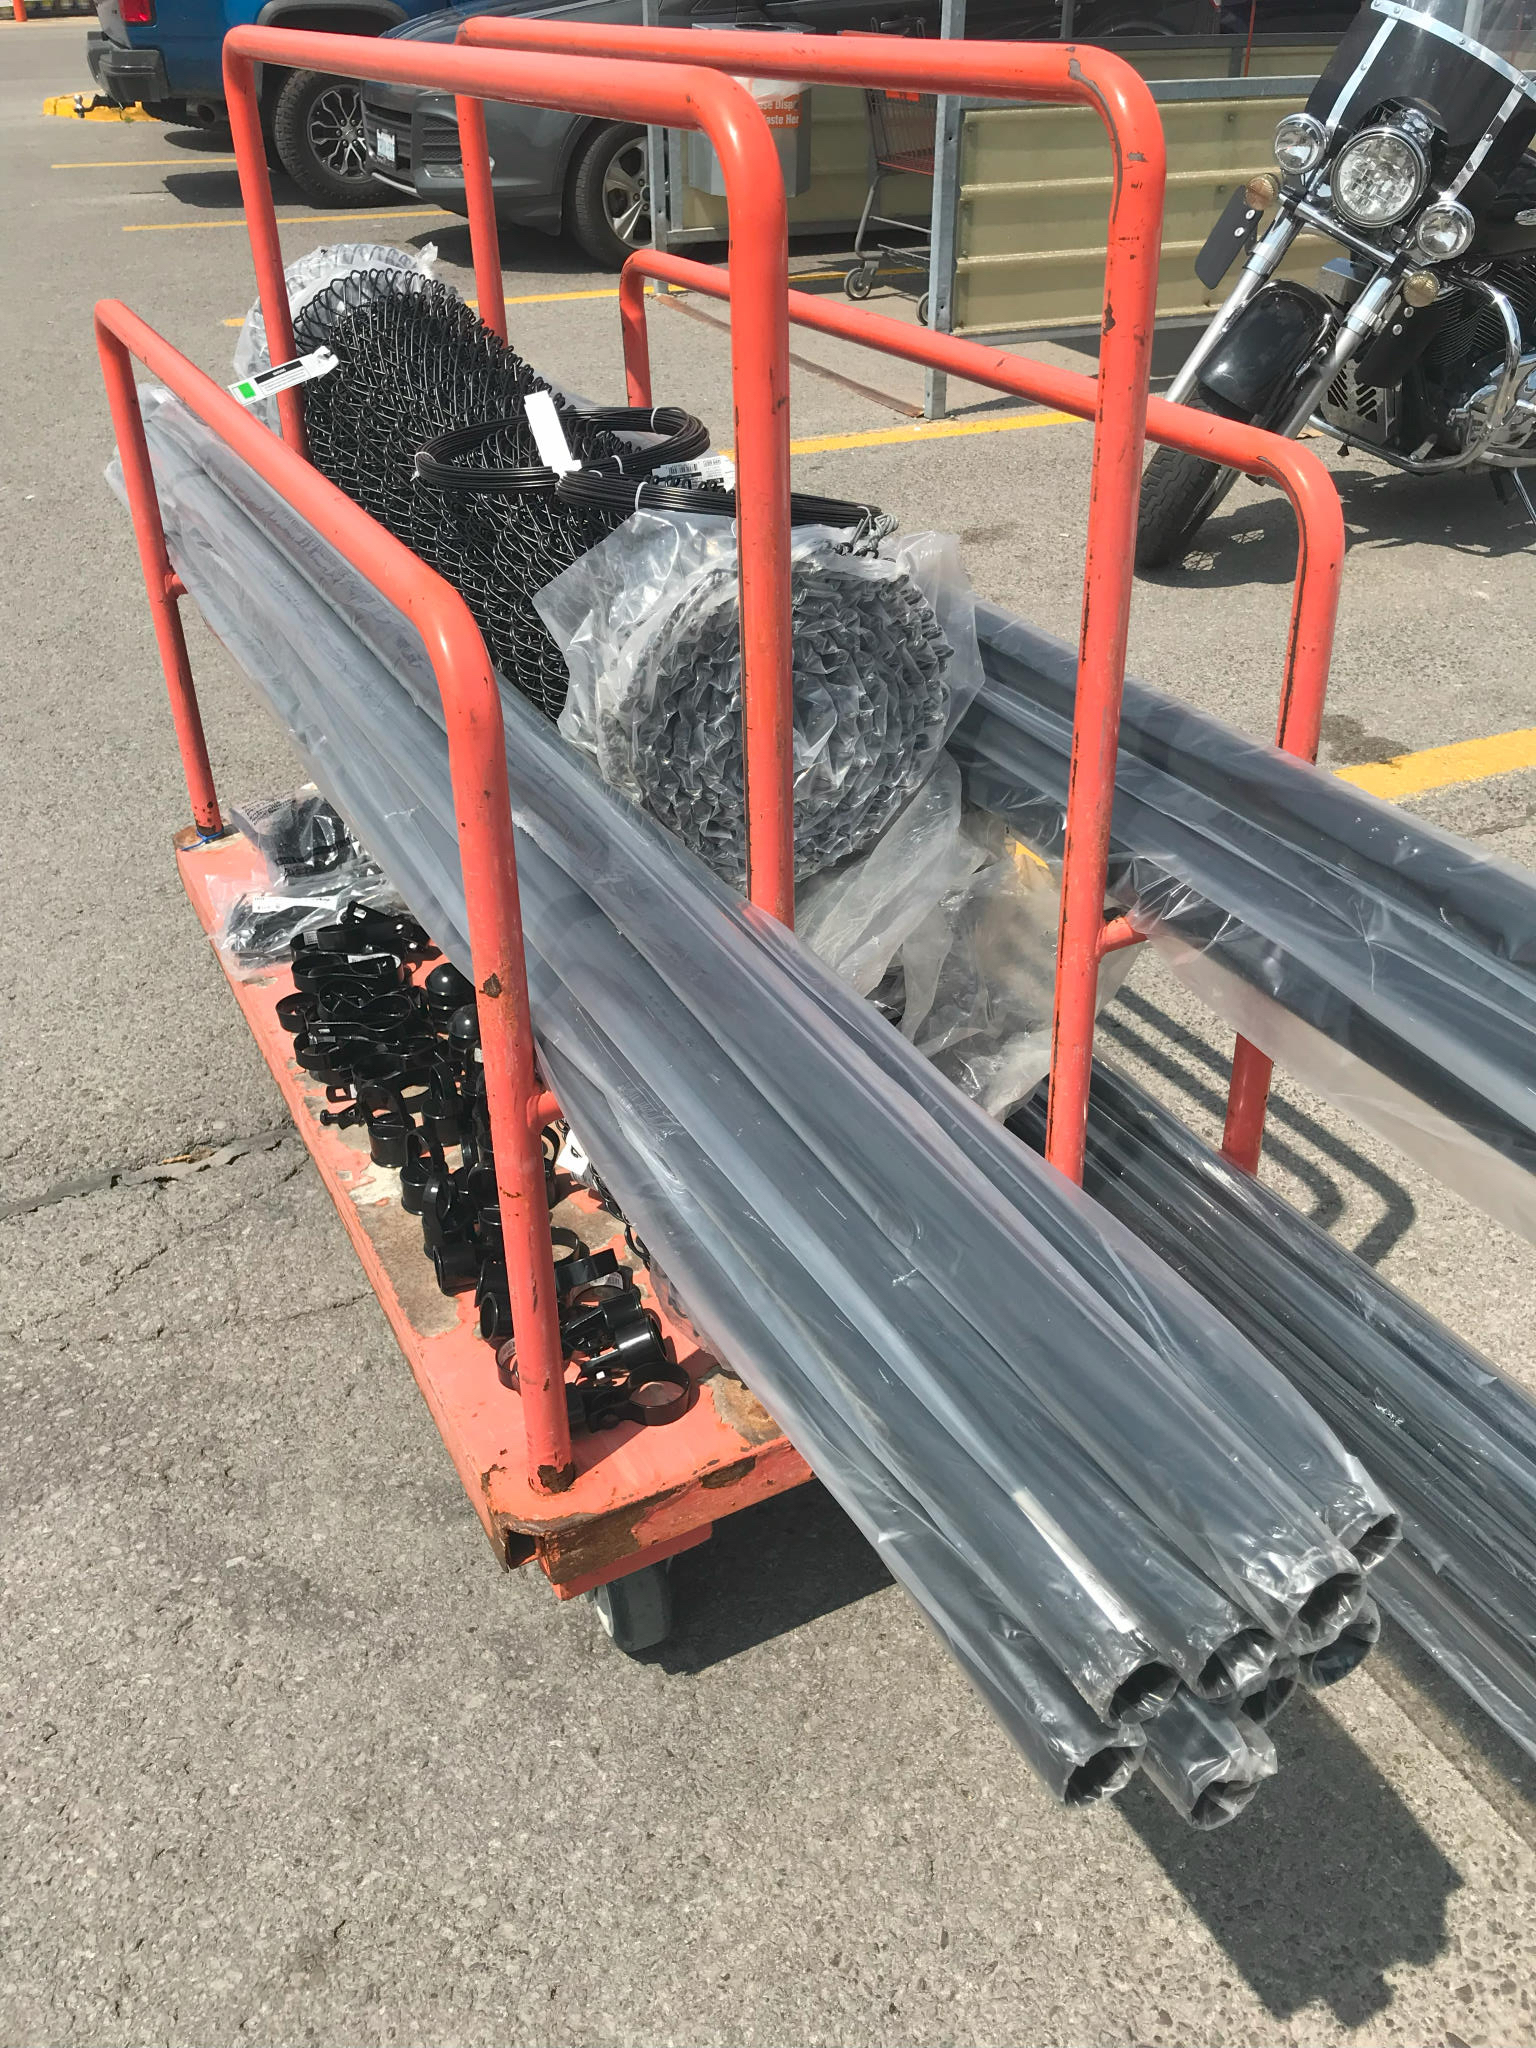
<p>Like all good projects, this one begins at your big box DIY store of choice.  We had about 120’ to do which worked out to be, oh, this much of stuff. I didn’t take a picture but all this went into the back of a <a href="https://en.wikipedia.org/wiki/Ford_Fiesta">Ford Fiesta</a> with the help of a lot of bungee cords and the 10’ top rails sticking out the back.</p>

<div class="imgWrapper imgFlex center" style="width: 80%; ">
    <picture class="imgPicture">
  <img class="imgImg rounded shadow" src="/assets/posts/2023-08-30-Chain-Link-Fence/img_7135_53153221552_o.jpg" style="width: 100%; " />
</picture>
</div>

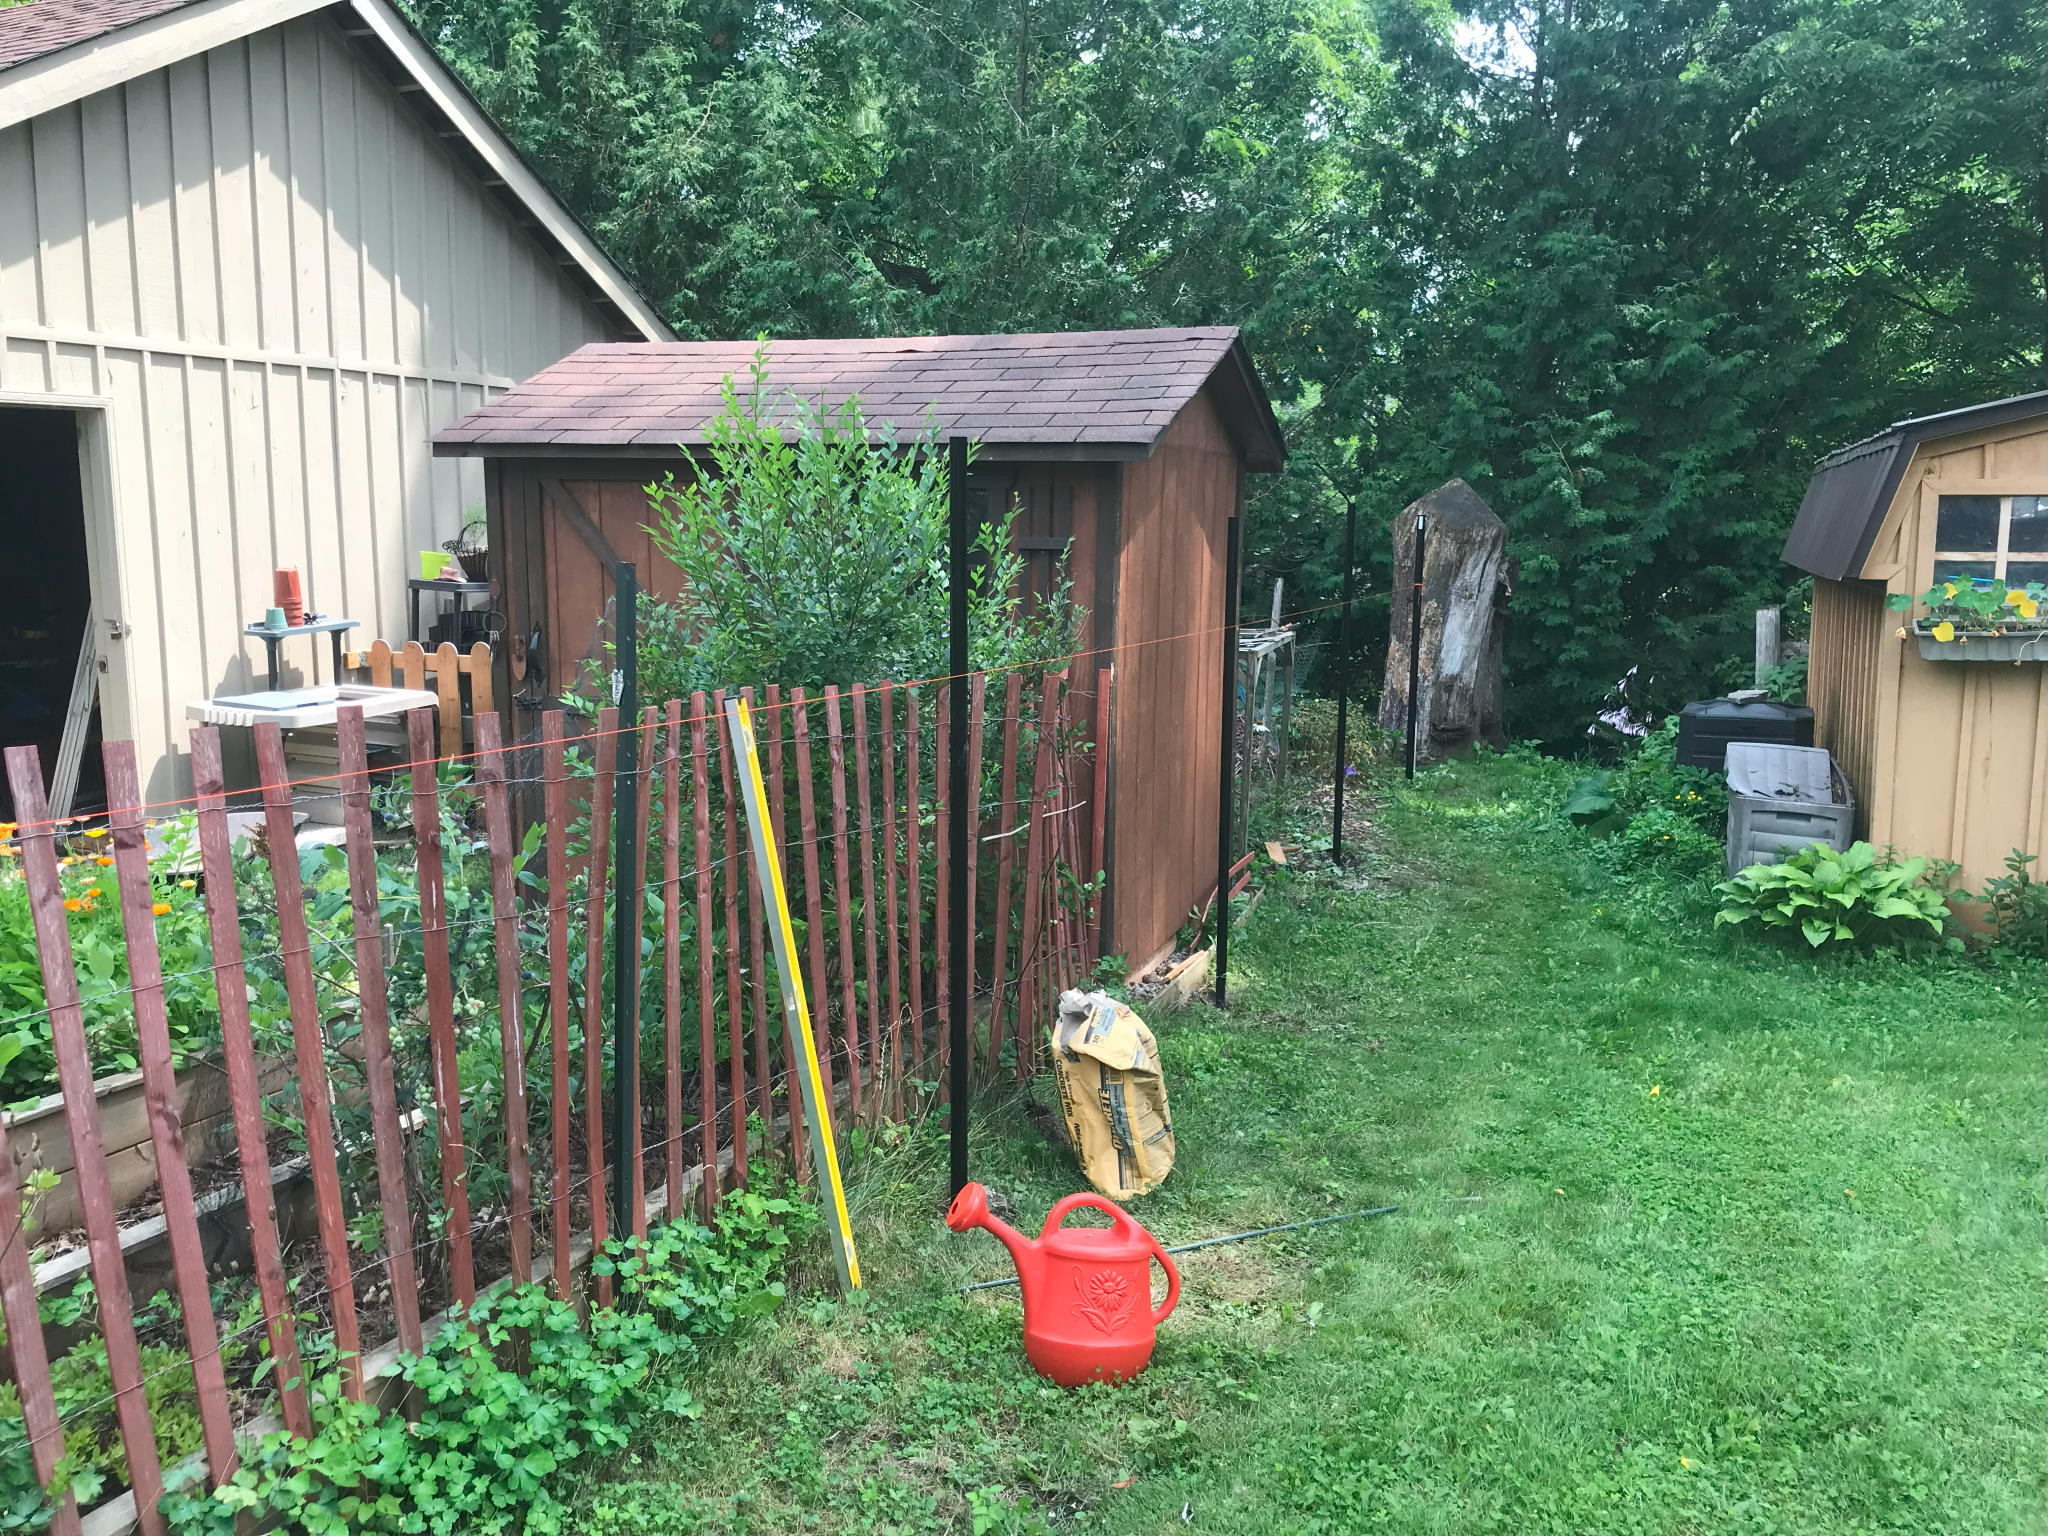
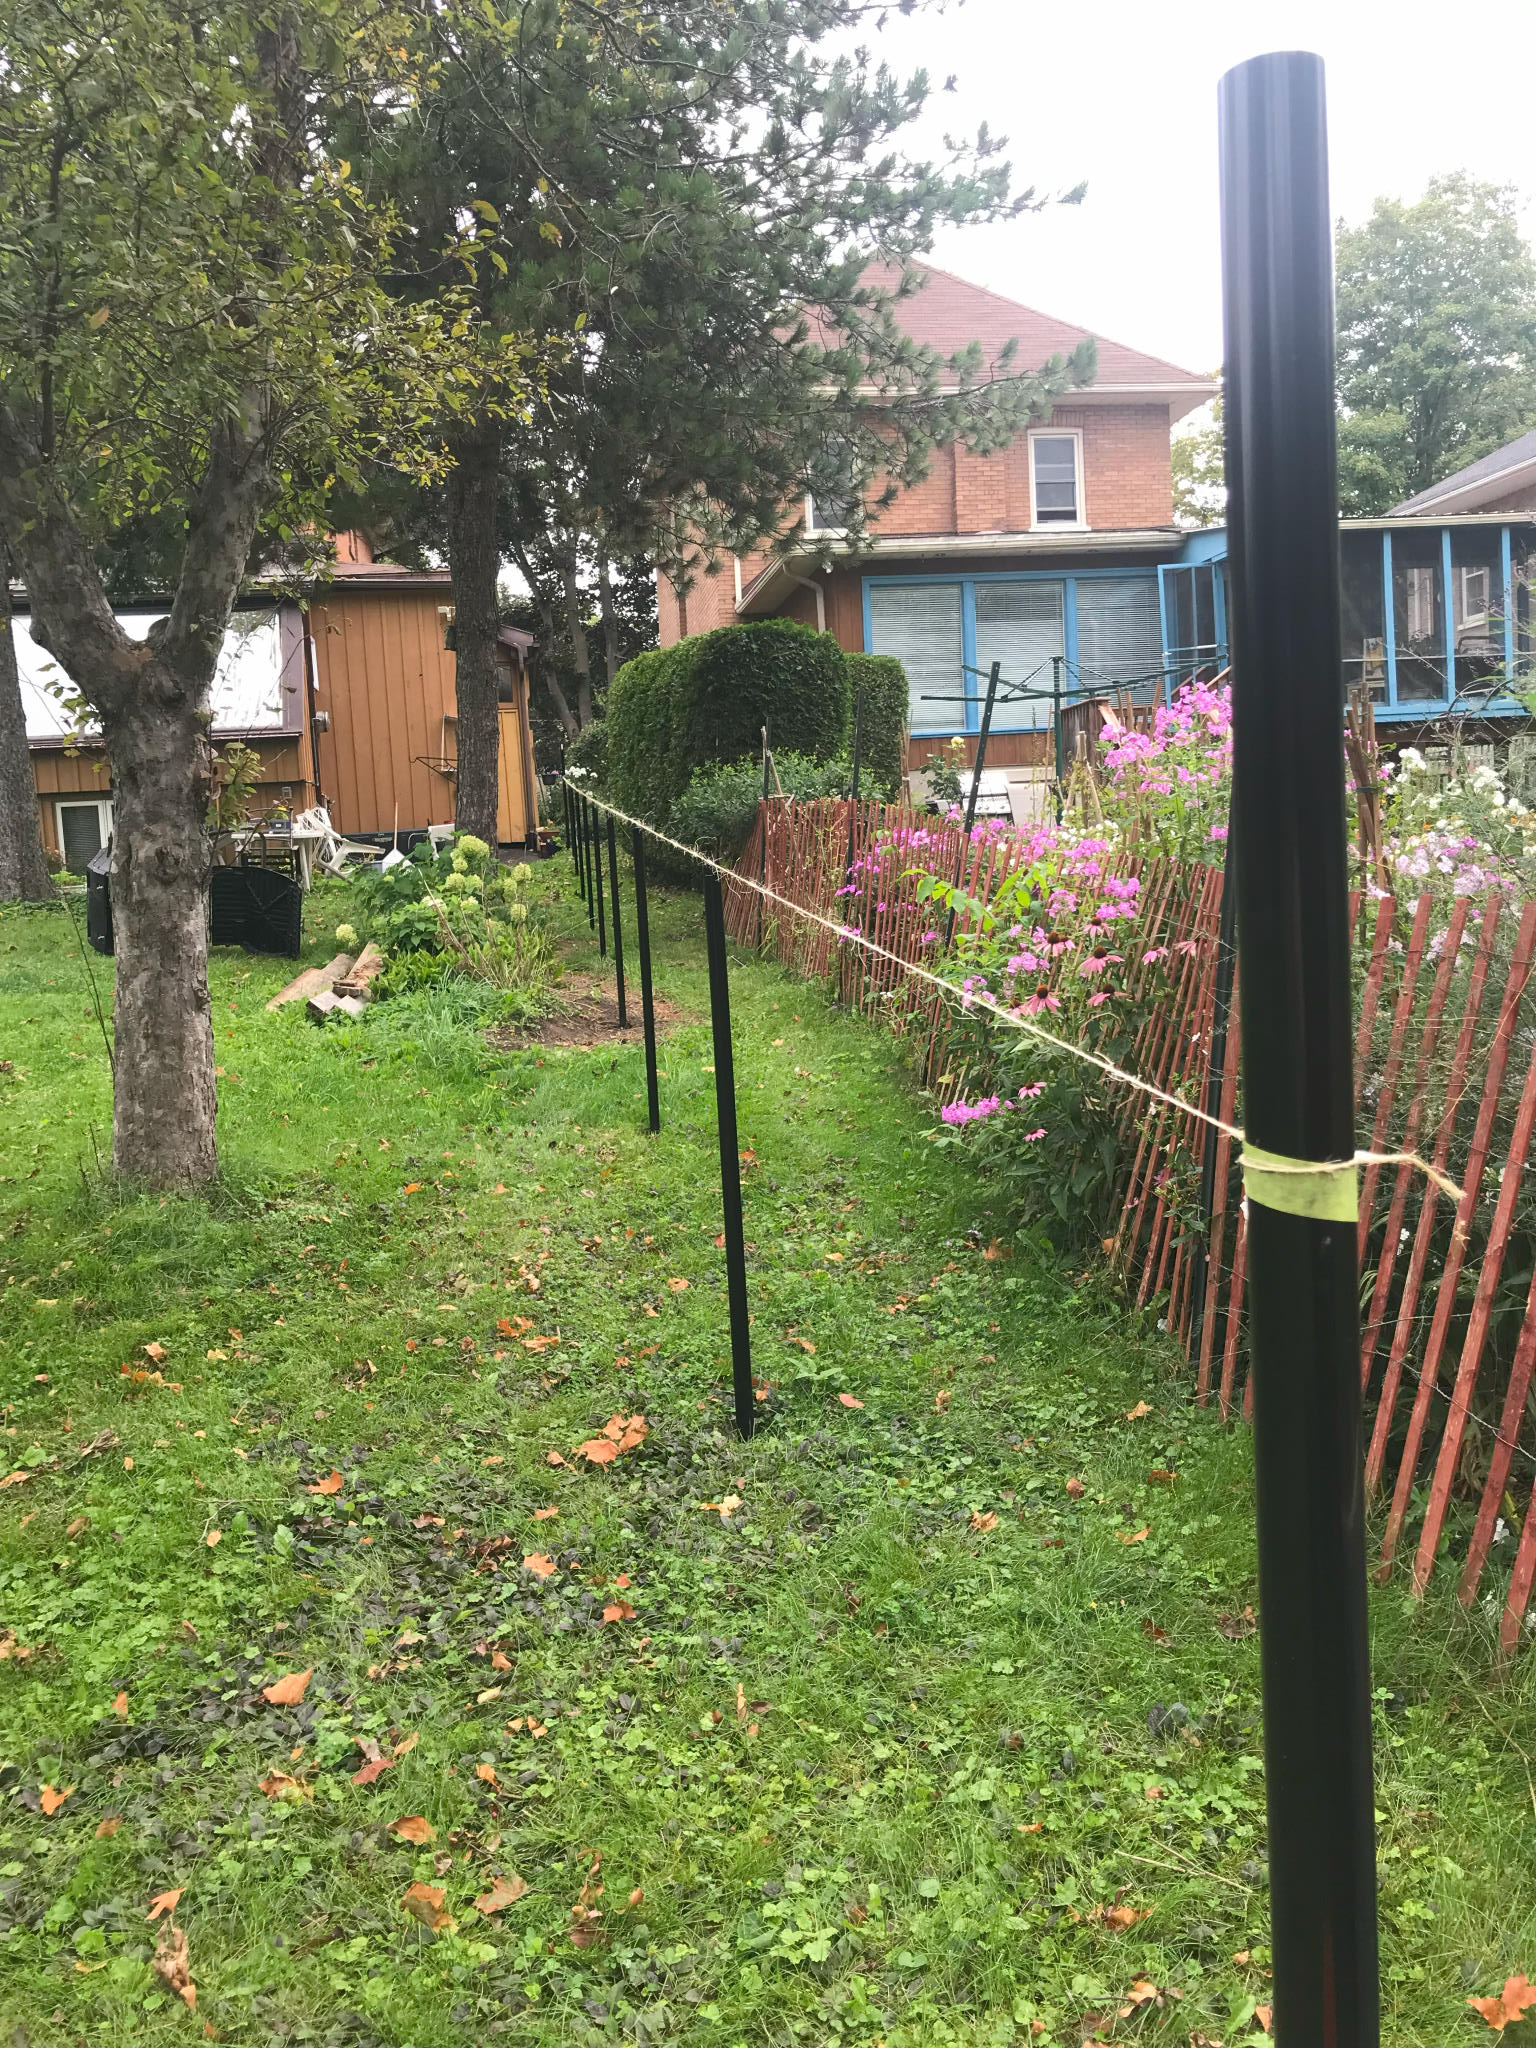
<p>According to some helpful YouTube links on chain link fence you don’t have to use cement on all the posts, only the ones at each end.  But where’s the fun in that? So first thing to do is to stake out the line of the fence with some suitably long string and use the post auger to dig in all the holes. Each one was aprox 24” deep (give or take depending on how many stones there were) and filled with half a bag of post cement.</p>

<div class="imgWrapper imgFlex center" style="width: 80%; ">
    <picture class="imgPicture">
  <img class="imgImg rounded shadow" src="/assets/posts/2023-08-30-Chain-Link-Fence/img_7141_53153221572_o.jpg" style="width: 100%; " />
</picture>
</div>

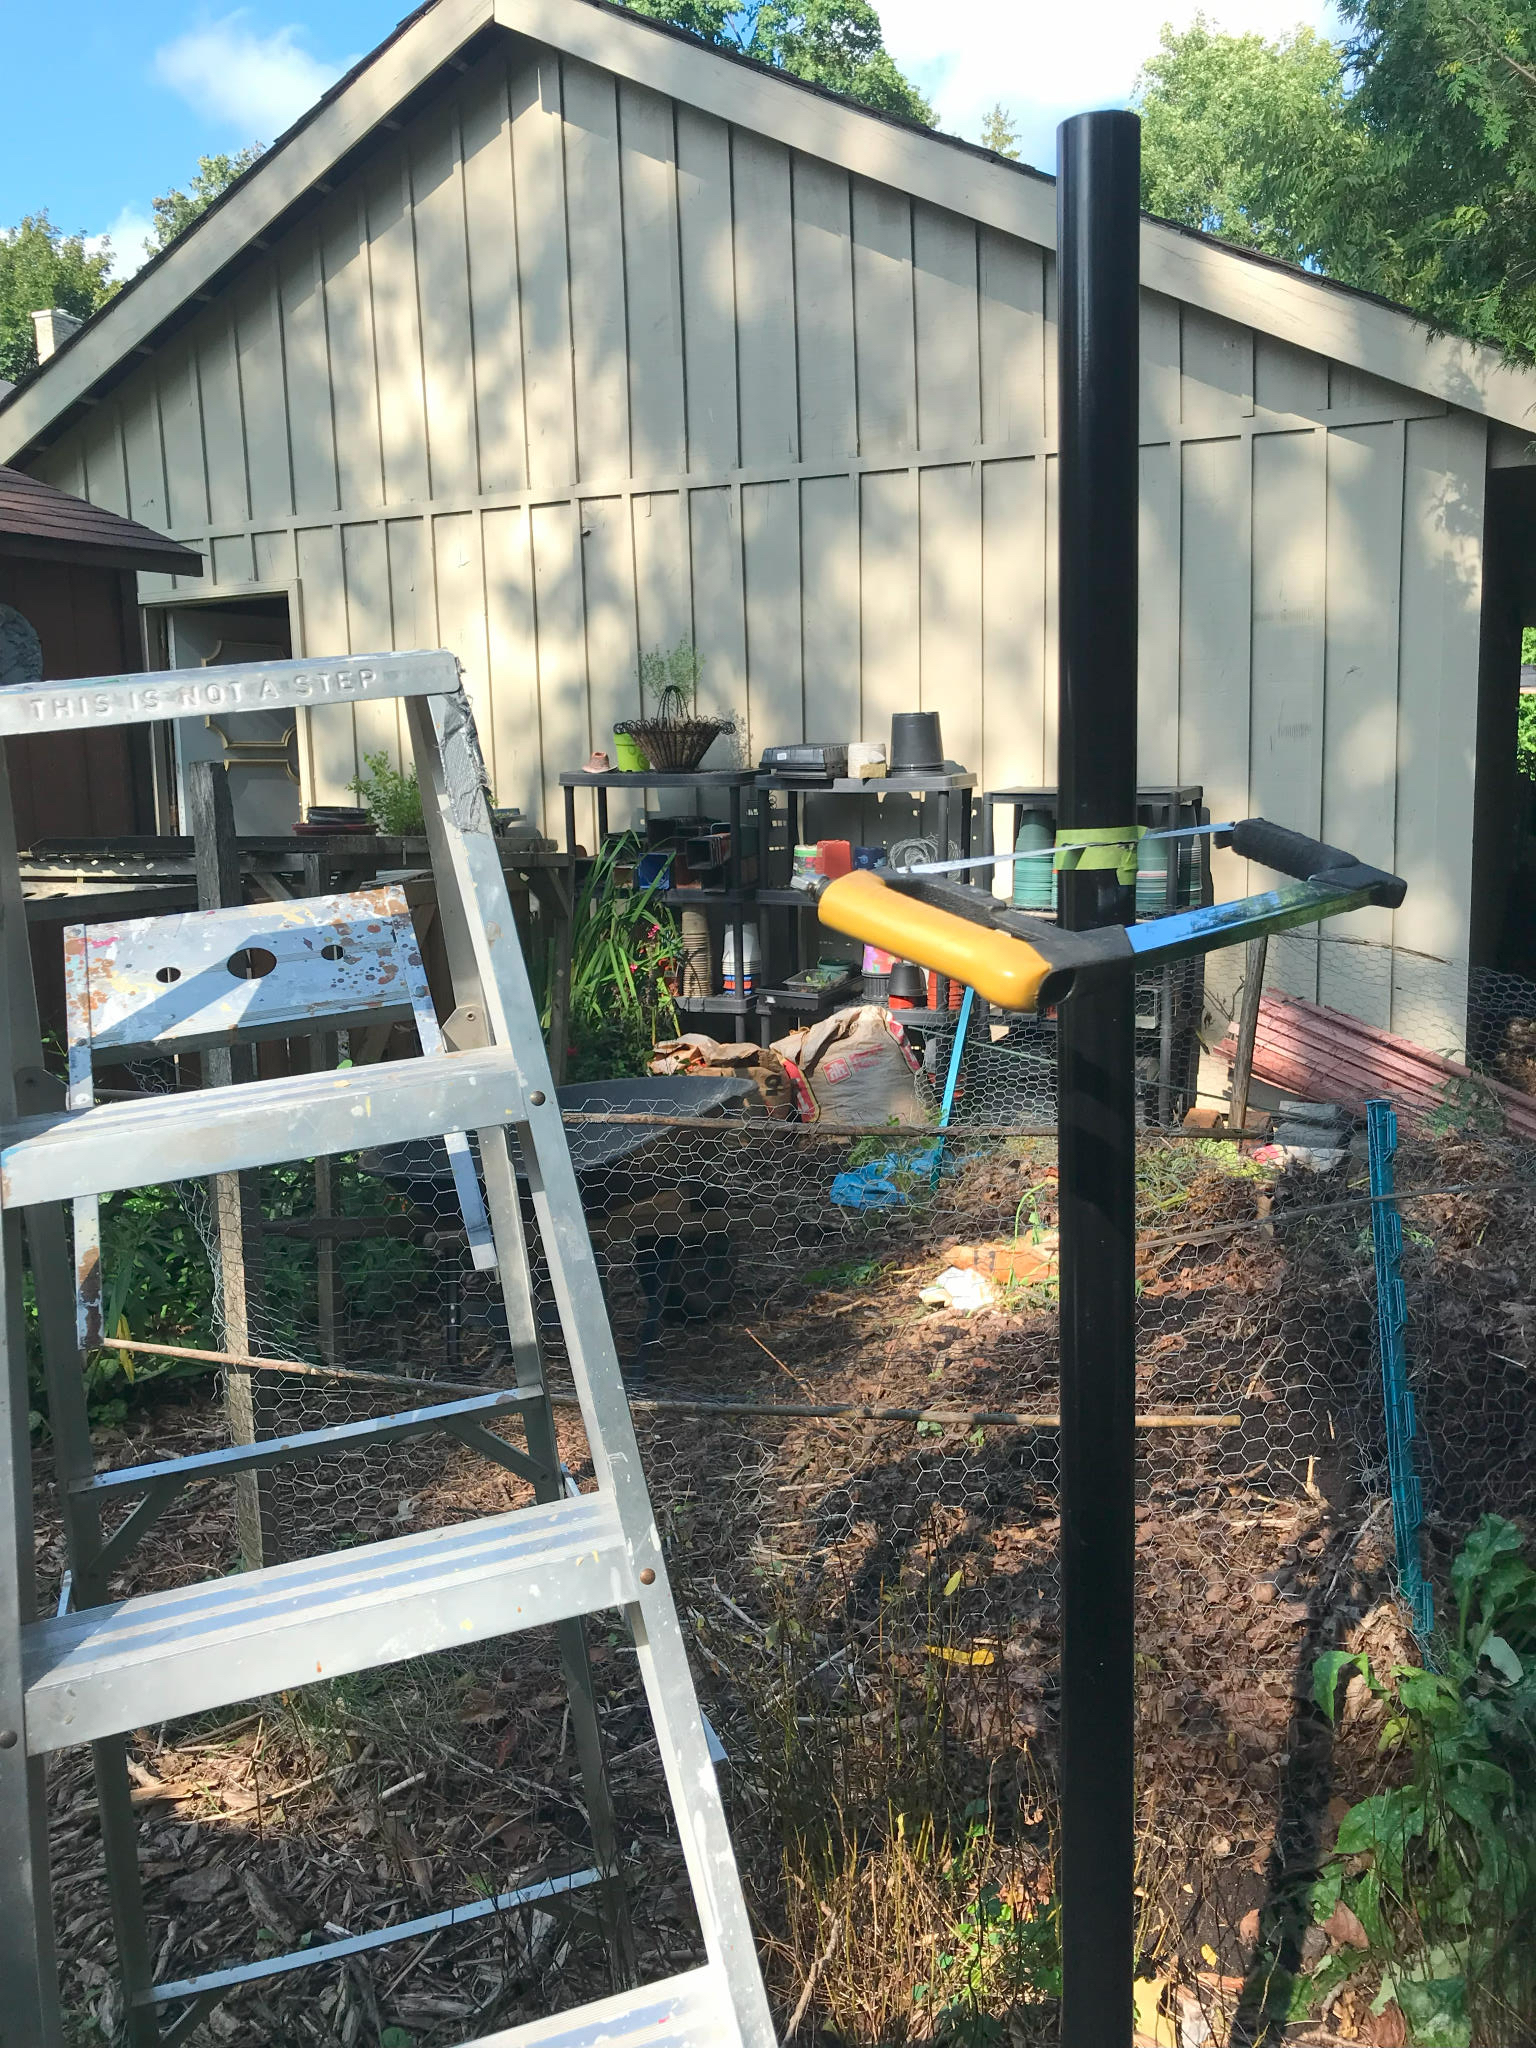
<p>Each pole is about 7’ high, so they need cutting.  Those helpful YouTube videos suggest using a portable band saw, a formidable piece of kit. But who needs power tools when you have a hacksaw?</p>

<div class="imgWrapper imgFlex center" style="width: 80%; ">
    <picture class="imgPicture">
  <img class="imgImg rounded shadow" src="/assets/posts/2023-08-30-Chain-Link-Fence/img_7158_53154229025_o.jpg" style="width: 100%; " />
</picture>
</div>

<p>Top Tip of the Day : hacksaws work a lot better with a sharp blade. The first few posts took 15mins each and then I finally realized the blades the dull.  After that, I changed out the blades every 4 posts or so they only took a few mins each.  Significant improvement in time and energy.</p>

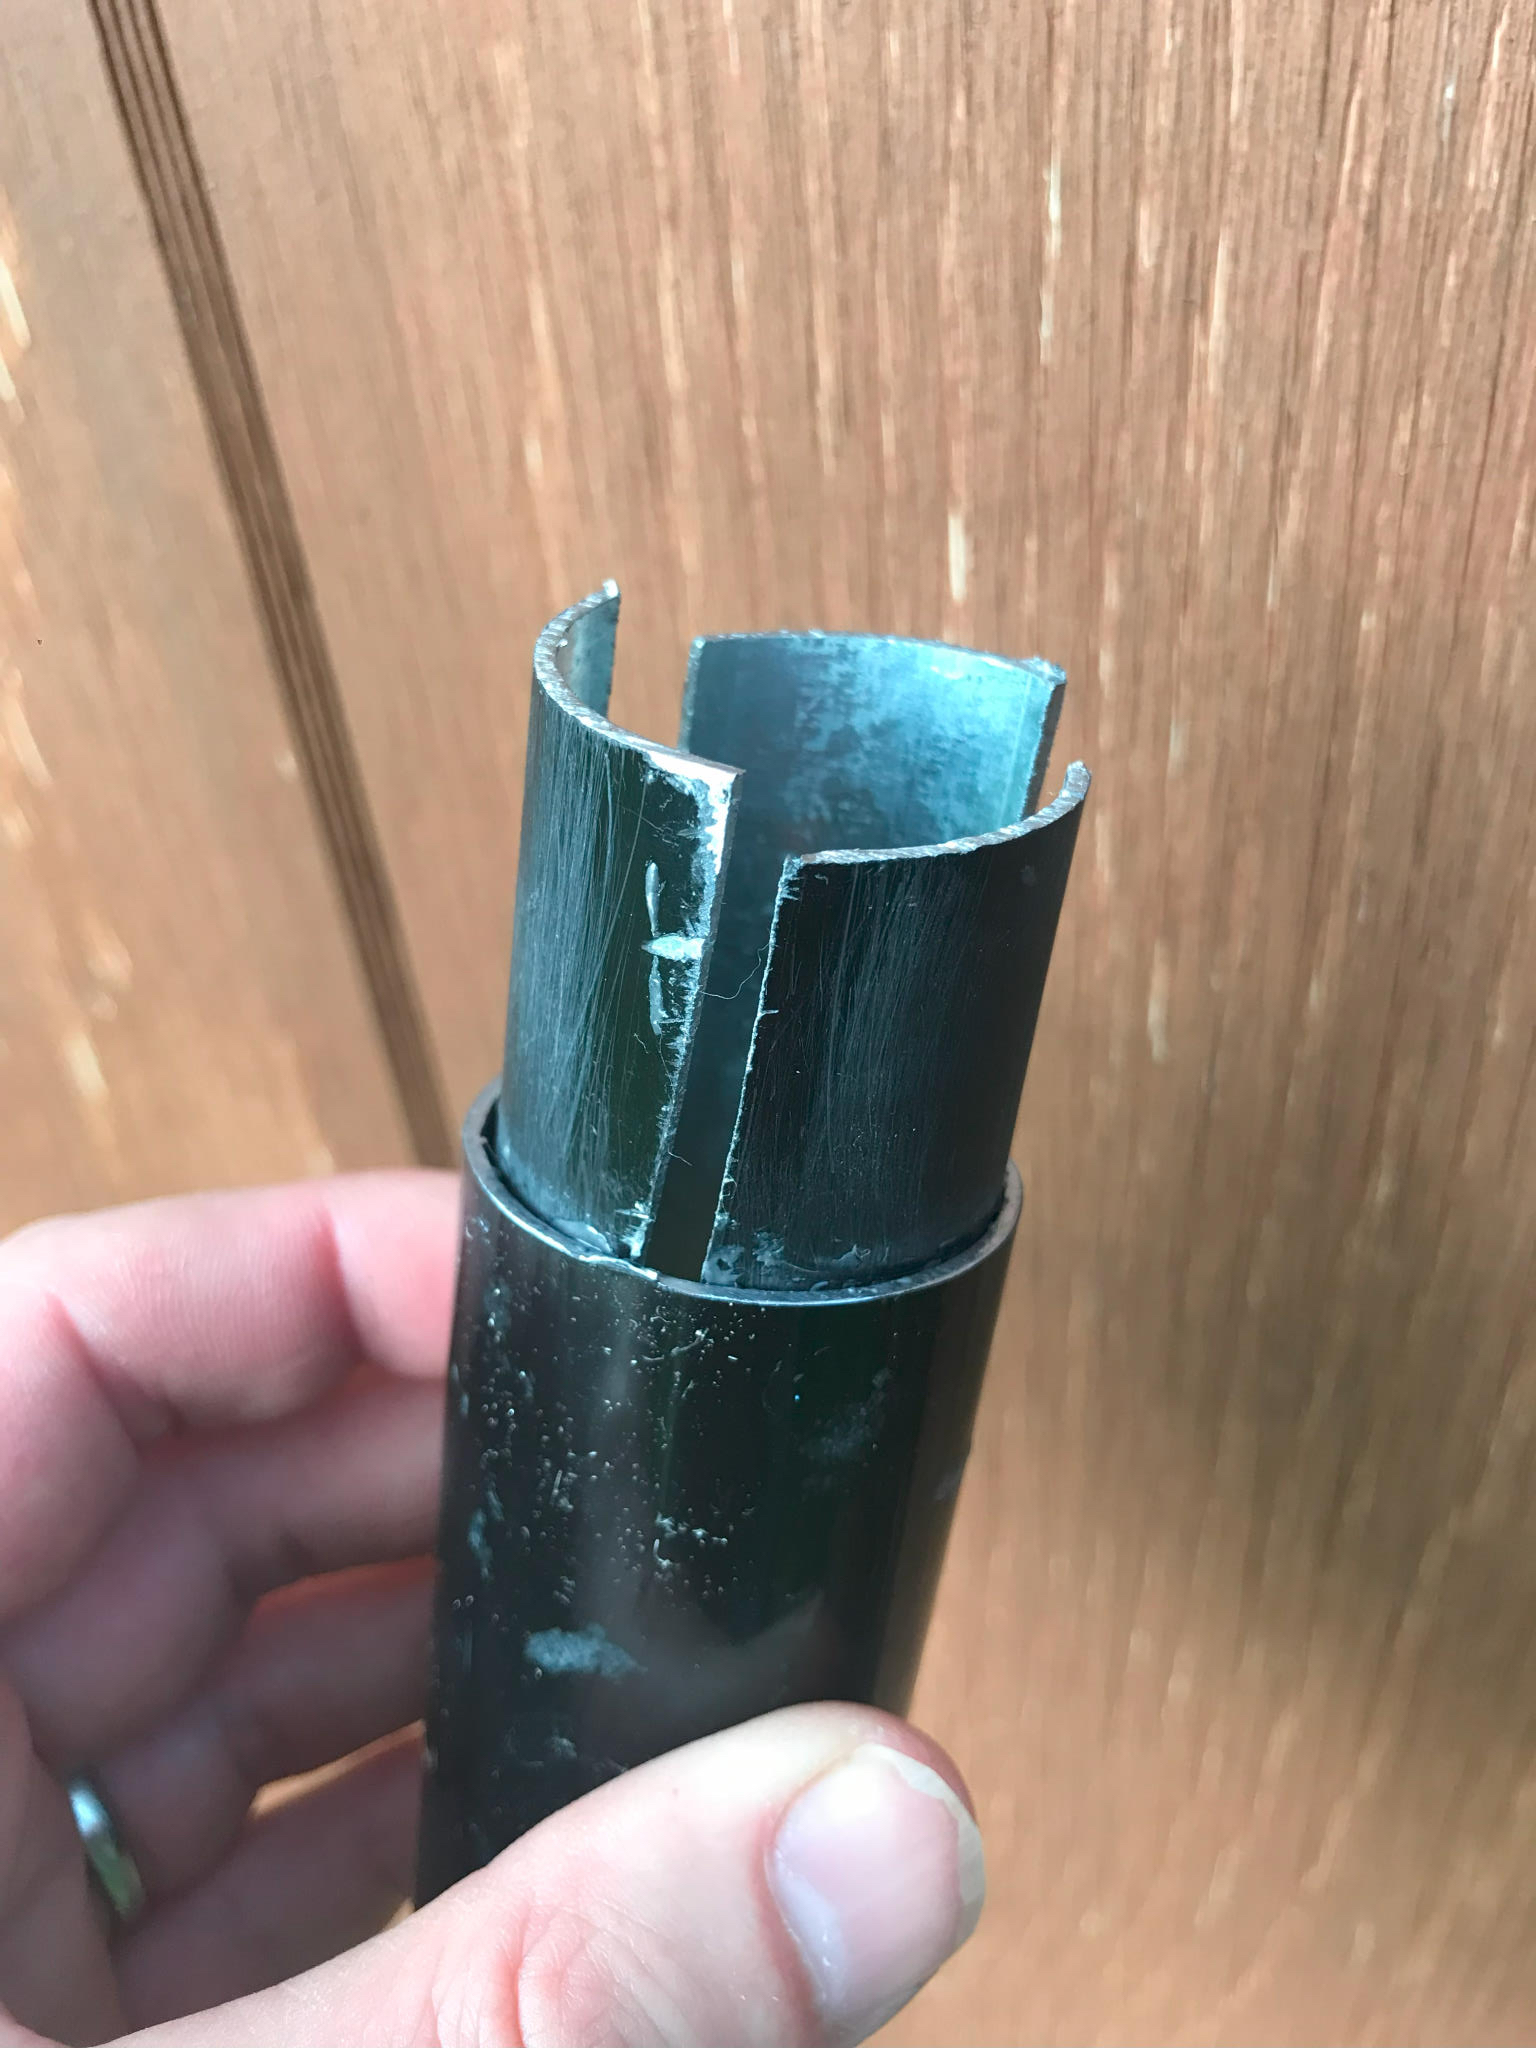
<p>This was about the time I screwed up.  For the posts at the end of the garden I measured the cut line from the bottom of the pole.  That meant that each post followed the gradient of the garden.  Big mistake. It meant that some posts were shorter than the others.  Like this.</p>

<div class="imgWrapper imgFlex center" style="width: 80%; ">
    <picture class="imgPicture">
  <img class="imgImg rounded shadow" src="/assets/posts/2023-08-30-Chain-Link-Fence/img_7172_53153796921_o.jpg" style="width: 100%; " />
</picture>
</div>

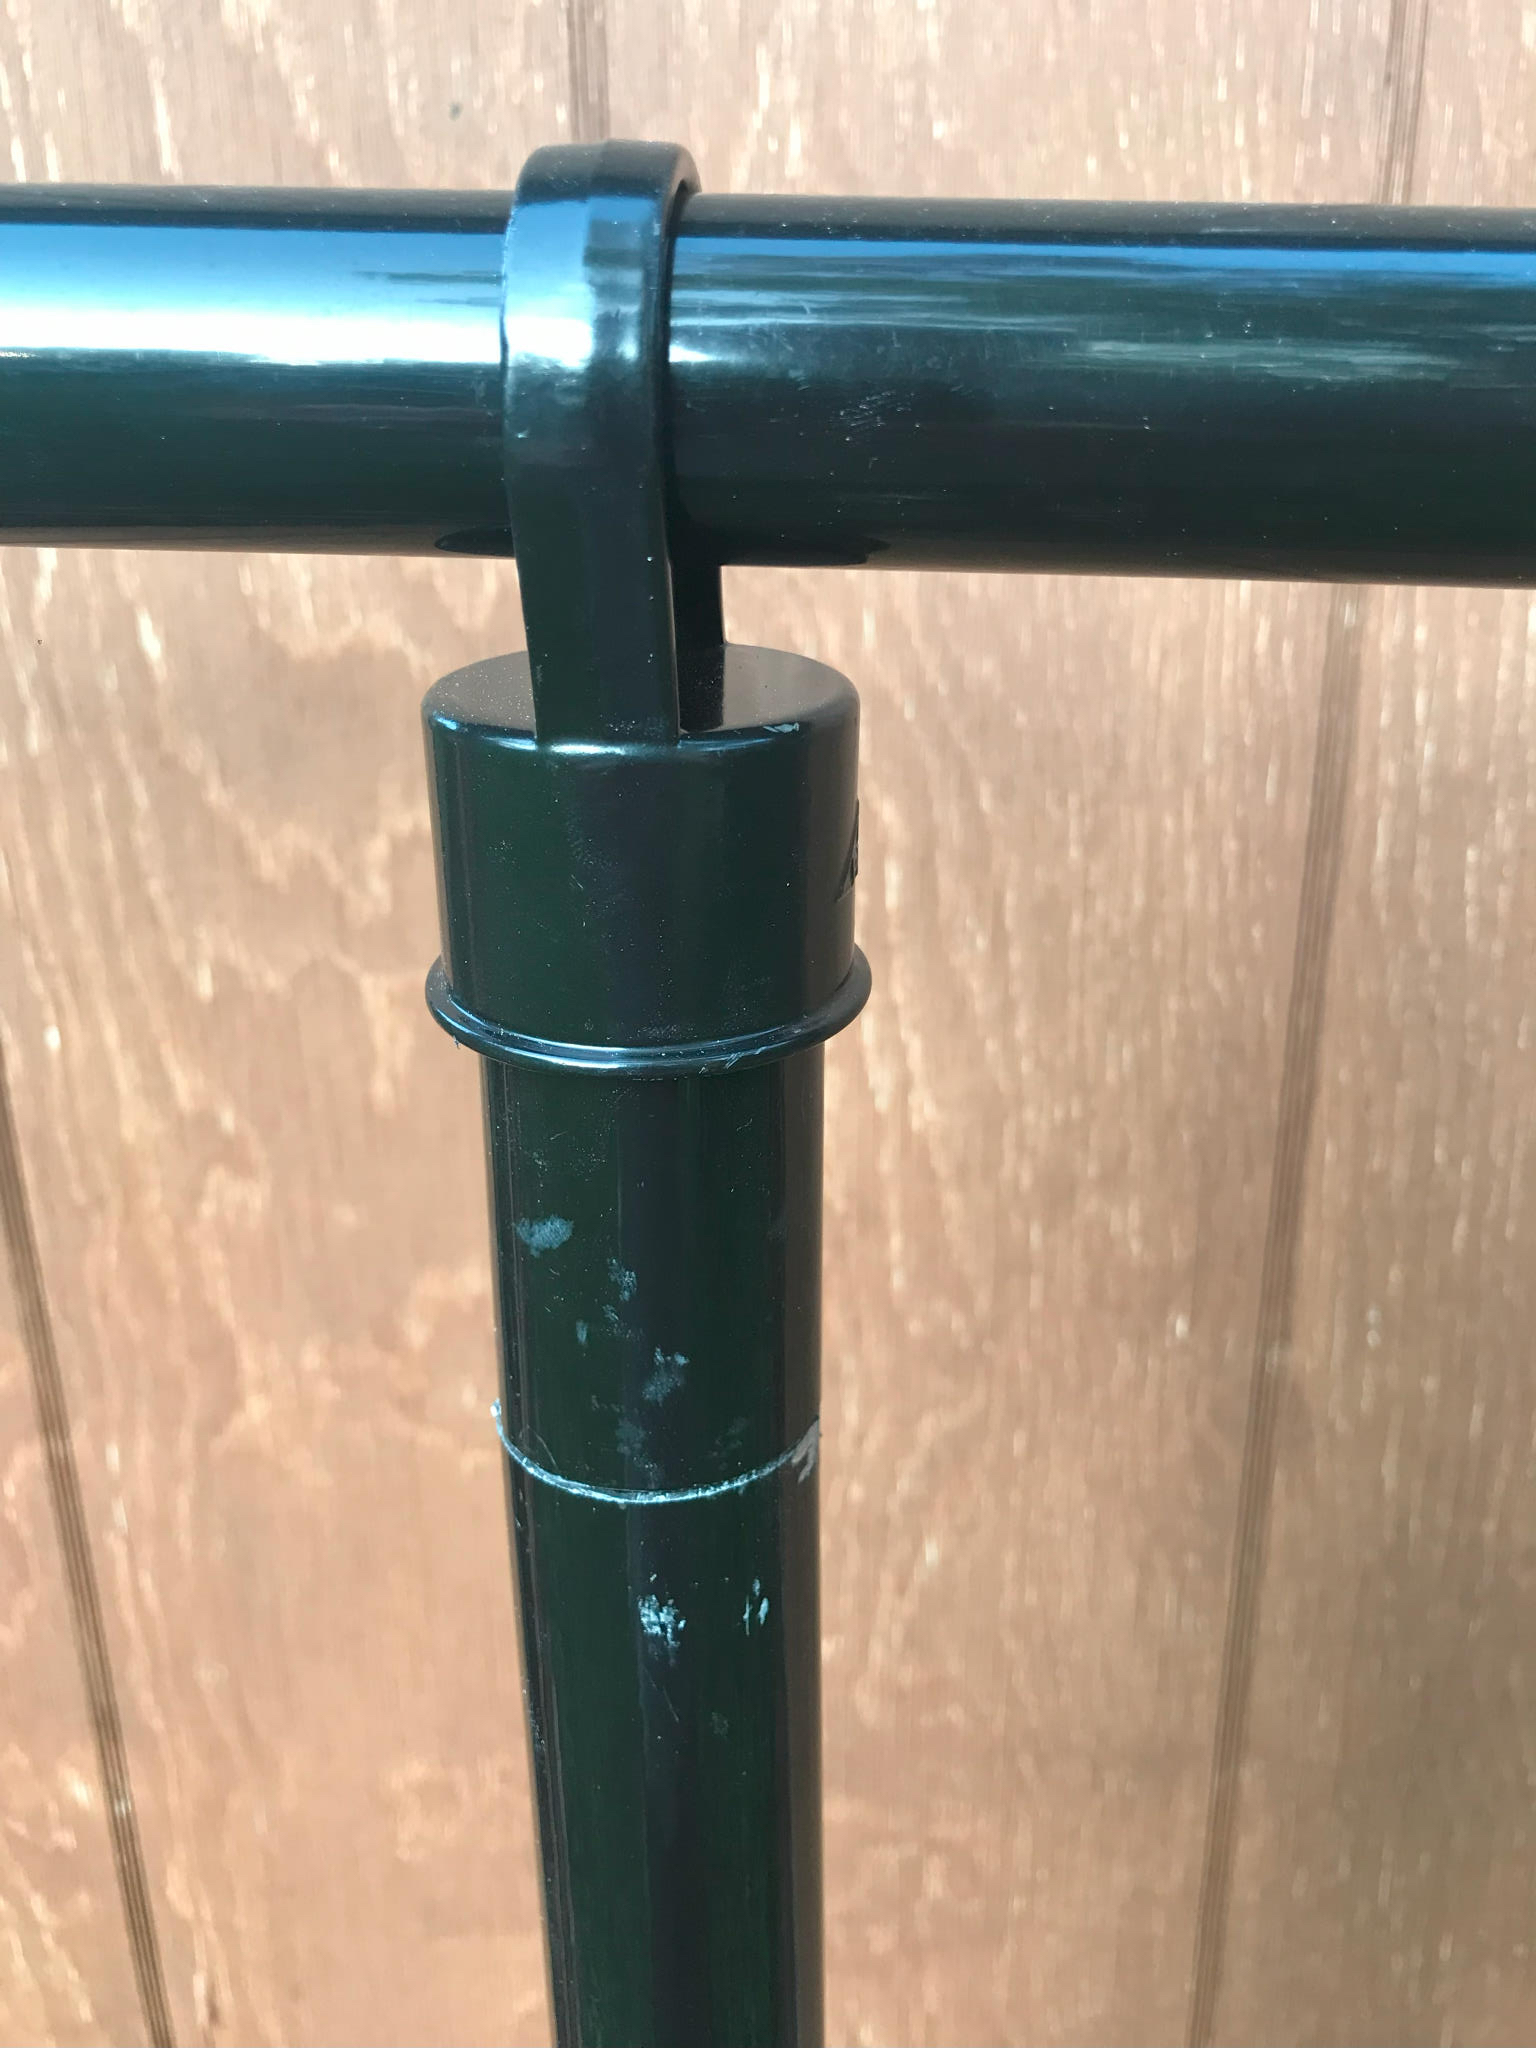
<p>Yup. Since I had cut a few poles I did have spare material, so was able to cut a piece to the missing size, then cut up a portion of another piece of pole to use as inserts.  I gave them a good sanding, then used 2-part epoxy glue to put it all together.</p>

<div class="imgWrapper imgFlex center" style="width: 80%; ">
    <picture class="imgPicture">
  <img class="imgImg rounded shadow" src="/assets/posts/2023-08-30-Chain-Link-Fence/img_7173_53153221632_o.jpg" style="width: 100%; " />
</picture>
</div>

<p>It wasn’t bad, apart from the excise glue making a mess on the sides.</p>

<div class="imgWrapper imgFlex center" style="width: 80%; ">
    <picture class="imgPicture">
  <img class="imgImg rounded shadow" src="/assets/posts/2023-08-30-Chain-Link-Fence/img_7175_53153221647_o.jpg" style="width: 100%; " />
</picture>
</div>

<p>Which brings me to the next Top Tip.  Use a string line stretched from the end poles to mark where the cuts should be.</p>

<div class="imgWrapper imgFlex center" style="width: 80%; ">
    <picture class="imgPicture">
  <img class="imgImg rounded shadow" src="/assets/posts/2023-08-30-Chain-Link-Fence/img_7161_53154293438_o.jpg" style="width: 100%; " />
</picture>
</div>

<p>The top rail now went on nicely. You can see in the finished pictures what a different this makes, as the fence looks straight and narrow.</p>

<p>The actual chain link is a pain in the but to work with. I didn’t take many pictures as I was too busy untangling it.  Every time I moved it, it got tangled again.  Grrr.</p>

<div class="imgWrapper imgFlex center" style="width: 80%; ">
    <picture class="imgPicture">
  <img class="imgImg rounded shadow" src="/assets/posts/2023-08-30-Chain-Link-Fence/img_7176_53153221702_o.jpg" style="width: 100%; " />
</picture>
</div>

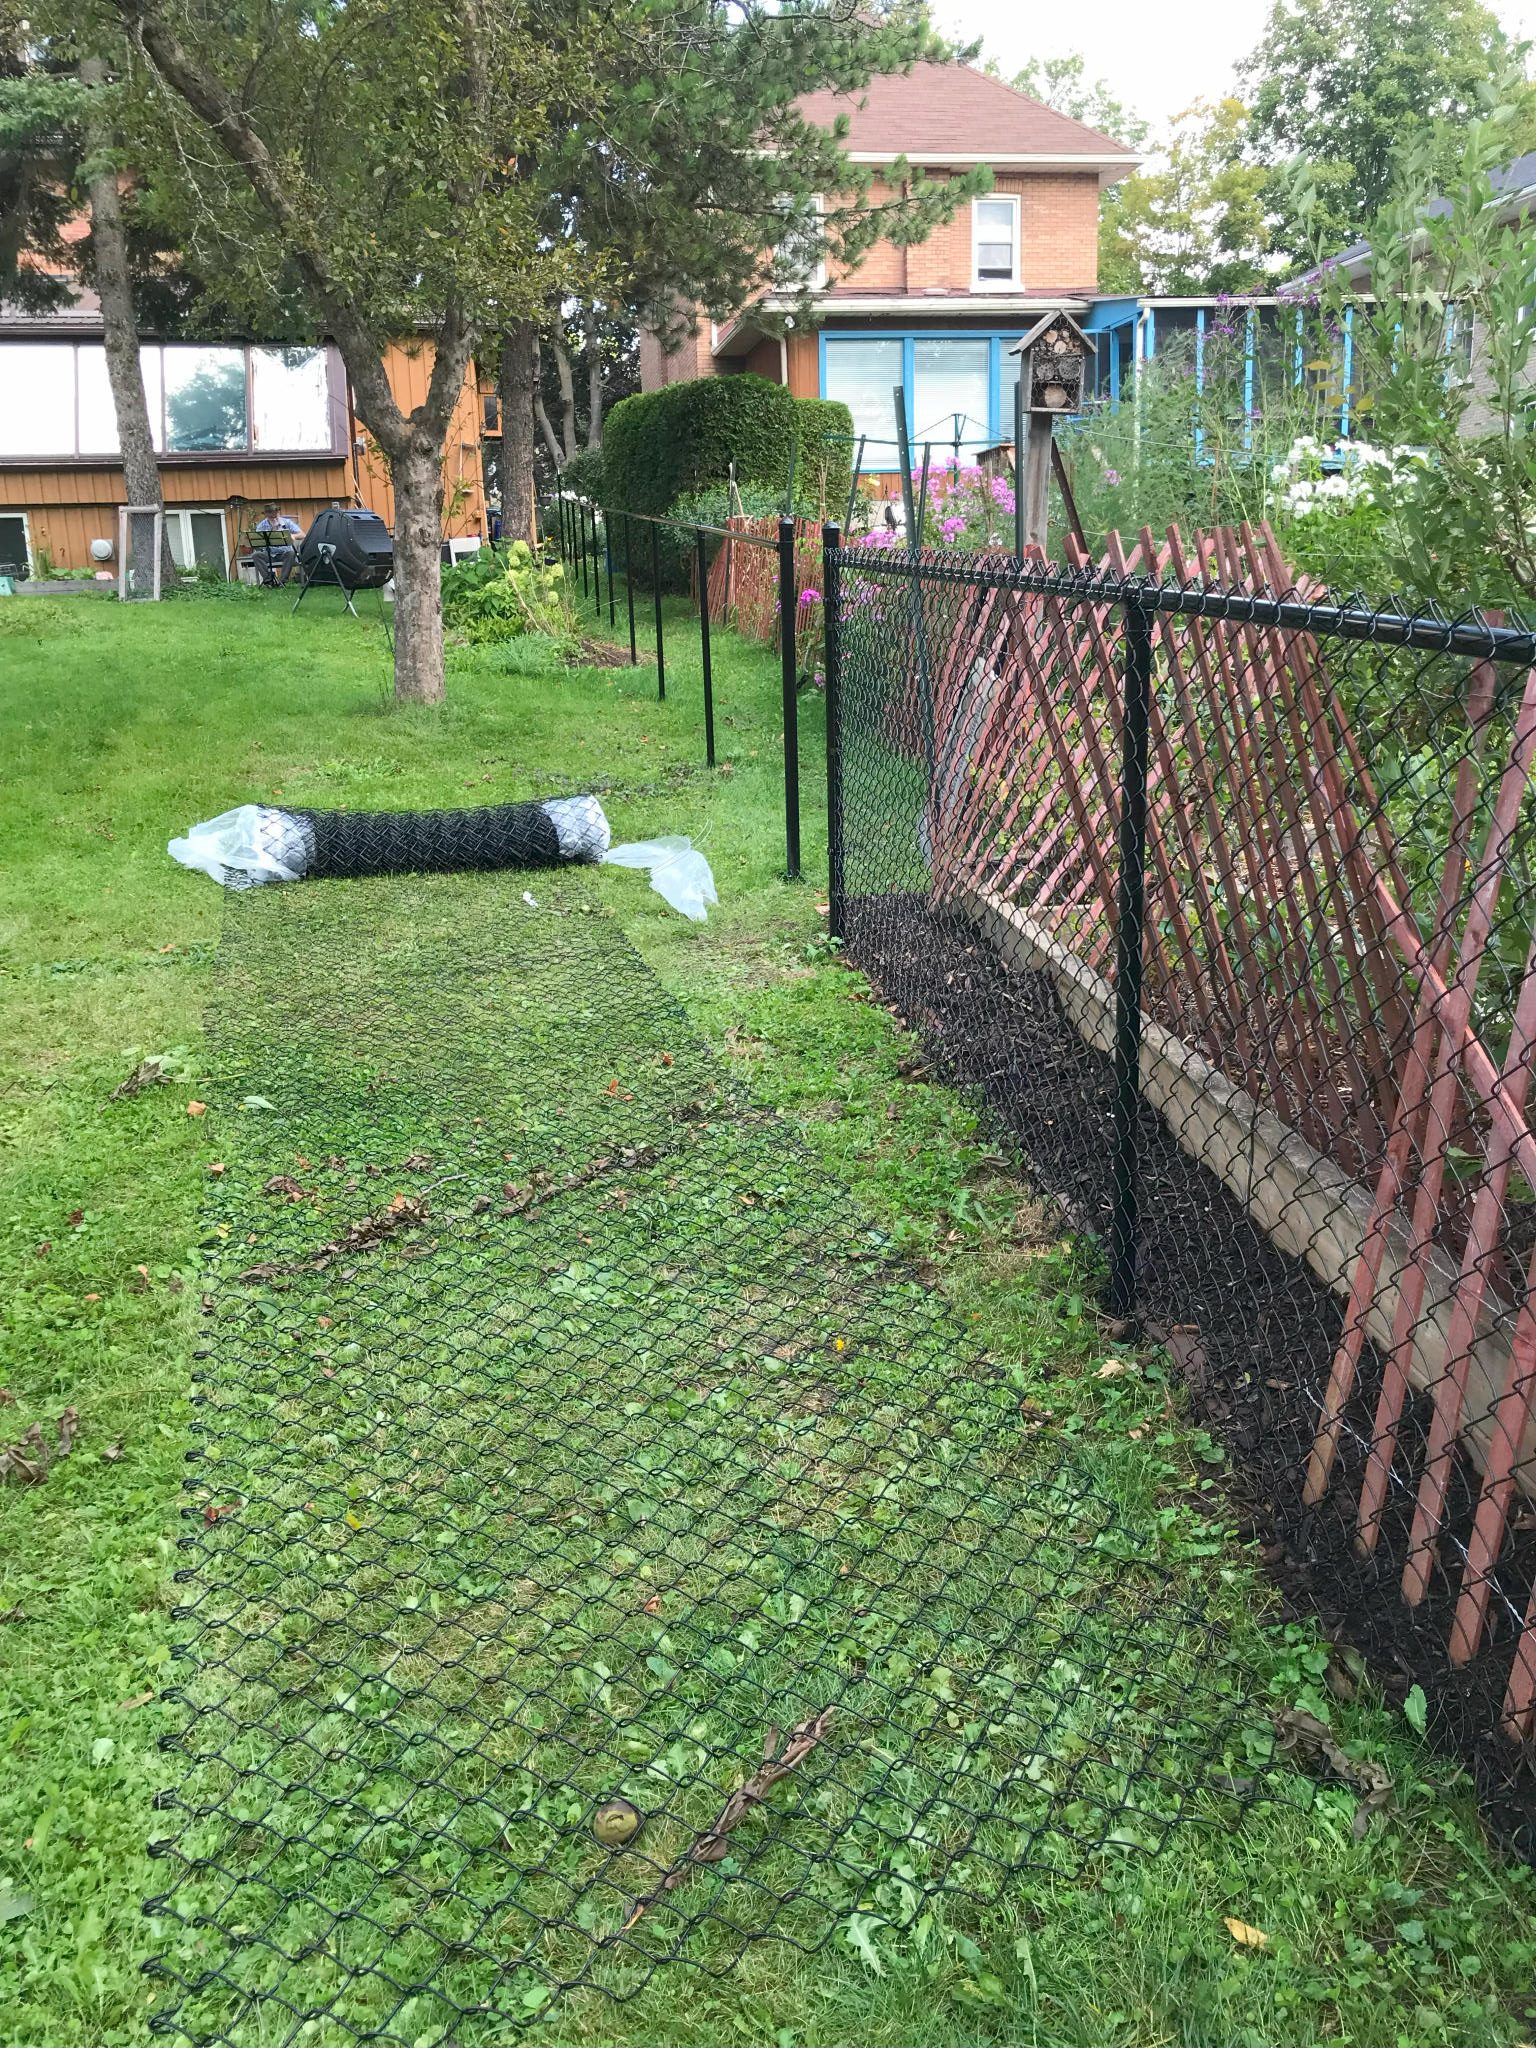
<p>A new piece of chain link rolled out ready to use.  Top Tip : don’t do this. It looks pretty but now you have to hold it vertical and move it to the fence as the whole thing twists and tangles (again).</p>

<p>I had more success with holding it vertical, unrolling a bit, loosely tying it to the top rail and then unrolling a bit more.</p>

<p>What is pretty neat is that you can ‘weave’ two pieces together. Each piece of fence is a strand of wire from top to bottom in a zig-zag shape.  It is possible to twist a strand out to shorten the fence, or use a strand to join two pieces together.</p>

<p>After the chain link is on loose it needs to be stretched. I rented a ‘come-along’, basically a hand winch, from the local rental shop for a day to do this.  In retrospect I did not stretch it tight enough.  It’s not bad, but is a bit looser than I would like.  After that the fence is kept in place with many, many, little twisty bits of wire.</p>

<p>Here are a few pics of the fence as we took out the old fence and trimmed.</p>

<div class="imgWrapper imgFlex center" style="width: 80%; ">
    <picture class="imgPicture">
  <img class="imgImg rounded shadow" src="/assets/posts/2023-08-30-Chain-Link-Fence/img_7180_53153221727_o.jpg" style="width: 100%; " />
</picture>
</div>

<div class="imgWrapper imgFlex center" style="width: 80%; ">
    <picture class="imgPicture">
  <img class="imgImg rounded shadow" src="/assets/posts/2023-08-30-Chain-Link-Fence/img_7326_53154293553_o.jpg" style="width: 100%; " />
</picture>
</div>

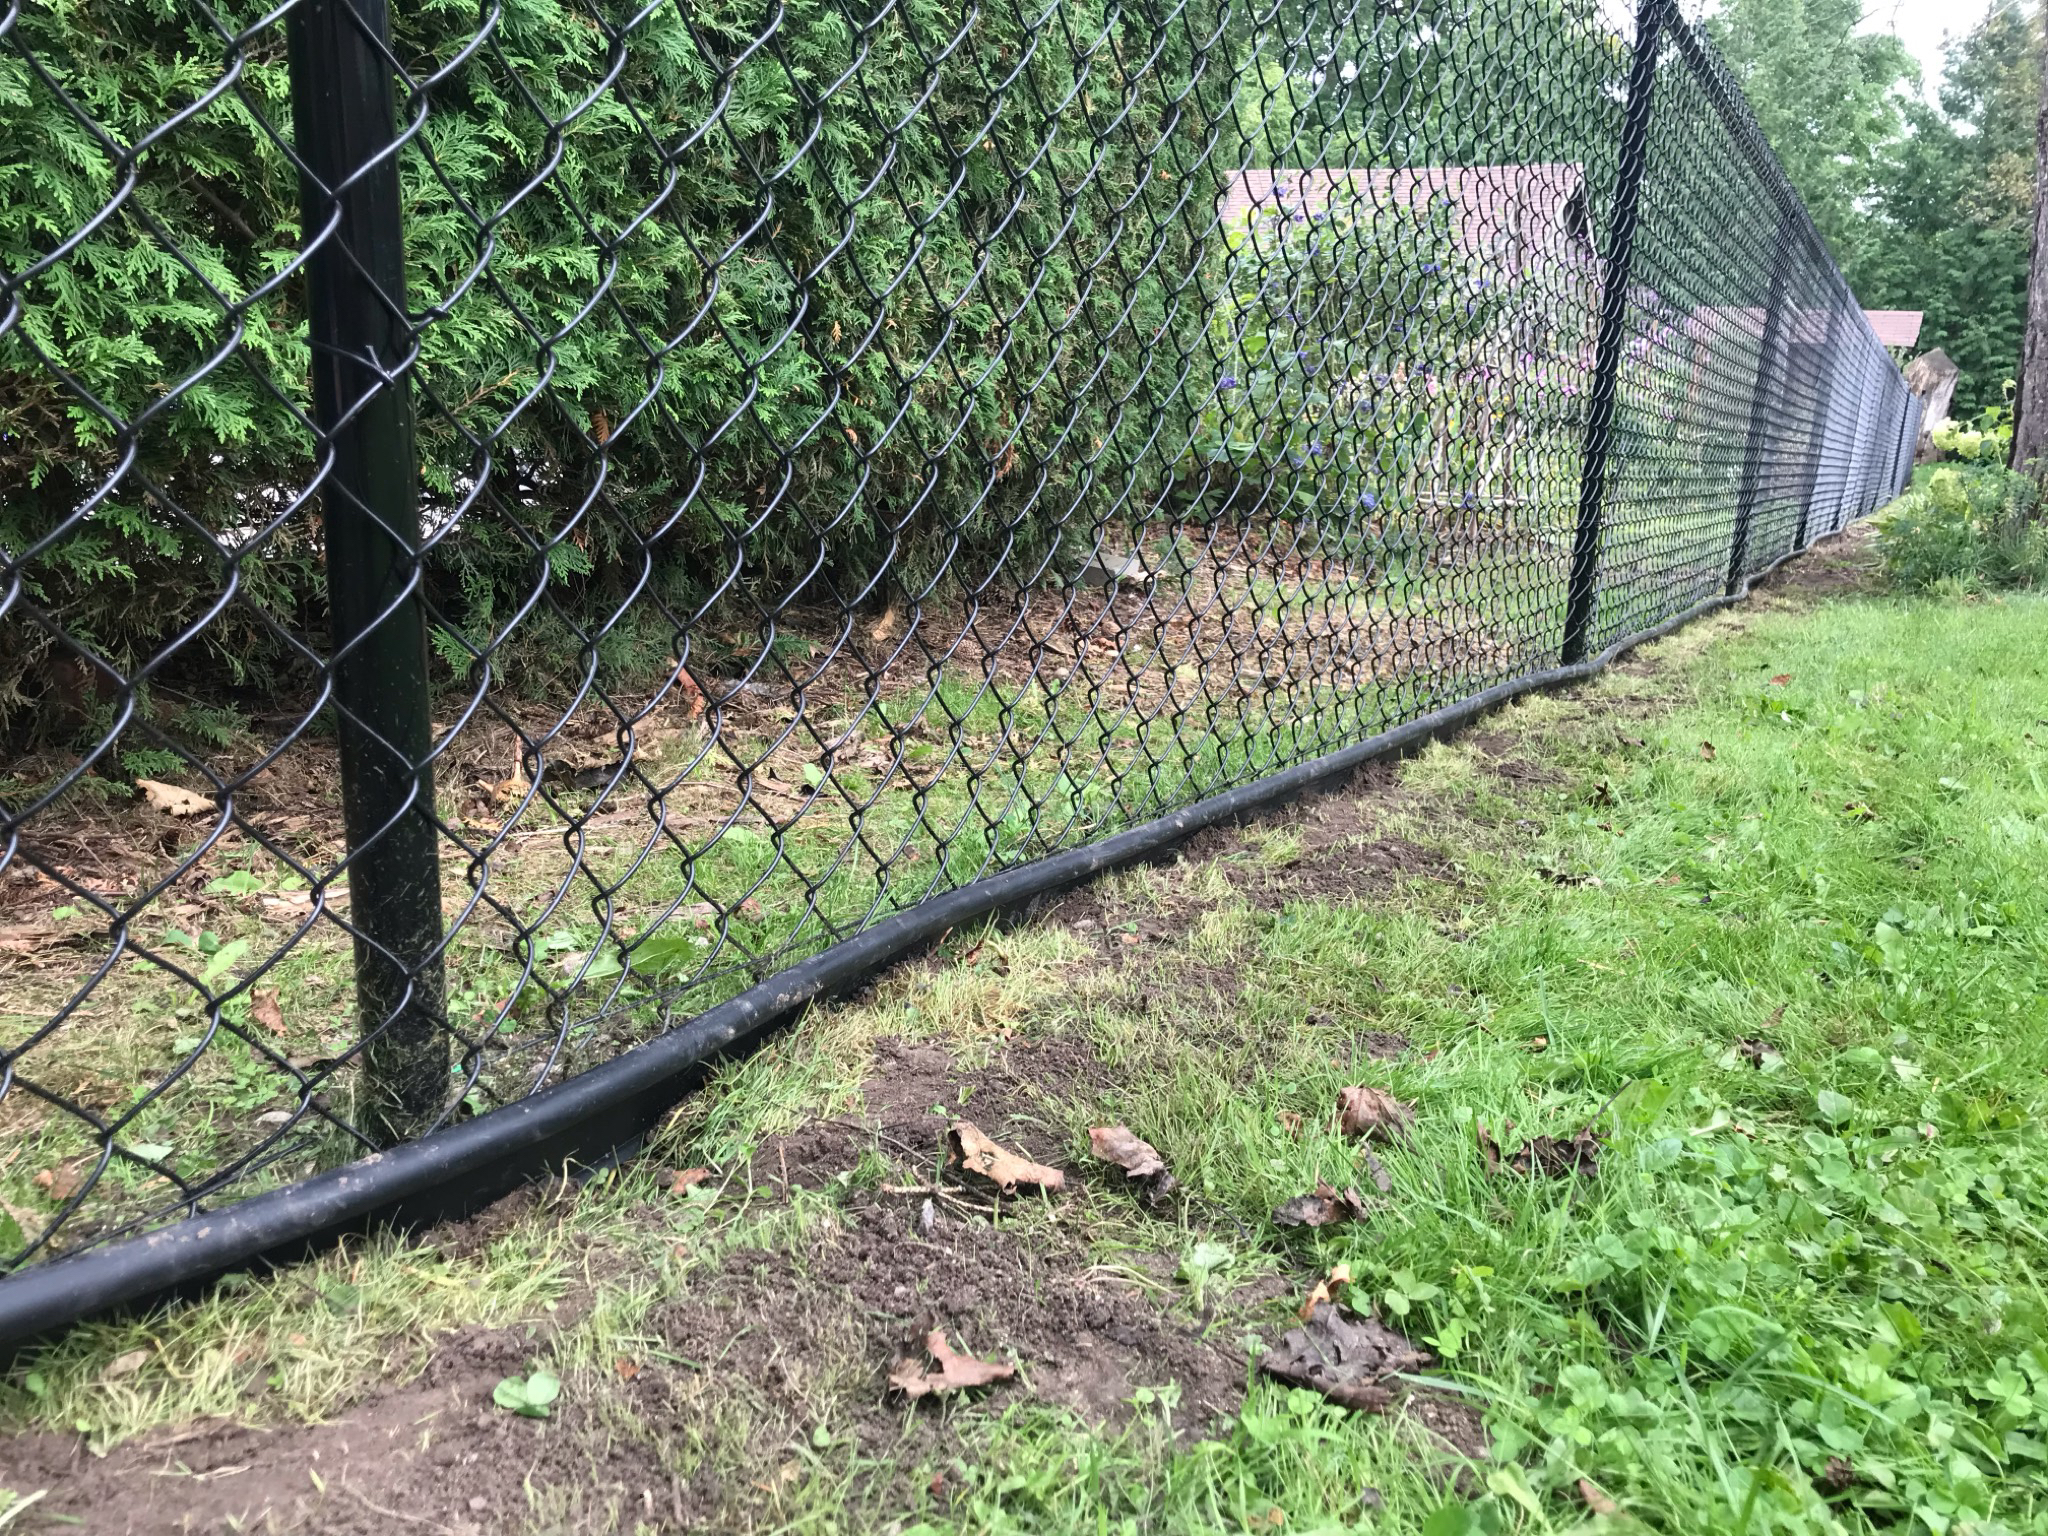
<p>At this point the fence was done, but we also wanted to stop weeds spreading (as if that is possible), so I also dug in a 4” plastic garden edge along the whole length.</p>

<div class="imgWrapper imgFlex center" style="width: 80%; ">
    <picture class="imgPicture">
  <img class="imgImg rounded shadow" src="/assets/posts/2023-08-30-Chain-Link-Fence/img_7333_53153797096_o.jpg" style="width: 100%; " />
</picture>
</div>

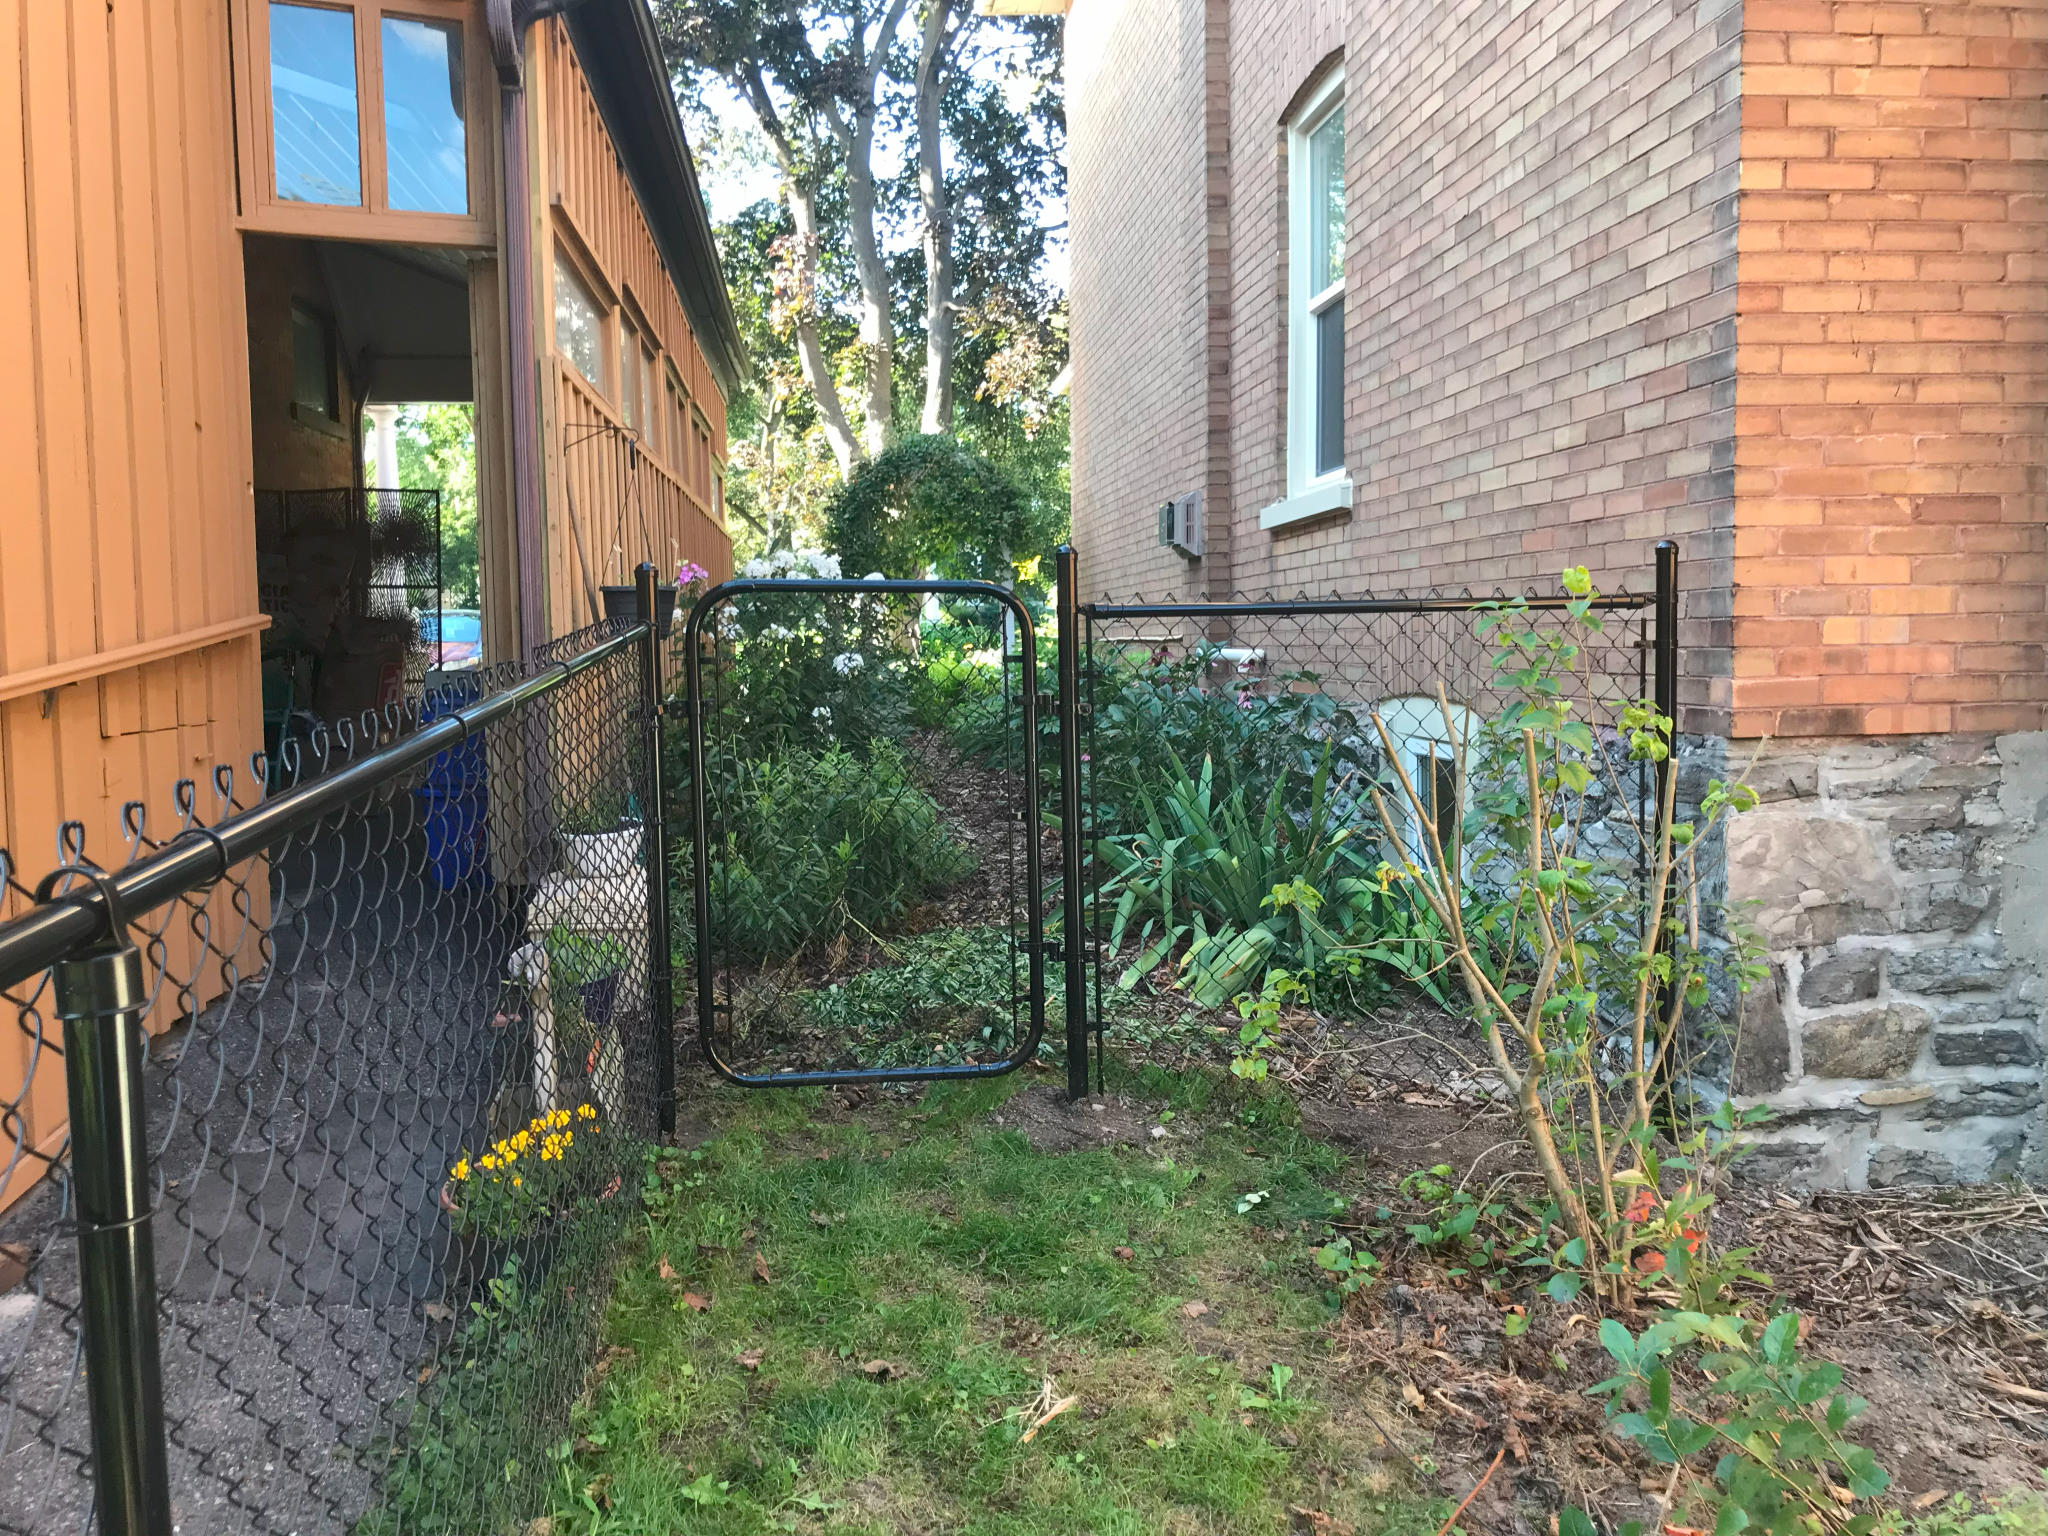
<p>We also put in two gates along the length, so we can still visit each other’s gardens.</p>

<p>Here’s one</p>

<div class="imgWrapper imgFlex center" style="width: 80%; ">
    <picture class="imgPicture">
  <img class="imgImg rounded shadow" src="/assets/posts/2023-08-30-Chain-Link-Fence/img_7328_53154004434_o.jpg" style="width: 100%; " />
</picture>
</div>

<p>All in all, it took a few weeks of working evenings and a two full weekends to complete.  Overall, I’m quite pleased with it.</p>]]></content><author><name></name></author><category term="chainlink" /><category term="fence" /><category term="garden" /><category term="project" /><summary type="html"><![CDATA[Once upon a time, all the houses on our street had no fences in their backyard. Kids and dogs roamed freely and football games were played. At least, that’s what our neighbours say who have lived there for many years. By the time we moved in it was just our two houses with a shared backyard. This never really bothered us much until we got a dog, when the need for some secure fencing was more urgent.]]></summary></entry></feed>